Managing Union Tables
Schema Modeler provides a means to create a Union Table that seamlessly combines the data of several tables together and presents it to the client as a single unified virtual data table.
Union Tables overview
Selecting the Unions folder in the Schema tree provides an overview of the Union Tables that have already been created, as well as a means to create new ones, and delete those no longer required.
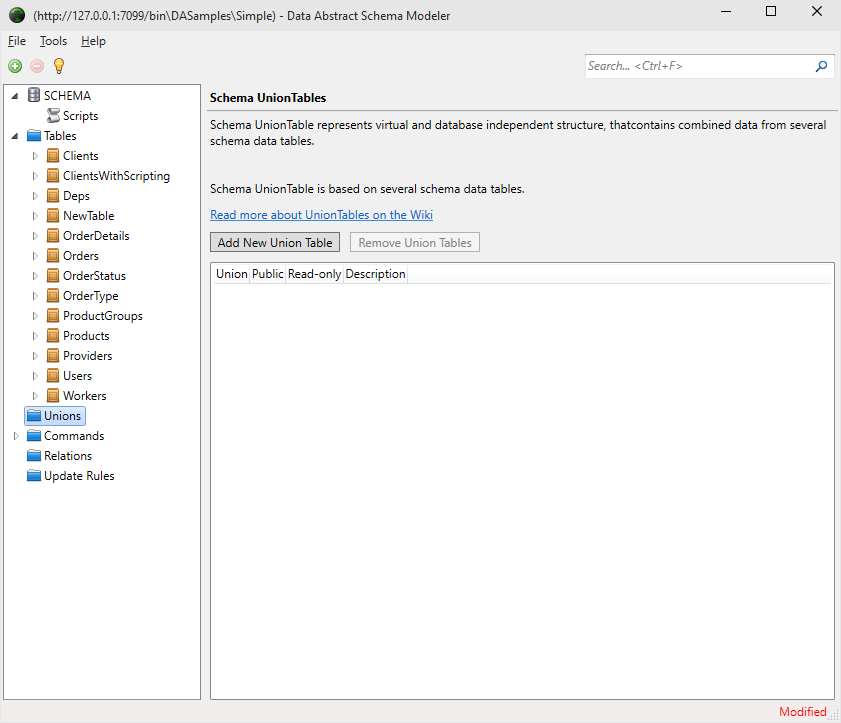
The table has four columns which presents basic information about the Union Table, specifically the name of the Union Table that you would use in your code, whether it is available publicly or is internal for the server, whether it is Read-Only and a description.
To delete a Union Table that is no longer required, simply select it in the table and press the Remove Union Tables button.
Adding a new Union Table
To add a new Union Table to the Schema, either press the Add New Union Table button in the Unions view. Doing so will take you to the Union Table editor as seen below.

This editor allows you to set the basic details of the Union Table:
Union Nameis the required name of the table, which can be accessed in code to retrieve the table.Descriptionis an optional description of what the table is for.Publiccheck this if the Union Table is to be available to client applications. Otherwise it is only available to the server.Read-Onlycheck this if you wish the Union Table to be read-only.Custom Attributesis an optional field where you can supply a string that can be used by the client application or on the server side with Business Rules ScriptingDefault Source Tableis a drop down box from which you can select which of the tables you've added to the Union Table should be the default table.
If you expand your new Union Table folder you will see two additional folders. The Fields folder presents the abstract & database independent fields that will make up the Union Table. The Source Tables folder lists the tables that comprise the Union Table.
The next step is to add the tables that will form the Union Table.
Add Source Tables
When you select the Source Tables folder from the Schema tree, you will see the Source Tables editor.
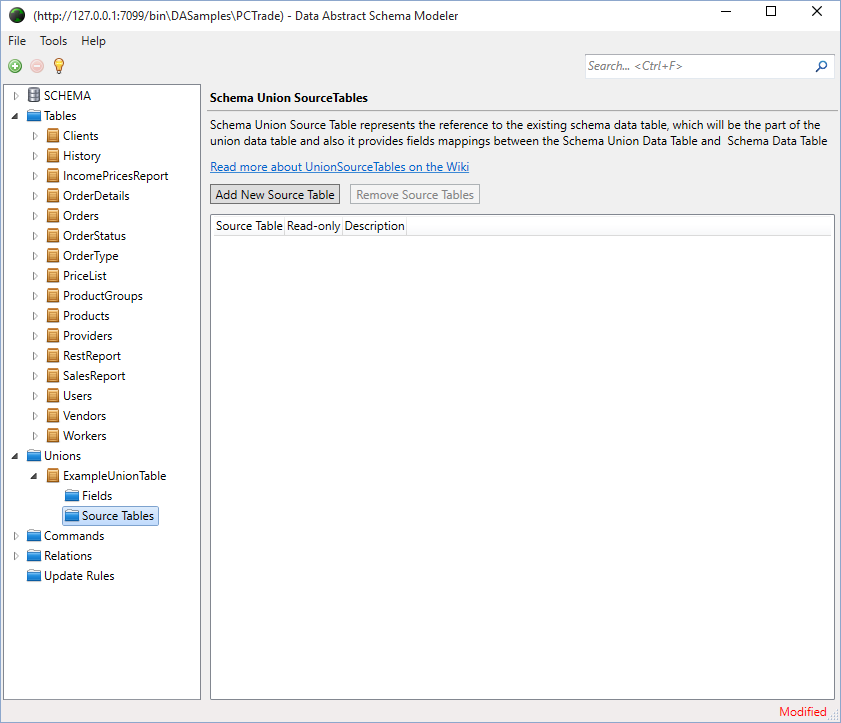
There are two ways to add tables to the Source Tables folder.
The first way is to click the Add New Source Table button. This switches to the Source Tables editor view and Schema Modeler chooses the last of the available tables and sets that as the Schema Table and then creates the Unions Fields to match the fields of the selected Schema Table. You can easily change the Schema Table by clicking on the drop down box and choosing the appropriate table. You should then click the Recreate Fields button which will recreate the fields in the Union Table to match the newly selected Schema Table.
Another way to add a new Source Table is to use drag & drop. Simply drag a Table from the list of available Tables from the Schema Tree and drop it onto the Source Tables folder. The fields for the Union Table are generated based on the first Table you drop onto the Source Tables folder.
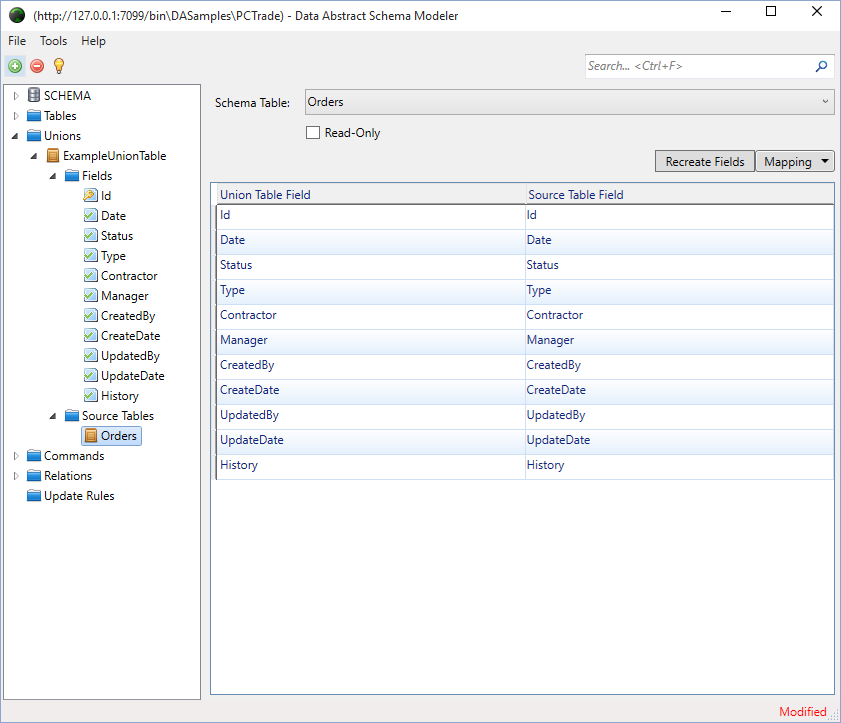
One last thing you can do in the Source Table editor, is to change the mappings between the Union Table fields to those in the Source Table. Schema Modeler analyses the Source Tables and matches them to the Union Table fields that it feels are the most appropriate match.
However if you feel those aren't appropriate you can switch the Source Table Field by clicking on the Source Table View which exposes a drop down box from which you can choose a different field.
If you ever want to recreate the mapping, or indeed clear the mappings completely, then click on the Mapping button, which exposes a menu from where you can choose those options.
Add / Edit Fields

When you click on the Fields folder in the Schema Tree you are presented with an view which presents basic information about the fields that are currently available in a table. The table shows some basic information about each field, specifically:
Fieldis the name of the field.DataTypeis the data type of the field.Logwhen checked changes to that fields data are logged.Descriptionis an optional description of what the field is.
You can work with the fields, including adding new ones, removing ones that are not needs and recreate the fields in case you have made a mistake and need to start over. If you want to edit a field either double click it in the table in the Fields view, or select the field from the Fields folder.
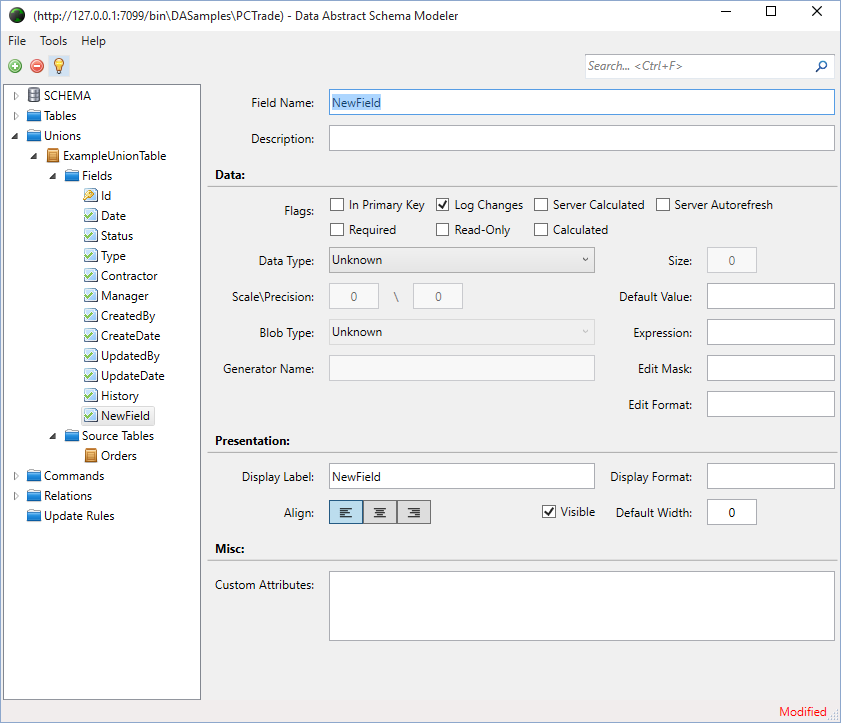
Adding or editing a field takes you to the Field editor which is the same as when you are editing a normal Schema Table.
This view is split into four sections allowing you to customise the field to your needs:
- General - You can change the field name here, and supply an optional description of what the field is used for.
- Data - Here you can manage the main details of the field. You can specify if its a primary key, a Calculated field, its data type and much more.
- Presentation - allows you to supply information about how the field would be presented in a table view. You can specify a separate label to use instead of the field's name, its alignment, whether it should be visible (for instance in a client app you wouldn't normally display the id field) and so on.
- Misc - Here you can specify custom attributes that can be used to tune your business logic.