Managing Relationships
A Relationship is a special named structure in a relational database that defines how data in one table is related to the data in another table. The Relationship specifies the table and field names that are related, and its main task is to provide data integrity inside a database.
There are several ways in Schema Modeler to set up relationships between the schema tables. It can be done automatically when related tables are imported from the Connection Manager or when using New Schema Wizard. Otherwise you can manually create a relationship, even when the underlying database doesn't support or have relations.
Creating a Relationship when importing a Schema
When you use the New Schema Wizard to create a schema, any relationships defined between the tables will also be imported into the schema. You can find the New Schema Wizard command in the Tools menu of the Schema Modeler.
Creating a Relationship using Drag & Drop
You can easily create a Relationship between schema tables by dragging one table and dropping it on to another. Schema Modeler will display a dialog asking if you are sure you want to create the relationship between the tables, if you are sure then answer Yes.
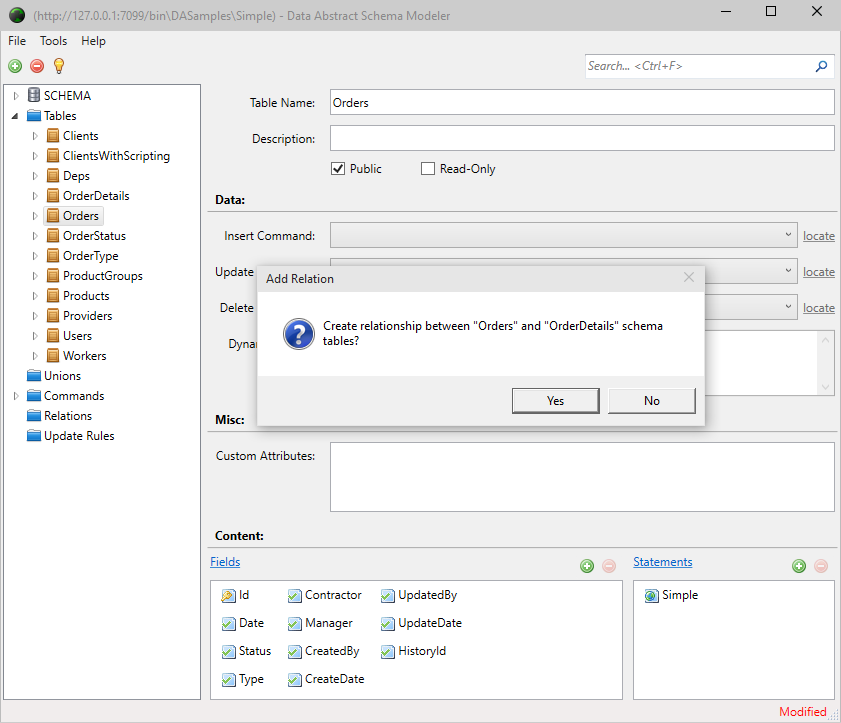
When you choose Yes, a new relationship will be created with dragged schema table used as the Master table and the table you dropped onto as the Detail table. Schema Modeler will then analyze the two tables and calculate the fields that should be linked together with a relationship, and set the Master Fields and Detail Fields as appropriate. If you need to, you can adjust the relationship details manually at any time.
Creating a Relationship Manually
Another way to create a new Relationship is to do so manually. At any time you can add new Relationship by:
- Right clicking on the Relations folder in the Schema Tree and then clicking on the Add button.
- Left clicking on the Relations folder in the Schema tree, which opens the Relationships collection view. You can then click on the Add New Relation button.

After either of those, you can then define the Master and Detail tables by choosing the tables from the drop-down list, and them select the fields that are related.
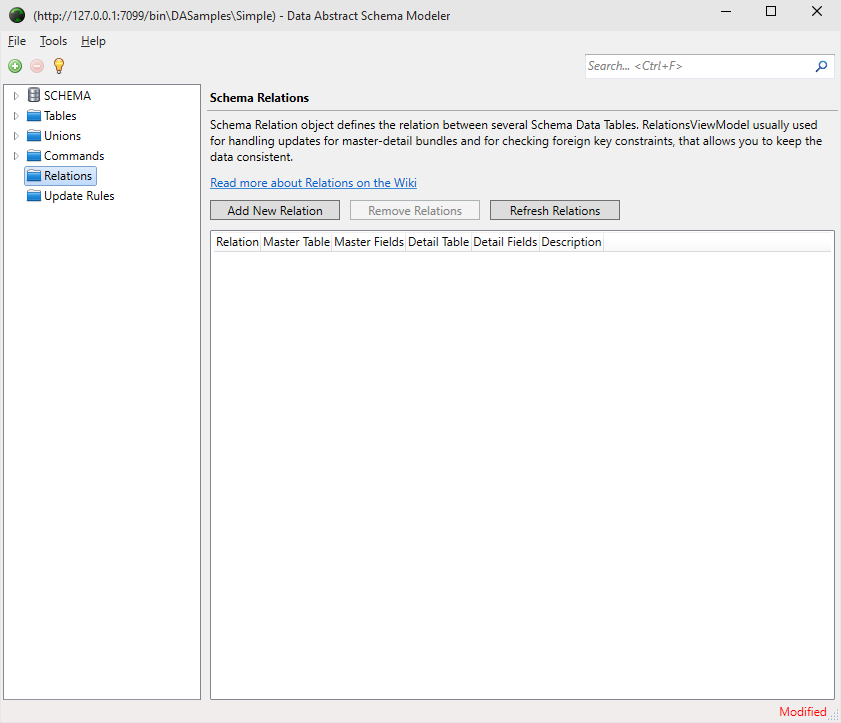
Refreshing Relationships
Schema Modeler allows you to refresh schema relationships according to the latest state of the database. If the underlying database has changed since the Relationships where defined, then you can force Schema Modeler to update/recalculate the relationships by pressing the Refresh Relations button in the Relationships Collection view.
However there are several points that you will need to remember:
- The Refresh Relations action imports only the relationships that are appropriate for the tables that exist in the schema.
- The name of the schema table can differ from the name of the table in the database, so the Refresh Relations action obtains relation information based on the Target Table property of the Statement of the selected schema table. This means that if the schema table does not have a value specified for the Target Table then it will not be refreshed.
- If a schema table has more than one Statement, i.e. it can work with several connections where each connection can have its own relationships list, then you must select the connection from which you want to refresh relations.
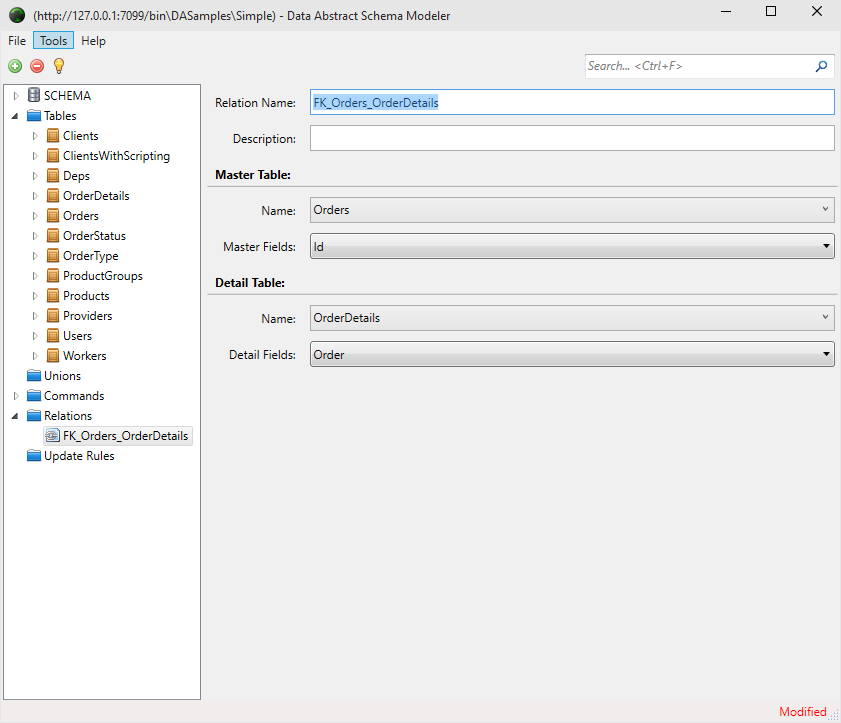
Editing Relationships
The Relationship view contains few properties:
The view is broken into three sections:
- General Where you specify a unique name for the relationship and an optional description of the relationship.
- Master Table where you choose the name of the master schema table. If you use the drop down selector you can quickly choose from one of the available schema tables. The Master Fields property allows you to select one or more fields that are part of the relationship by using the provided drop-down selector.
- Detail Table where you choose the name of the master schema table. If you use the drop down selector you can quickly choose from one of the available schema tables. The Master Fields property allows you to select one or more fields that are part of the relationship by using the provided drop-down selector.
Remember when you have made any modifications a note will appear in the bottom right of the Schema Modeler window to tell you that the Schema has been modified. To save your changes, or indeed discard your changes, then choose the Save or Discard Changes operations from the File menu.