Managing Connections
The foundation for creating a schema is a Connection, which is the means through which the middle tier server, generally an instance of Relativity, talks to the database.
When creating a new Schema you specify which Connection you wish to use, from a list of existing ones, or you can create a new connection string either via a Wizard or manually enter a connection string.
You define a Connection String that tells the server what the database it will connecting to, how to do it, and other details like username and password if they are needed.
Main UI
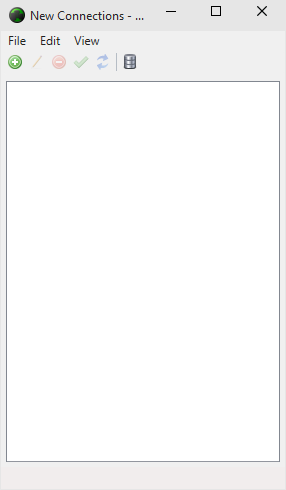
This is the main interface of the Connection Manager. It displays any connections that have already been defined, each of which can be expanded to display the tables, fields, views and stored procedures available in the underlying database.

The toolbar above the main view, provides quick and easy access to managing a connection. Clicking on the:
- Green + icon will open a dialog that you can use to define a new Connection
- Pencil icon will open a dialog that allows you to edit the selected Connection
- Red - icon will delete the currently selected Connection.
- Green tick will test the currently selected Connection.
- Blue arrows will refresh the Connection, reloading the underlying data.
- Silver barrel icon is a shortcut to show the Schema document in the main Schema Modeler interface.
Creating a Connection
To add a new connection press the Green + icon, or select Edit->Add Connection Definition... from the menu. This opens the "Connection Definition Editor" where you can fill in the details of the Connection.

Typically you would only fill in the Connection Name and the Description yourself with something meaningful so that when you glance at the list you know what the connection is for.
If you have a Connection String that you've used before you can just paste it into the textbox, or you can use "Connection String Builder" by pressing the "Build Connection String..." button.
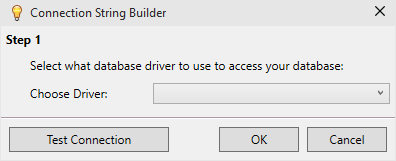
The first step is to choose the driver that will be the basis of the connection string. Data Abstract has support for many different databases out of the box, checkout the Drivers for a full list.
Once you've chosen the driver you want to use, that builder will update with additional steps that are appropriate for the driver/database choice.
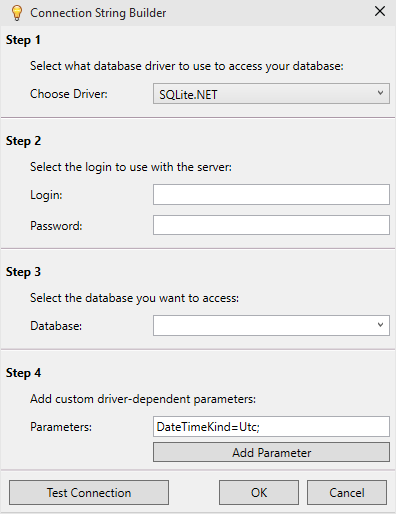
In this instance we chose the SQLite.NET driver to have a connection to an SQLite database. The builder dialog has been updated with 3 additional steps.
In step 2 you specify the username and password if they are required to access that server.
In step 3 you enter the path to the database file you are using and its name. You can manually type it, or if you click the small disclousure icon on the right of the textfield, it will open a File Open dialog you can used to navigage the file system to find the file.
The final step is to supply any additional parameters that are applicable to the driver type. For instance with the SQLite.NET driver the DataTimeKind parameter is specified by default, where for others the Paremeter field is blank.
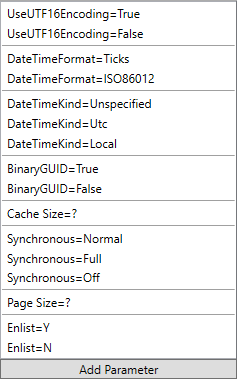
These are the additional parameters available for the SQLite.NET driver when you. Consult the documentation for the particular drivers/databases to understand what each of the parameters are for.
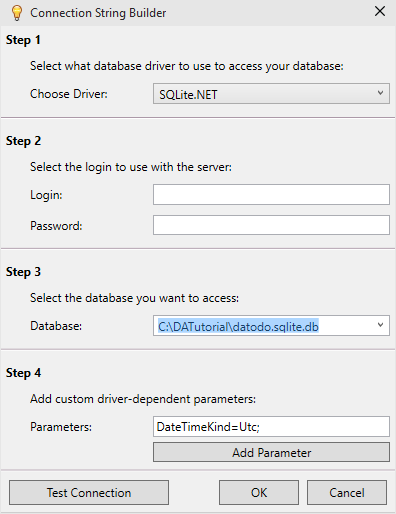
When its complete the "Connection string Builder" will look similar to this. To test that the parameters have been correctly set you can press the Test Connection button, which will attempt to open a connection to that database.

Assuming that everything is correct, you will get a "Connection is alive" dialog similar to above.
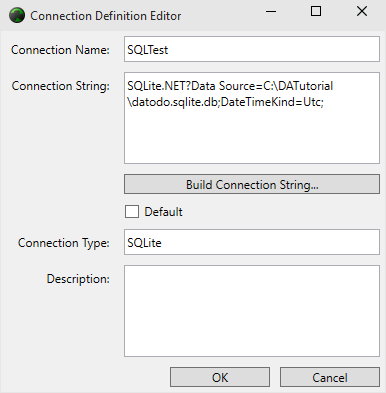
Once you've finalised your settings press OK to return to the "Connection Definition Editor" where you newly generated connection string has been entered into the Connection String textbox and the Connection Type textfield has been set to the type of database you have chosen to use.
If everything looks correct, press OK to be returned to the main "Connection Manager" window.
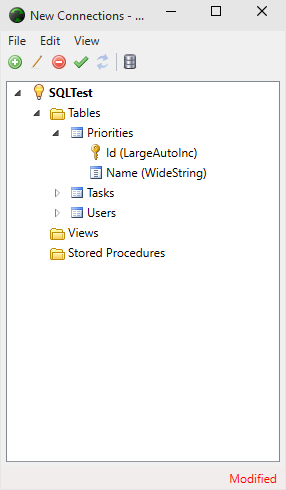
As you can see the SQLTest connection be built through the previous steps has now been added to the view. By default it is a collapsed tree which leaves the loading of the details until it is needed, as the "Connection Manager" makes use of lazy loading.
As you start to expand the tree, you can see the tables, fields, views and stored procedures are retrieved from the database. Later when we start to create a schema you will be able to drag and drop from the "Connection Manager" to the Schema model.
Note in the bottom right of the window the word Modified in red, this lets you know that the Connection document has changed and needs to be saved. Use File->Save to save the changes to disk or File->Discard Changes to throw away the changes you've just made.
Editing a Connection
To edit an existing connection, select the connection you are interested in and then either click on the pencil icon, or choose Edit->Edit Connection Definition... from the menu.
This opens the "Connection Definition Editor" with the connections details pre-populated. You can tweak the Connection String, or use the "Connection String Builder" to change/correct the username, password, parameters and so on.