Connections section
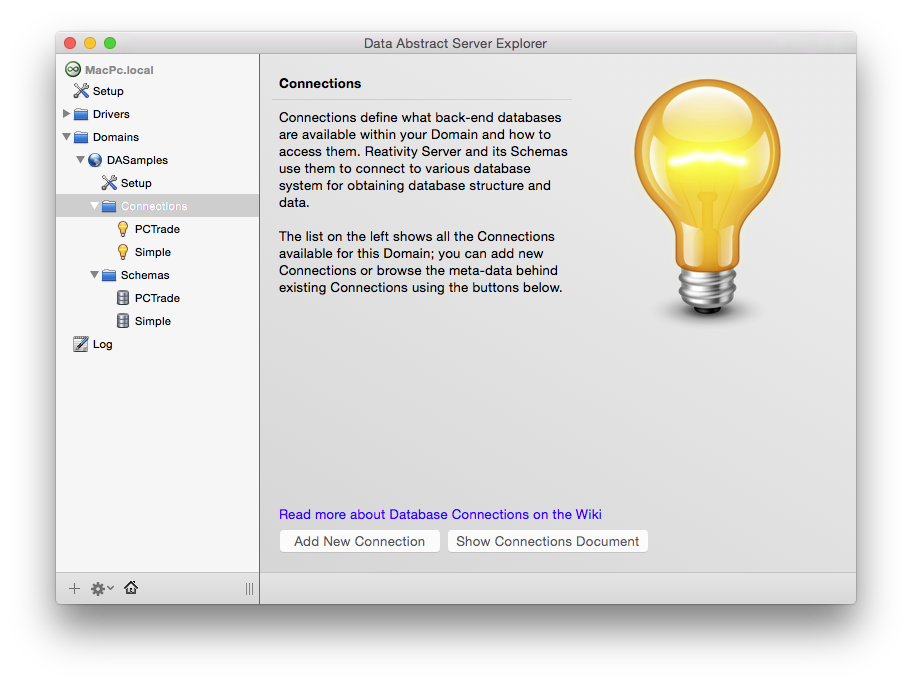
Each domain maintains its own list of Connections (or Connection Strings) that specifies the database or databases that schemas may use. Connections that are already created are visible in the source list when you expand the Connections folder.
On the page there are two buttons:
- Add New Connection - Opens a wizard that will step you through the creation of a new database Connection.
- Show Connections Document - Opens a window, also know as the Connection Manager, which displays the connections currently available and also has the ability to add or delete connections. When you expand an existing connection it will display the currently available tables, fields, views and stored procedures.
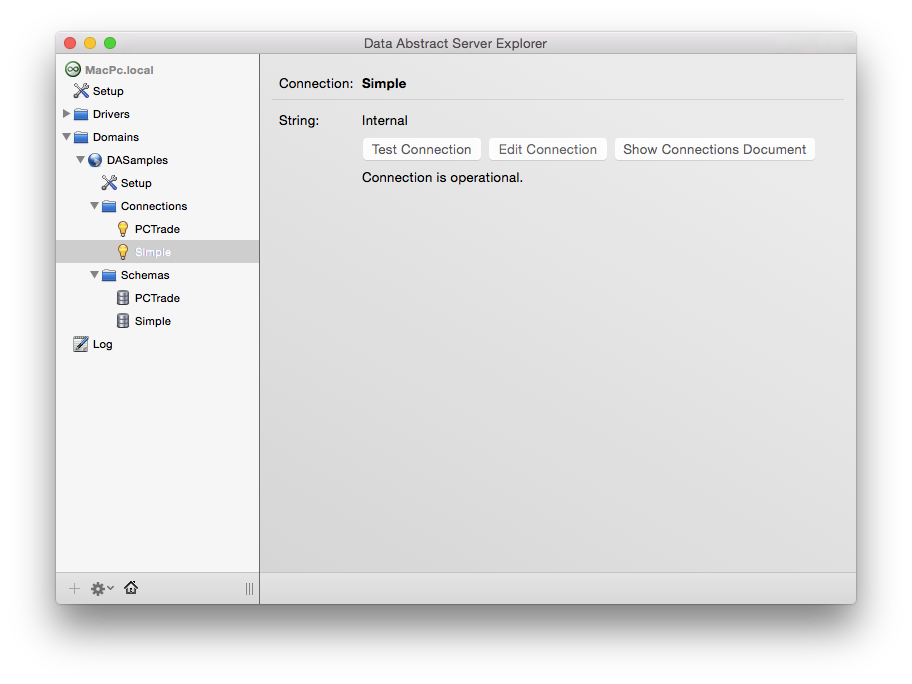
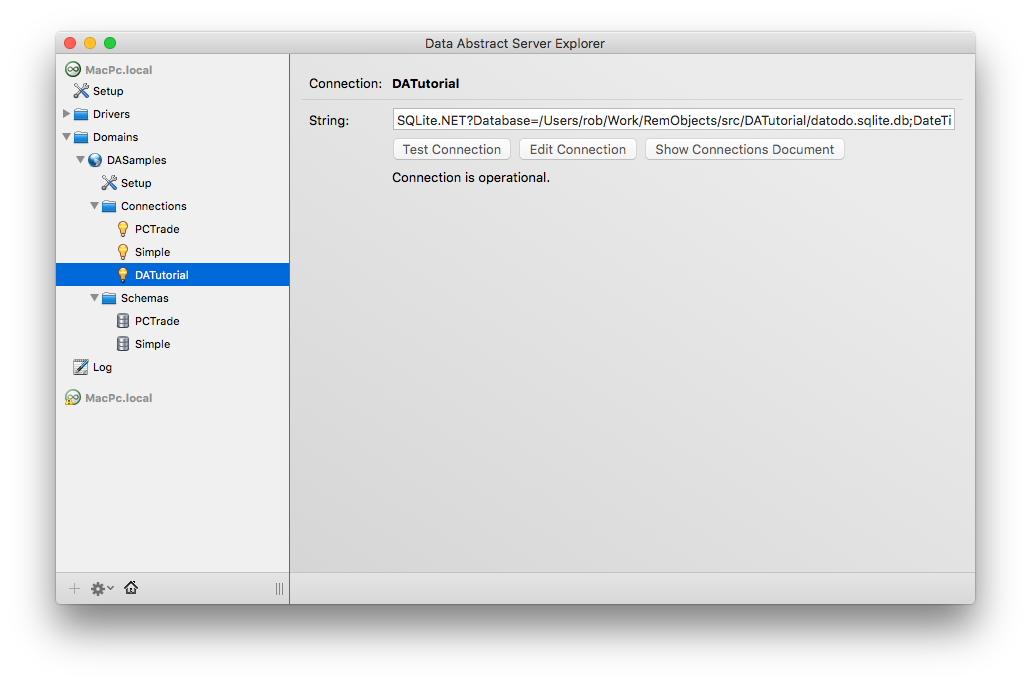
Selecting a specific connection will show details about that connection including the driver type, the complete connection string (if an Admin Login is available), as well as allowing the option to test or modify the connection.
In addition to providing the Test Connection button, Server Explorer will automatically ask the Relativity Server to test all connections in the background as servers are discovered and initialized. As noted earlier, if connections are found to be broken, a red X icon overlay is shown on the connection icon and the error message received from the server is displayed on the connection page:
Note that Server Explorer never tries to communicate directly with the database. If a connection shows as broken, this means that connection is broken on the server.
Adding a New Connection
Upon pressing the Add New Connection button a drop sheet will appear which is the the first step in a wizard that takes you through building a new connection. There are only a couple of steps to complete.
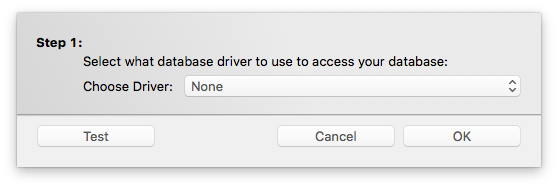
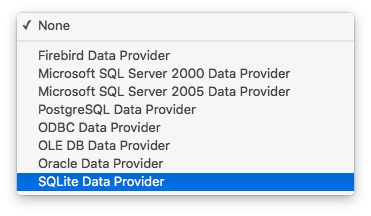
The first step is to choose one of the database drivers that Relativity Server comes with. This is what will be used to communicate with your database of choice. As you can see many of the most common databases are supported out of the box.
The next step is to provider details about where the database is, if required its name, and if login details if those are required. For instance with an SQLite database, you only need to provider the location of the database file as you can see below.
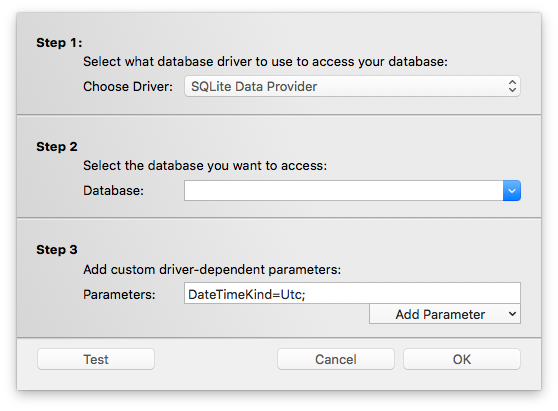
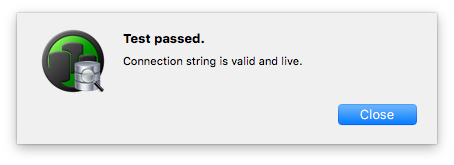
Once you have entered all of the details, you can use the Test button to verify that you have all of the information correct and that a connection to the database can be established.
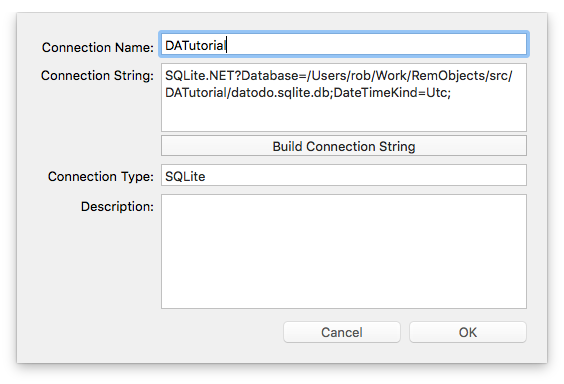
When you press OK on the wizard, you will be shown this screen which allows you to set a name for the connection, and also an optional description. Press OK when you are finished
This is the new connection listed in the list of available connections.