Tutorial
This article will guide you through setting up and getting started with Relativity Server "in the Cloud" on Amazon Web Services (AWS). For a higher-level introduction and reasoning about Relativity Server in the Cloud, check here.
This article might seem to show a lot of steps, but that is because we cover dealing with the AWS console, and go over a lot of concepts intrinsic to AWS. Despite its lengthiness, you will see that using Relativity Server on AWS is just about as straightforward and simple as it can get.
Prerequisites
For the purpose of the article, we assume the following prerequisites are set up or known to you already:
- An AWS account. You can sign up for one for free here, and there’s a free tier for one year to get you started while experimenting.
- An empty S3 bucket for Relativity to store the configuration in; you can create one here.
- A pair of Access Key and ID and Key Secret with access to the S3 bucket. You can use your global key from the Security Portal, or you can set up a user in the IAM Console.
- Finally, a database, ideally running in RDS, but to start with, it can also be any other database that’s accessible from Amazon EC2.
(Confused by all the acronyms? Check out our Amazon Web Services Overview.)
Getting Started
With those items in hand, let’s set out to boot up and set up a Relativity Server instance.
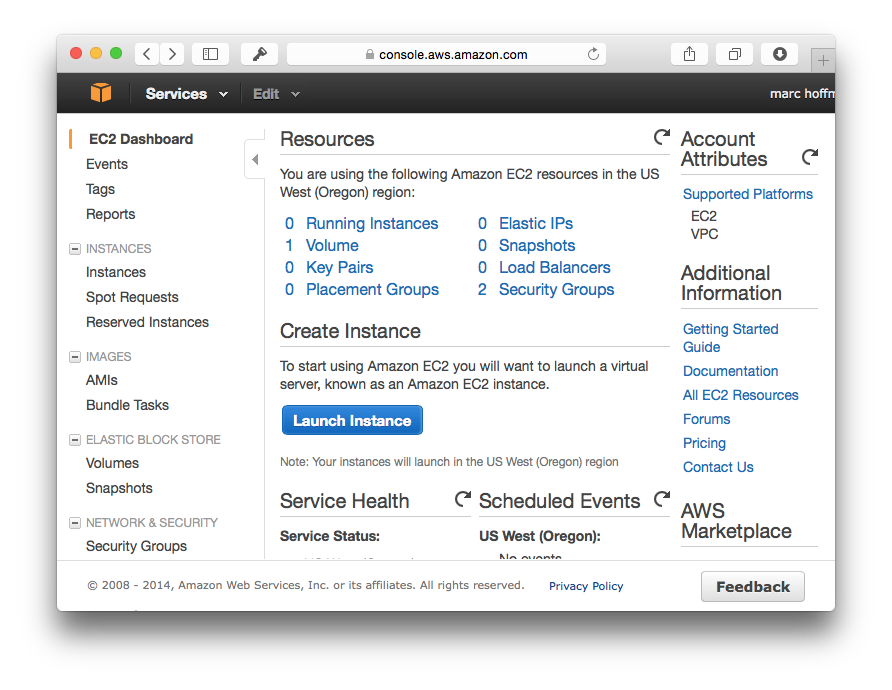
The first step is to go to the Amazon EC2 portal, which is where you manage all your running instances. An EC2 instance is essentially like a virtual machine running in the cloud: for all intents and purposes, it’s a full Linux or Windows box that you can do with as you please. For our purpose, we want to run Relativity Server, and we don’t want to spend any time setting the box up, so we’ll use an existing image from the EC2 market place:
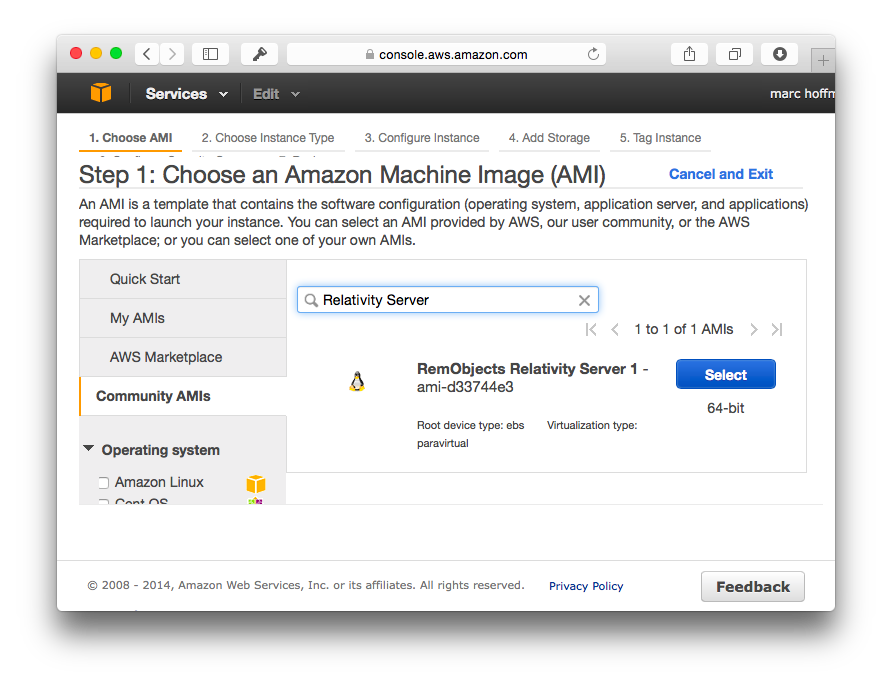
Click the ‘’Launch Instance’’ button, switch to the “Community AMIs” tab on the left, and then type “Relativity Server” into the search field. Pick the “RemObjects Relativity Server 8.0” item, and press ‘’Select’’. Alternatively, you can use these direct links to the AMI images.
The next few pages guide you through some questions about what kind of machine you want to set up. The cost for running your instance will depend on what options you pick — for example CPU speed, memory size, and so on. The smallest type of machine (‘’t1.micro’’) is eligible for a free run during your first year, and that should be enough to get started.
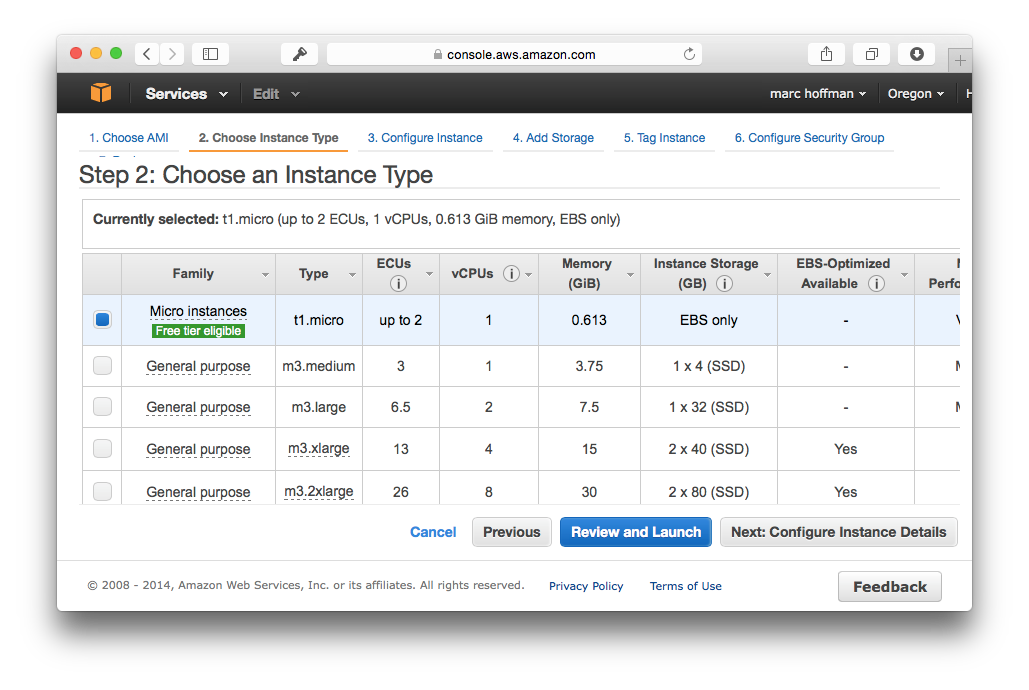
After picking your size, you ‘’could’’ just launch your instance via the ‘’Review and Launch’’ button, but there’s one more configuration step we should do, so let’s click ‘’Next: Configure Instance Details’’ and scroll down to the Advanced Details section.
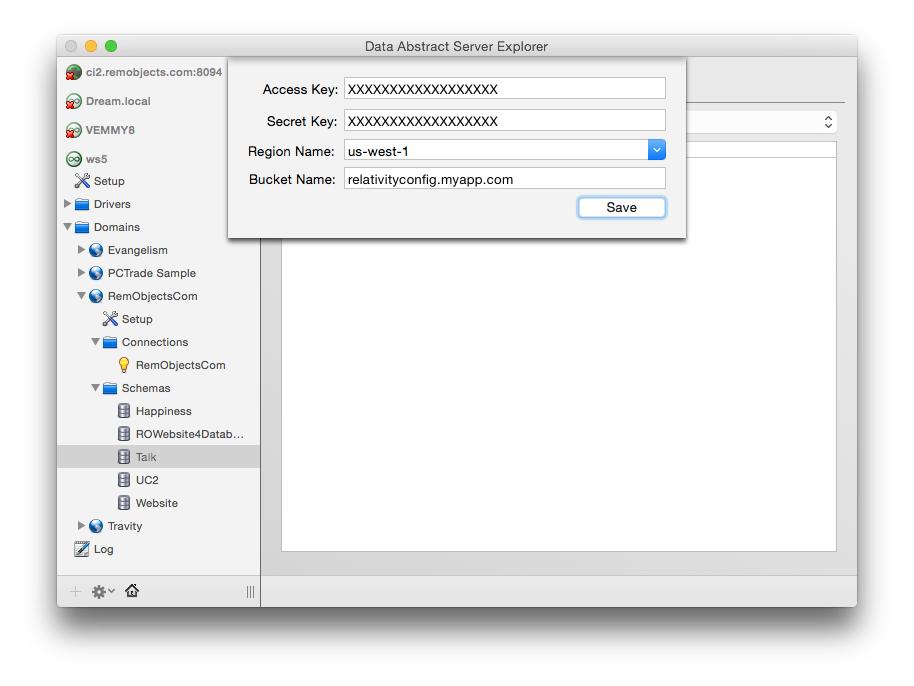
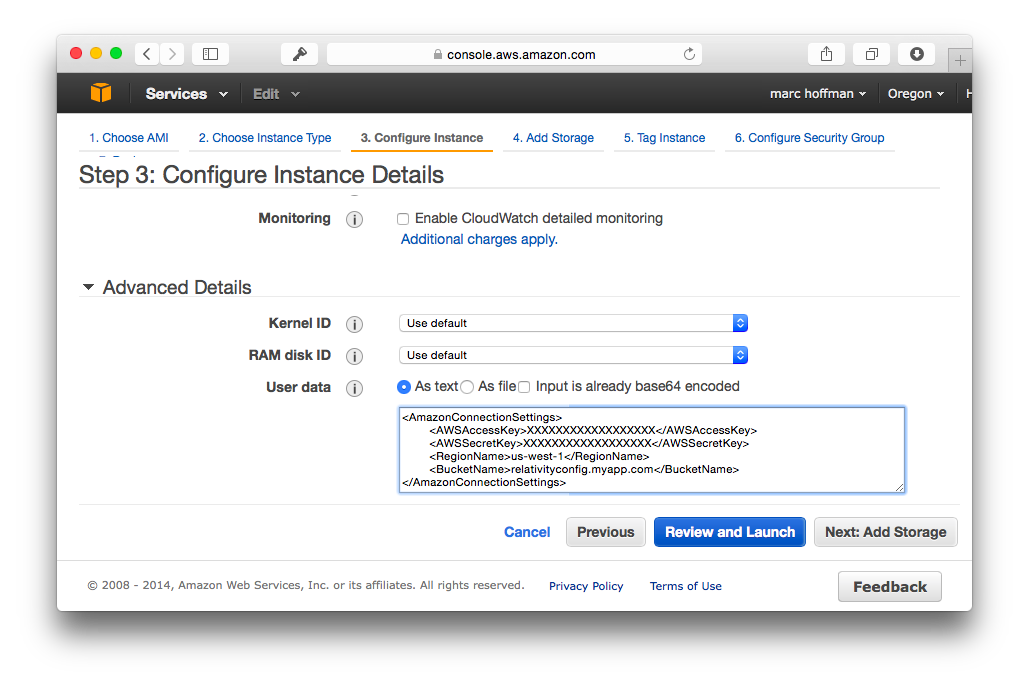
Earlier we talked about the S3 bucket where we want Relativity to store configuration options such as Domains and Schemas. This is important, because the whole point of hosting Relativity in the cloud is that each server instance is discardable, so we obviously do not want important data such as our schemas to be stored on the instance itself.
Connecting Relativity to S3 is easy and done via a simple XML snippet you can paste in or upload to the ‘’User data’’ section on the next screen. You don’t even need to manually create this XML snippet yourself, as Schema Modeler 7 for Window and Server Explorer for Mac have a small Wizard that creates it for you: Simply choose ‘’Create AWS Config File for Relativity Server’’.
Once created, you can upload or paste the XML:
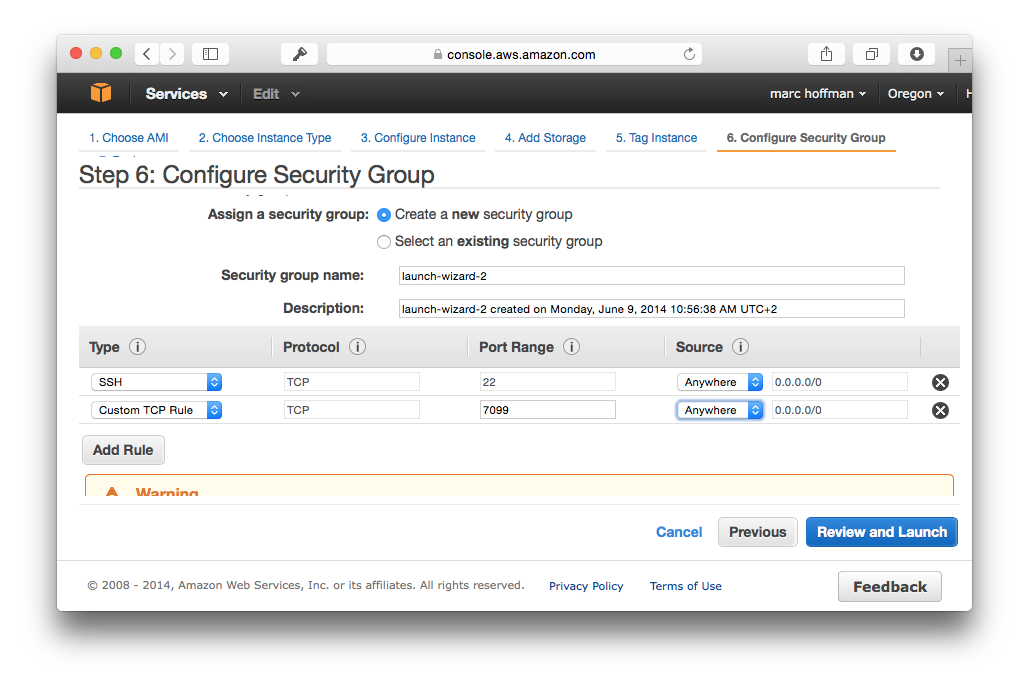
Last, fast-forward to the very top of tab number 6, ‘’Configure Security Group’’. Of course our Relativity Server is no good to us if we cannot access it from the outside, so we need to open its default port, 7099, in the firewall. Click ‘’Add Rule’’ to add a new rule for Port 7099 from any IP address. (Later on in real production systems, you can tie this rule to a specific IP address for more security.)
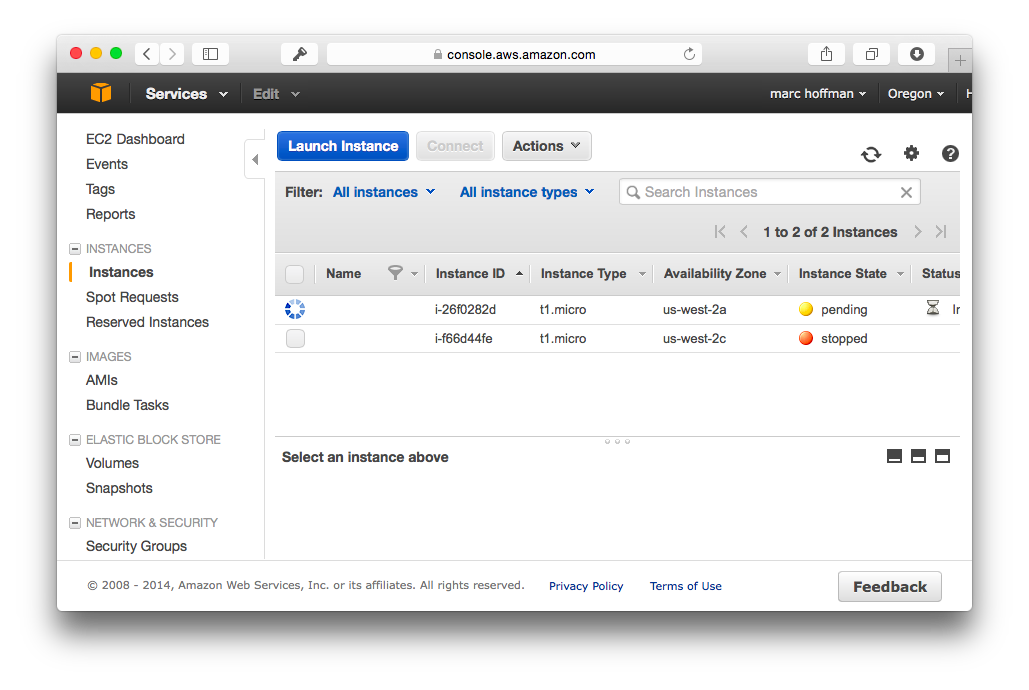
Finally, we’re ready to launch this instance by pressing ‘’Review and Launch’’ and then ‘’Launch’’. When asked for a key pair, you can choose to continue without, and then the machine will boot up. If you return to the EC2 Portal, you’ll see the boot progress, and after a minute or so, your machine should be ready to use.
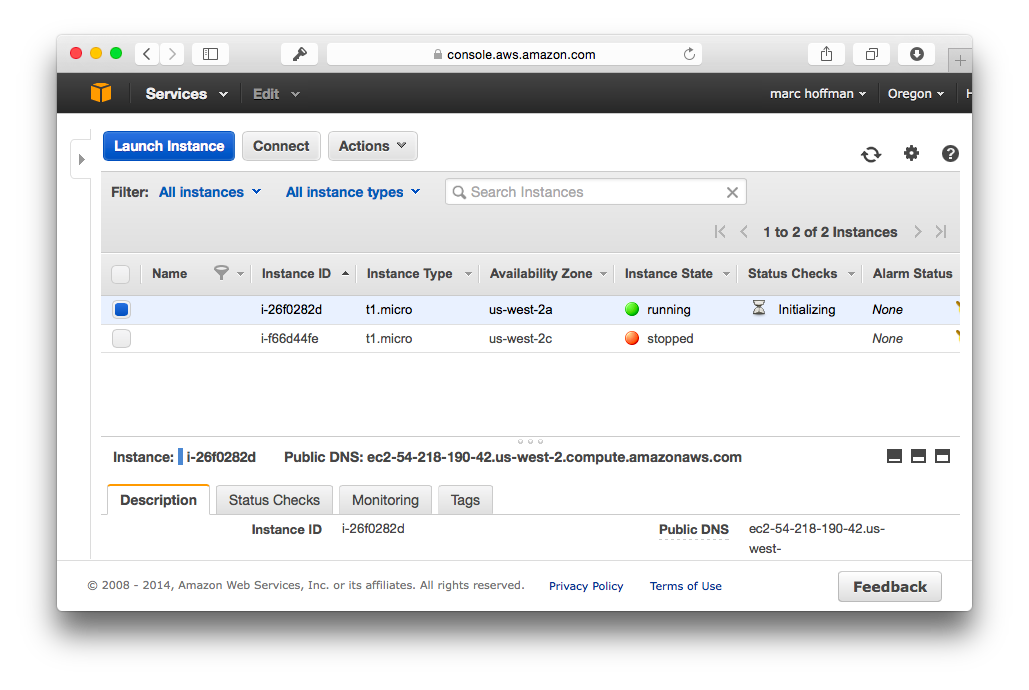
:7099 into your browser’s address bar:
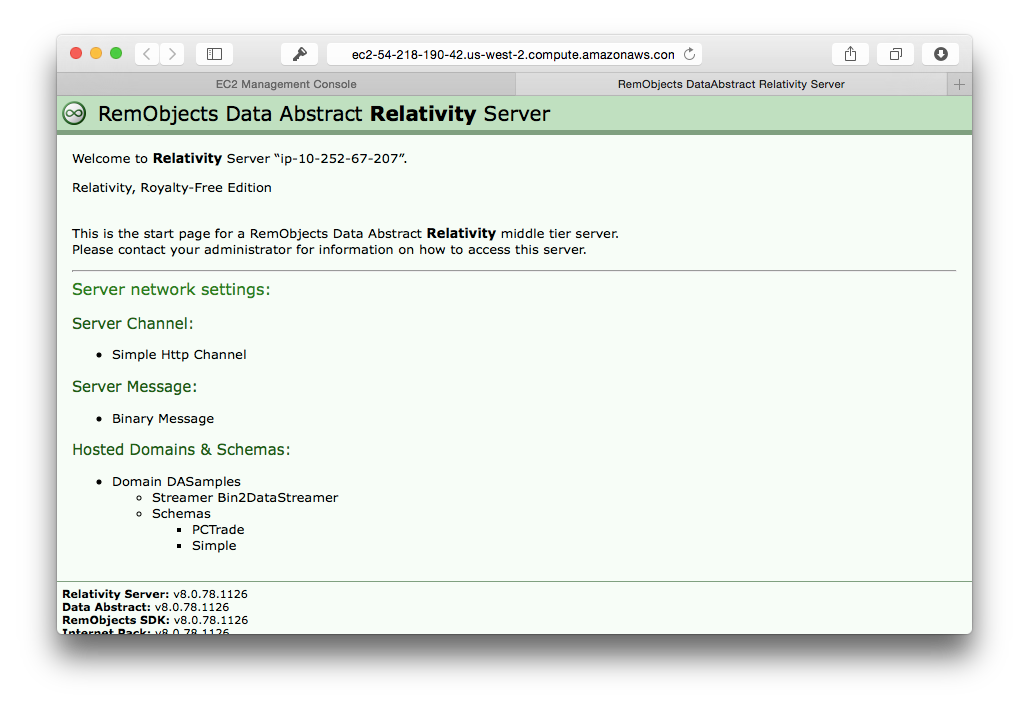
Relativity Server is now ready to be used.
Next, you can append /admin to the URL to go to the new Relativity Web
Admin and configure the server. (You can, of course, also use native
tools, such as Server Explorer on the Mac, or the Relativity Admin Tool
in Windows.)
Remember when I mentioned before that we need to take note of the Instance ID? That comes in handy now, because the instance ID is the default password for connecting to your Relativity server and setting it up, if no config is found in the S3 bucket. Of course you will want to change the password first thing.
Once Relativity server is set up and has stored its configuration into the S3 bucket, any new instance you boot up (with the same XML config snippet) will use that same config. This allows your Relativity Server middle tier to participate in all the failover and load balancing support that AWS has to offer, so that, if an instance dies (as all hardware ‘’will’’ eventually), there is no loss of data. You simply boot up a new instance and all is well. And of course you can boot up multiple instances, for example in different availability zones, to make your middle tier scale, and you can even leverage AWS’s built-in support for creating and destroying additional instances as the load on your server(s) changes over time.
Summary
This article guided you through the basis steps of getting Relativity running on Amazon EC2 with the new “Relativity in the Cloud” features. Now that your server is running, yo can configure it as you would any other Relativity Server.
See Also
- Configuring Relativity Server (Windows & Linux)
- Configuring Relativity Server (Mac OS X)
- Configuring Relativity Server by Web browser (Any OS)
- Relativity Server in the Cloud