Deploying Relativity Server to Azure
Relativity at this time does not have full "in the cloud" functionality when deploying to Azure, like is currently available when deploying Relativity to AWS.
The instructions below are for getting Relativity up and running using an Azure Virtual Machine.
Deploying Relativity server to the cloud using Microsoft's Azure platform is a quick and easy process.
If you haven't used Azure the Azure platform before, it is a comprehensive set of cloud services, provided by Microsoft, that offers the ability to deploy web-apps, SQL servers, Virtual Machines running Windows Server or Linux, to providing backends for Mobile applications.
For this article we will take you through the steps required for setting up an Azure Virtual Machine, deploying Relativity to the VM and configuring an endpoint so that your client applications and the Relativity Admin Tool can talk to your Relativity instance. After that there will be a section on deploying an SQL Database and configuring your schema in Relativity to use it.
It should be noted that at the time of writing the figures in this article represent the current UI of the Azure web portal. However Microsoft is currently previewing a new version of the portal.
Requirements
- Azure account (can sign up for free trial to test)
- A copy of the Relativity server.
Getting Started
The first step is to create a MS Azure account if you don't already have one. Microsoft provides a 30 day trial with $150/€150 to spend to test all the different services that Azure provides.
- Go to the Azure Trial page and click on Try it now and sign in with your Microsoft Account. If you don't have one then you can easily sign up for one.
-
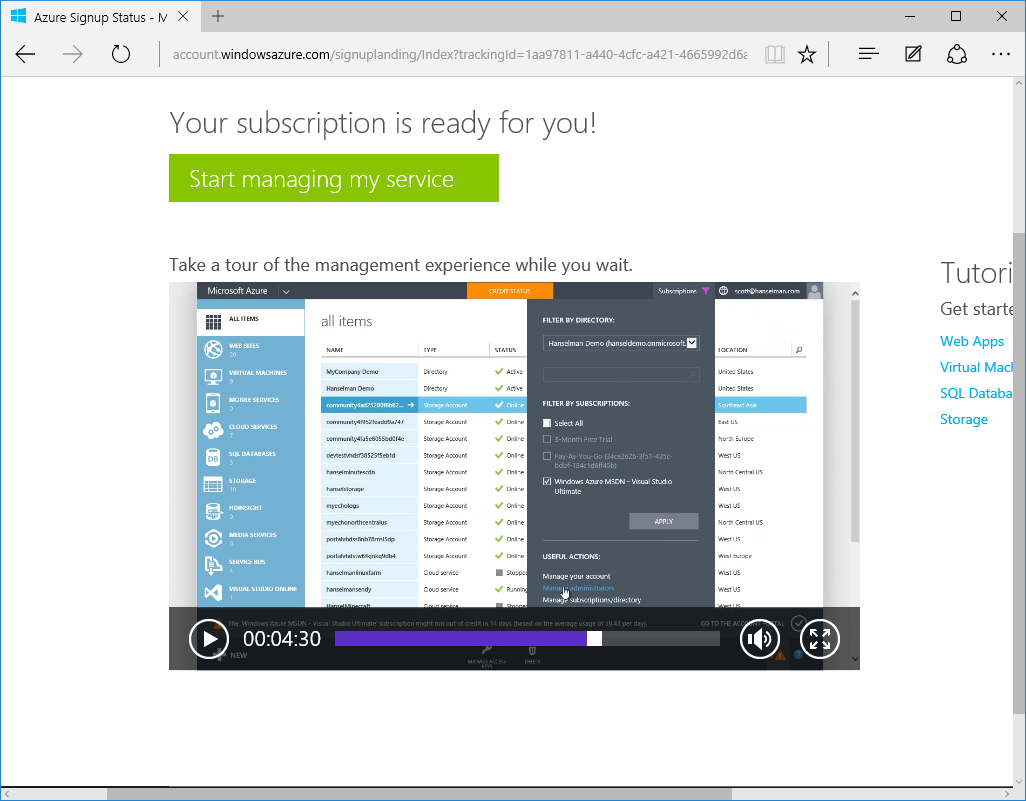
It will take a few minutes for your Azure account to become active, when it is you will see a screen similar to the one below
-
Click on the Start managing my service button, which will take you to a subscription overview page.

-
To get to the point of being able to create a VM or setup any other service, click on the Portal button in the top right of the page.
Create a Virtual Machine
Having created your Azure account (or signed in with your existing account), the next step is to create a Virtual Machine that will host an instance of the Relativity server.
The Azure Virtual Machines support both Windows Server and Linux, which you choose to use is ultimately up to you; as Relativity runs on both operating systems. For the purposes of this article we will talk you through creating a Windows 12 Server.
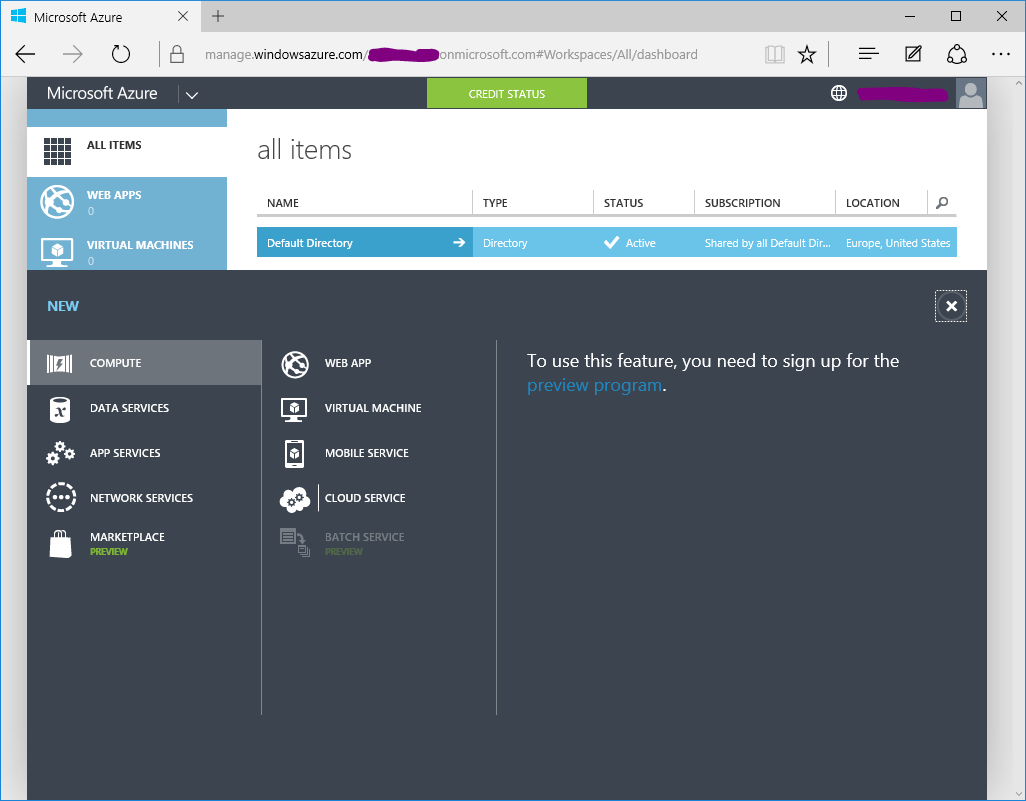
- In the Management screen, click on New at the bottom on the screen.
- Click on the Computer section if it wasn't auto selected.
- Click on Virtual Machine and then when the new tier of options appear click on Quick Create.
-
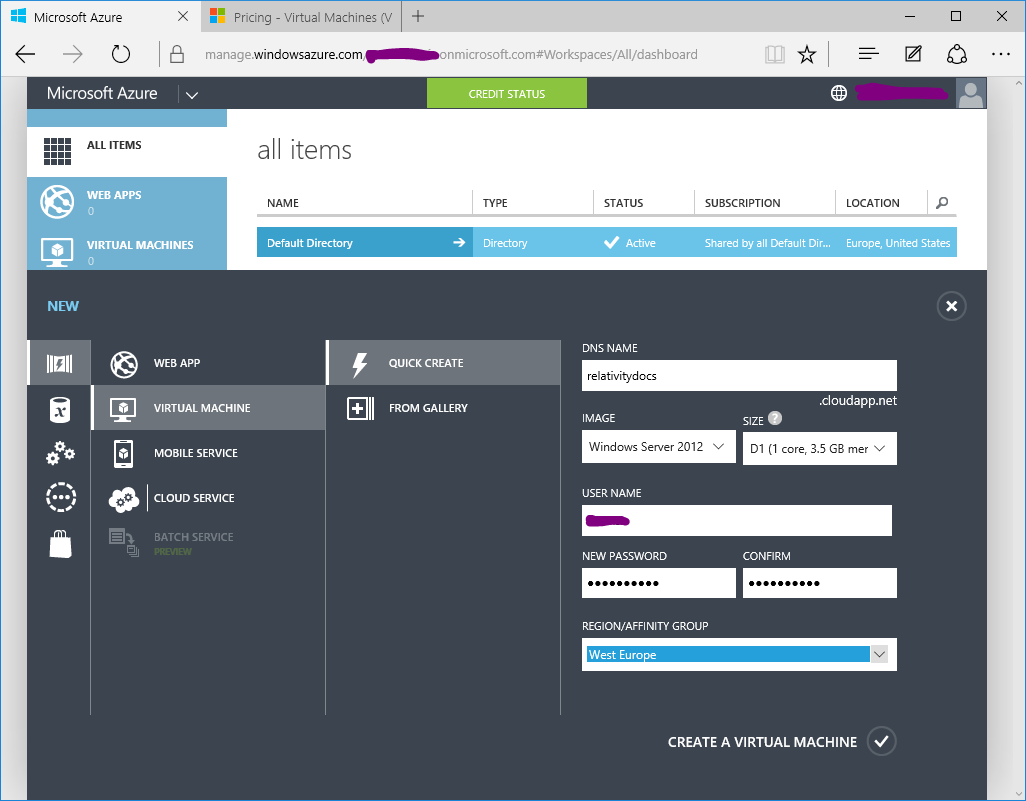
Fill in the details that are appropriate for you, like which region of the world to host the VM, the VM OS, the size1 of the VM, the DNS name and of course the username & password of the primary user. Here we chose a Windows Server 2012 VM, running in Western Europe using a D1 VM Size and set the DNS name to be relativitydocs.cloudapp.net
-
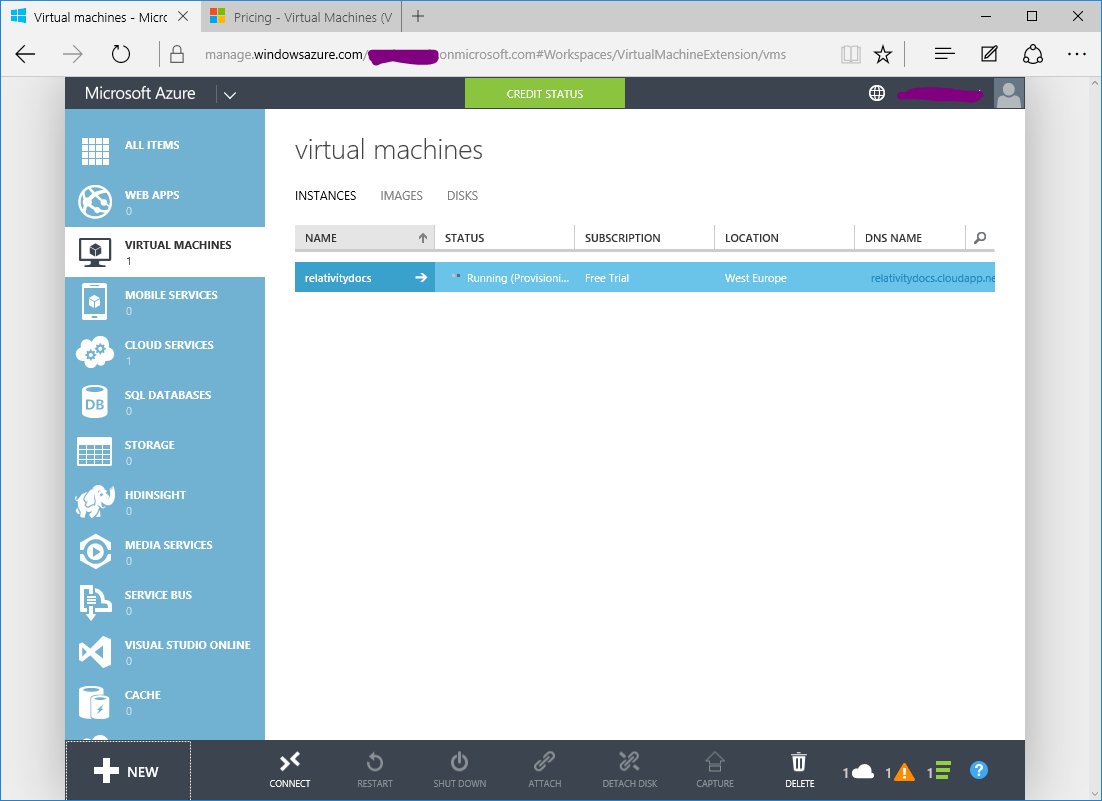
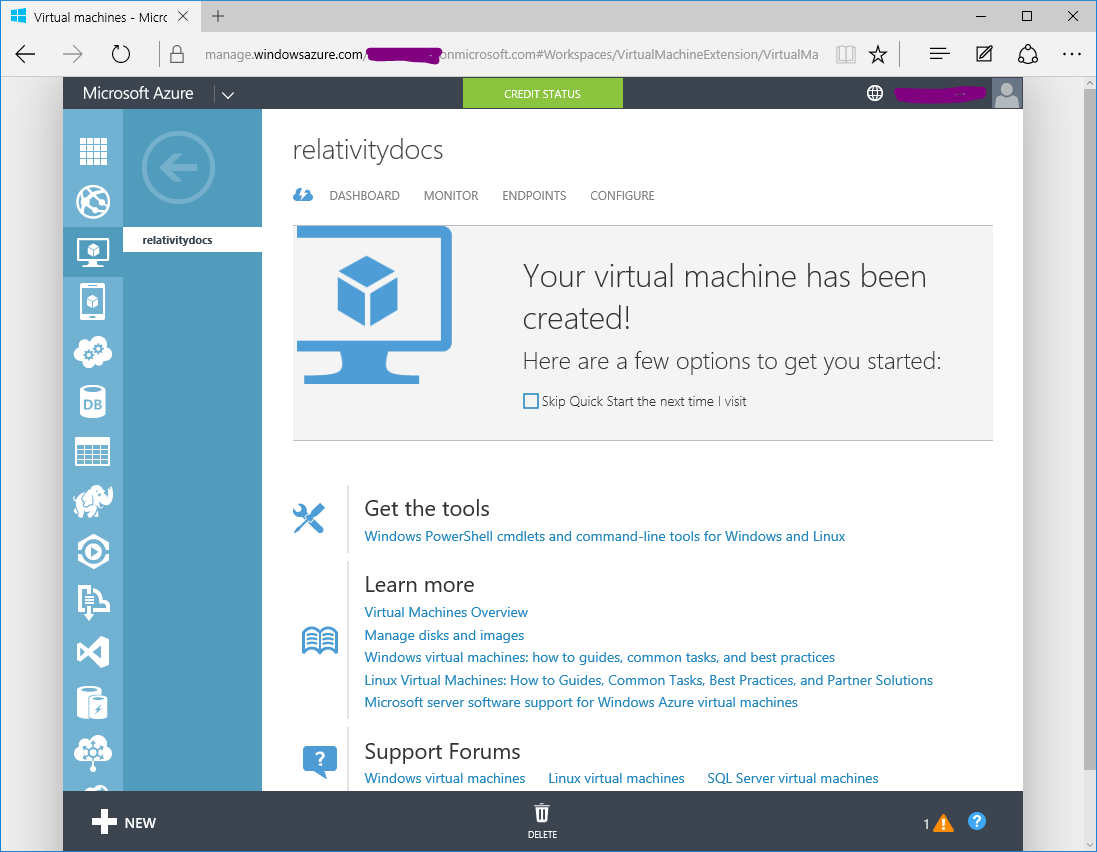
Click on CREATE A VIRTUAL MACHINE which will begin the process of provisioning the VM, note the status value. It will take around 5 minutes depending on how busy their system is. When its ready you will see the status change to Running
Configure an Endpoint
Before logging onto the newly running VM, we will take a moment to define an EndPoint that your Data Abstract clients will connect to. An EndPoint is essentially a mapping of a port between the VM and the outside Internet. The only way your client apps will be able to communicate with the VM is through that EndPoint. It should be noted that EndPoints are not required if you want to communicate between multiple VM's as they are on a private network.
-
In the Management Portal click on the name of your Virtual Machine which will take you to the VM's Overview page which provides detailed information about your VM including CPU, Disk and Network usage.
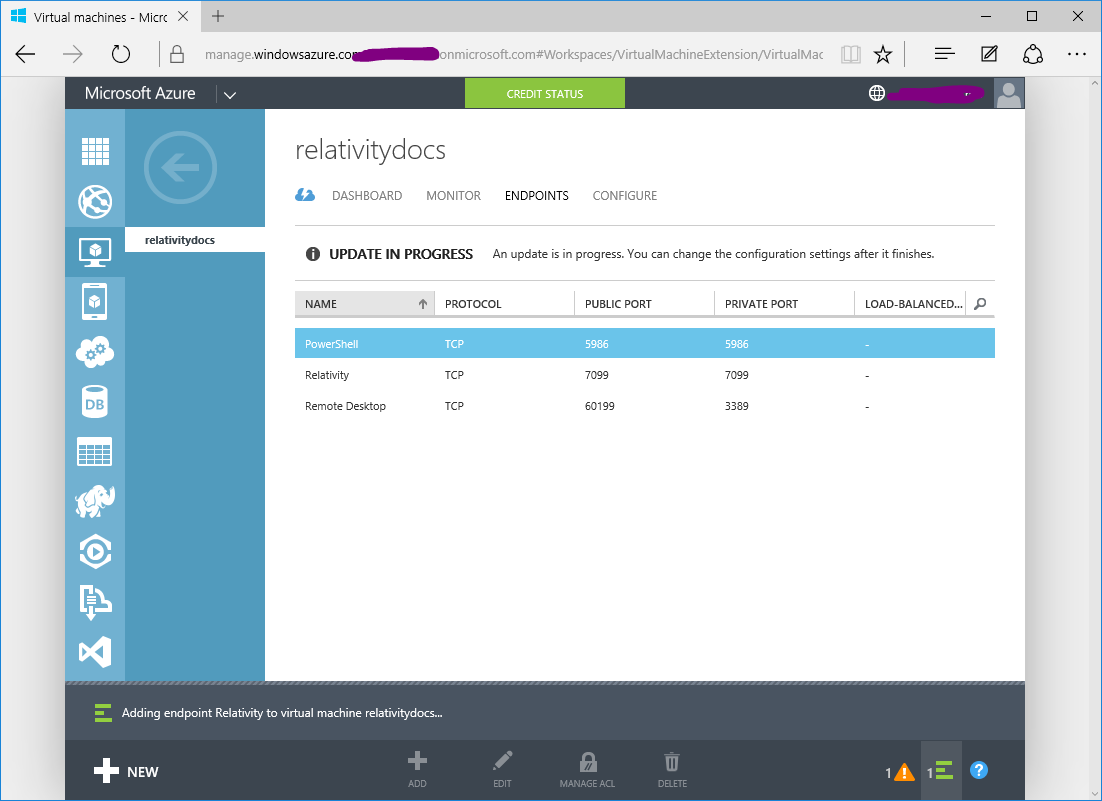
- Click on ENDPOINTS which will open a tab showing the currently configured EndPoints. If you used Quick Create to create the VM, then there should be two default EndPoints, one for PowerShell and one for RDP (the latter we will use in a moment to connect to the VM).
-
Click on ADD from the bottom of the page, which opens a wizard.
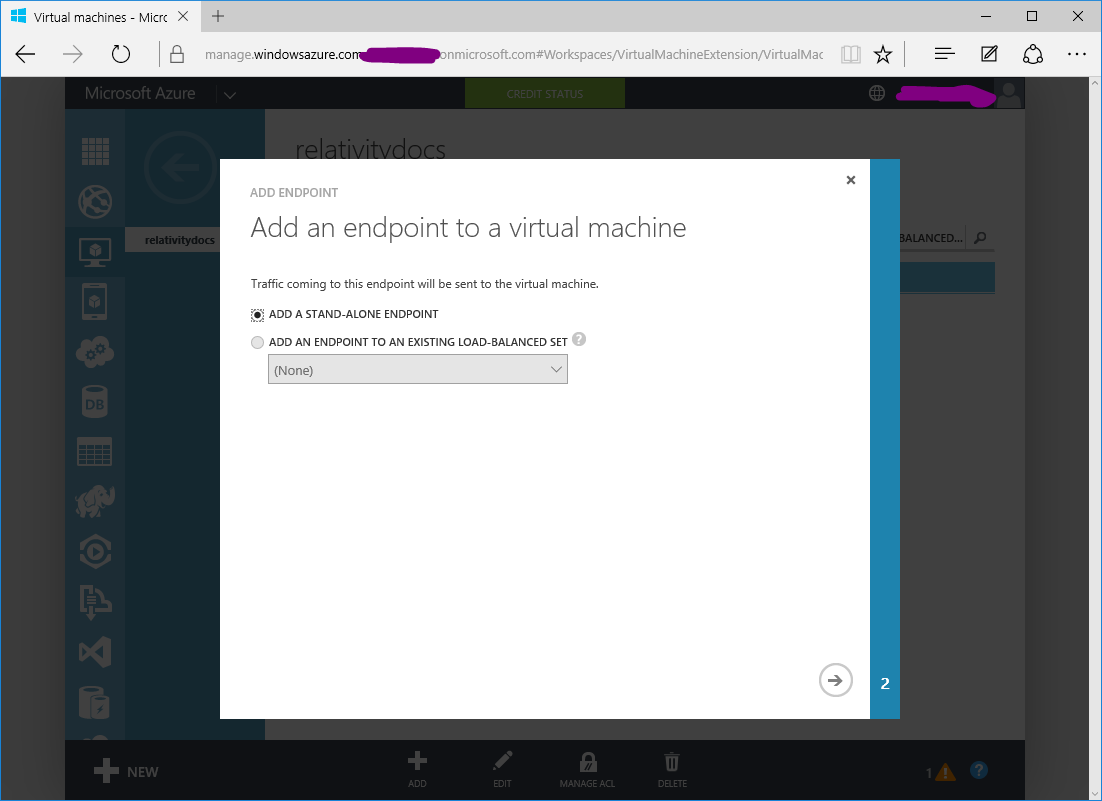
- Ensure that ADD A STANDALONE ENDPOINT is selected and click the forward arrow at the bottom of the wizard to go to the second page.
-
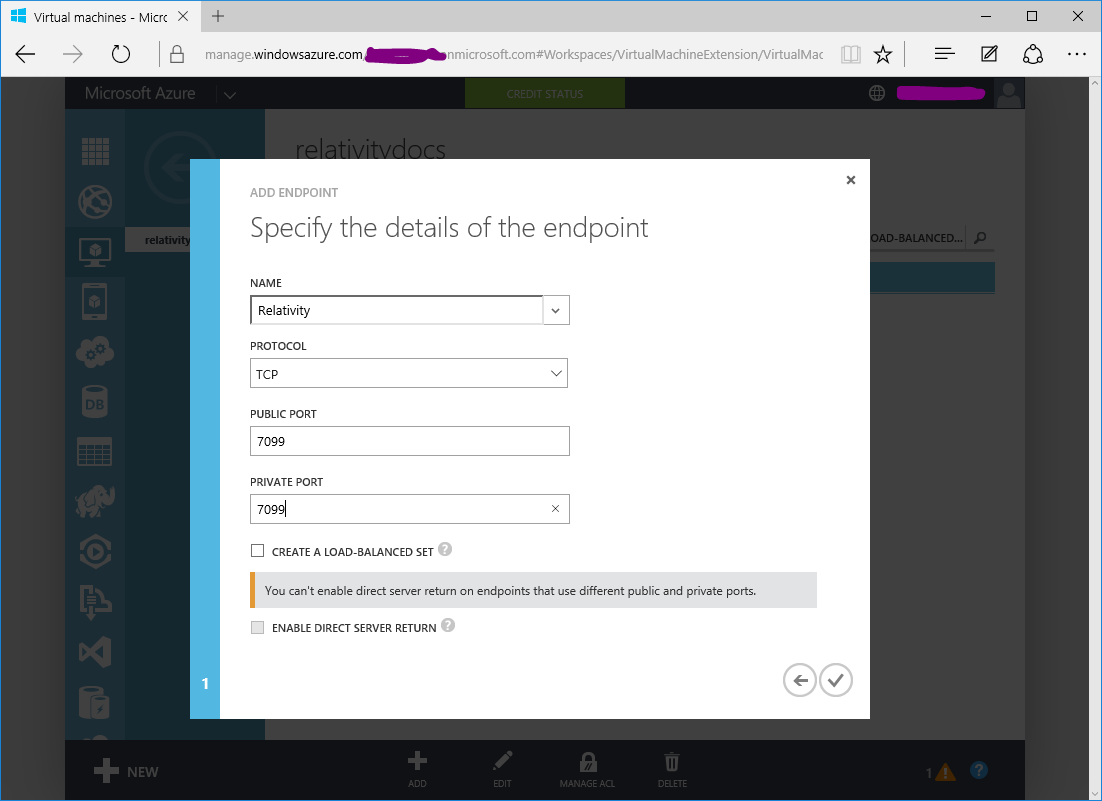
On the second page of the wizard you specify the details of the EndPoint you want. Set the NAME to something that will remind you later of its purpose, in this case we used Relativity, set the PROTOCOL to TCP, specify the PUBLIC PORT you wish client apps to connect to (can be anything as you can specify in your client apps the port to use, here we use the default port of 7099), lastly specify the PRIVATE PORT on the VM that the endpoint connects to. (Again we used 7099).
-
Click on the tick symbol and wait while it sets up the endpoint for you. Again this will be a couple of minutes before its active.
During development and testing you might wish to control who was access to the EndPoint. There is a ACL (or Access Control List) option that allows you to specify which IP addresses, or block of addresses are allowed to connect to that EndPoint.
Log into the VM
Having created the VM and defined the EndPoint through which our clients will connect, the next step is to log into the VM. For ease we will take advantage of using RemoteDesktop and the RDP protocol.
- If you aren't back on the Virtual Machines page in the Management Portal, click on the large back arrow in the upper left of the UI.
- Ensure your VM is highlighted in the list and then click on the CONNECT button at the bottom of the page. This will download an RDP file.
- Click on Open.
-
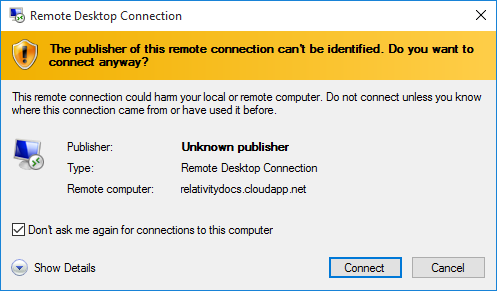
If its your first time connecting to the VM you will get a dialog asking for you to confirm that you want to connect. Click on the Connect button, you can optionally check the box to prevent the computer asking you about connecting to the machine in future.
- Next you need to enter the login credentials you specified when creating the VM, not your Microsoft ID. To do this click on Use another account (optionally checking Remember my credentials) and then enter the USERNAME and PASSWORD and press OK.
-
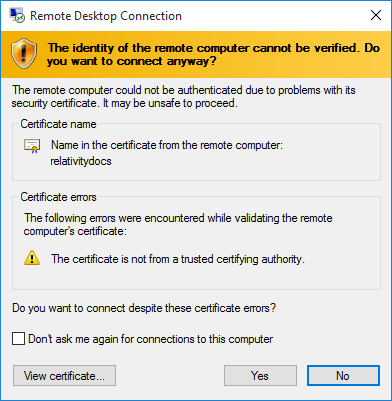
If the credentials are correct you will see a dialog informing you that the identity of the server isn't verified and you are asked if you are sure about connecting. Press Yes
-
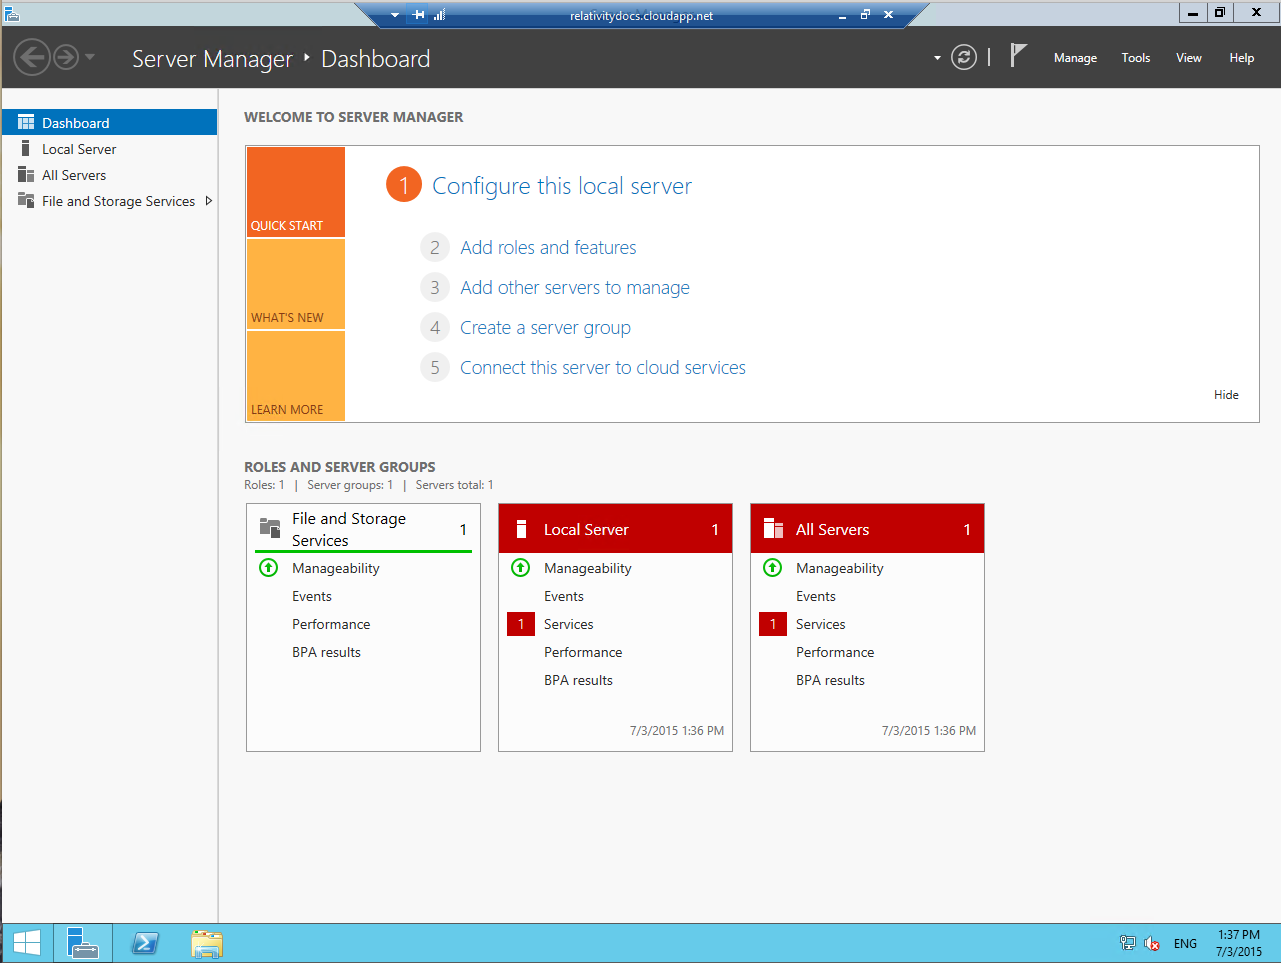
After that the remote desktop will log in, triggering the server to configure itself for your user and will then display the dashboard of the Server Manager app.
Upload Relativity
To upload your copy of Relativity to the server we will take advantage of the two-way feature of Remote Desktop to copy it over to the server.
- Ensure you are connected to the VM via Remote Desktop. (See previous section)
- On your local machine use Explorer to find the folder that Relativity was installed too. Generally this is the
Relativity Serverfolder in thec:\Program Files (x86)\RemObjects Software\directory. - Right click (or Ctrl+C) the
Relativity Serverfolder and select Copy. - Switch back to the remote desktop connected to your VM.
- Open Explorer there and move to a folder you feel is appropriate. (For instance create a folder called
UploadsinC:\) -
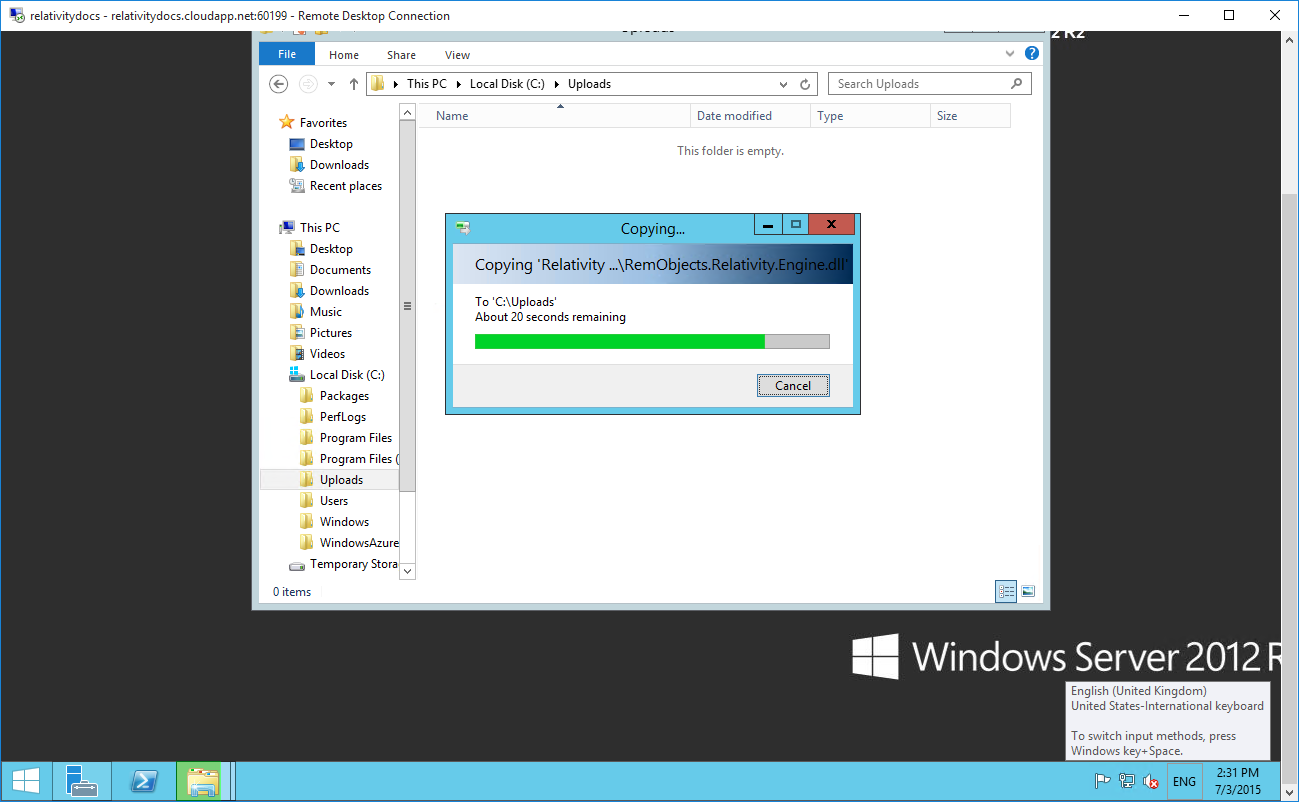
Right click in the folder and select Paste (or press Ctrl+V), Windows will then begin copying Relativity from the local machine to the virtual machine.
- When the copy is finished, open the
Relativity Server\Binfolder and double click on Relativity.exe which will start the server in desktop mode2.
Important: By default there is no SQLite driver available on Windows Server 2012. You will need to install that yourself for the DASample domain to work.
Test connection from Relativity Admin Tool on local Machine
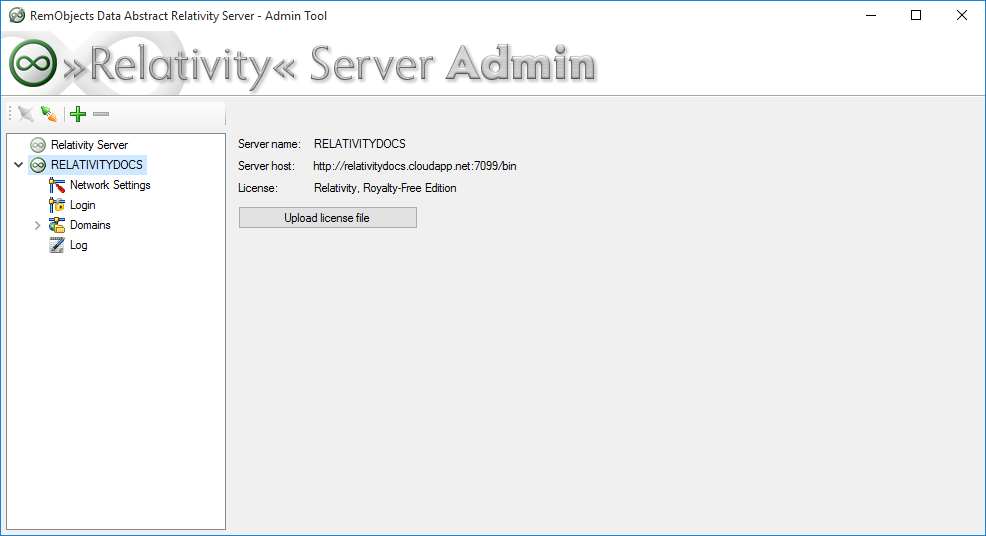
Having previously setup an EndPoint on the Virtual Machine and installed & run Relativity, it is now time to test trying to connect to the Relativity instance.
- On your local machine open the Relativity Admin Tool.
-
Now register a new Relativity connection by pressing the green
+button. Enter the details appropriate for your VM and click OK.
-
After a short delay as the Relativity Admin Tool talks to the remote instance to Relativity it will be added the source list on the left of the Window.
Optional: Add an SQL Server
One of the benefits of using the Azure platform, is that you can take advantage of their SQL Server deployment system and not have to worry about maintaining the machine.
Creating a new SQL Server requires only a few clicks.
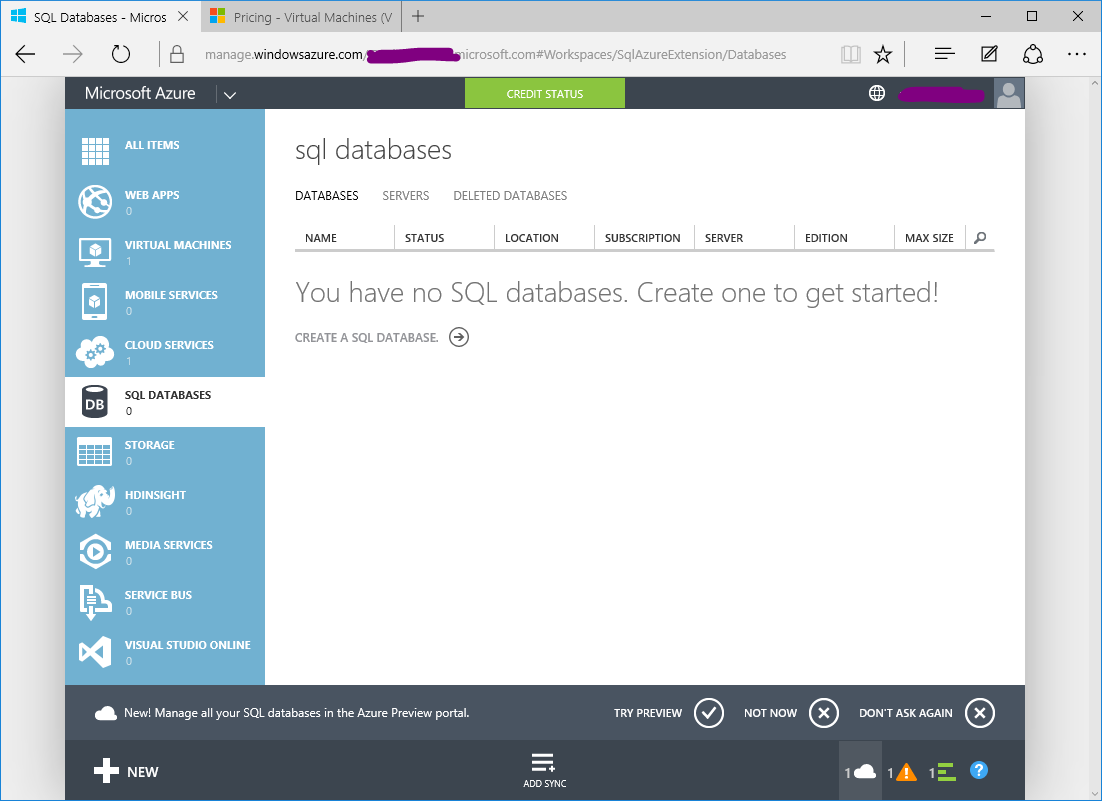
- Go back to the main page of the Management Portal and click on SQL DATABASES from the left sidebar.
-
This brings up the overview page for the SQL Database servers. Click on the CREATE A SQL DATABASE text to be taken to a database server creation wizard.
-
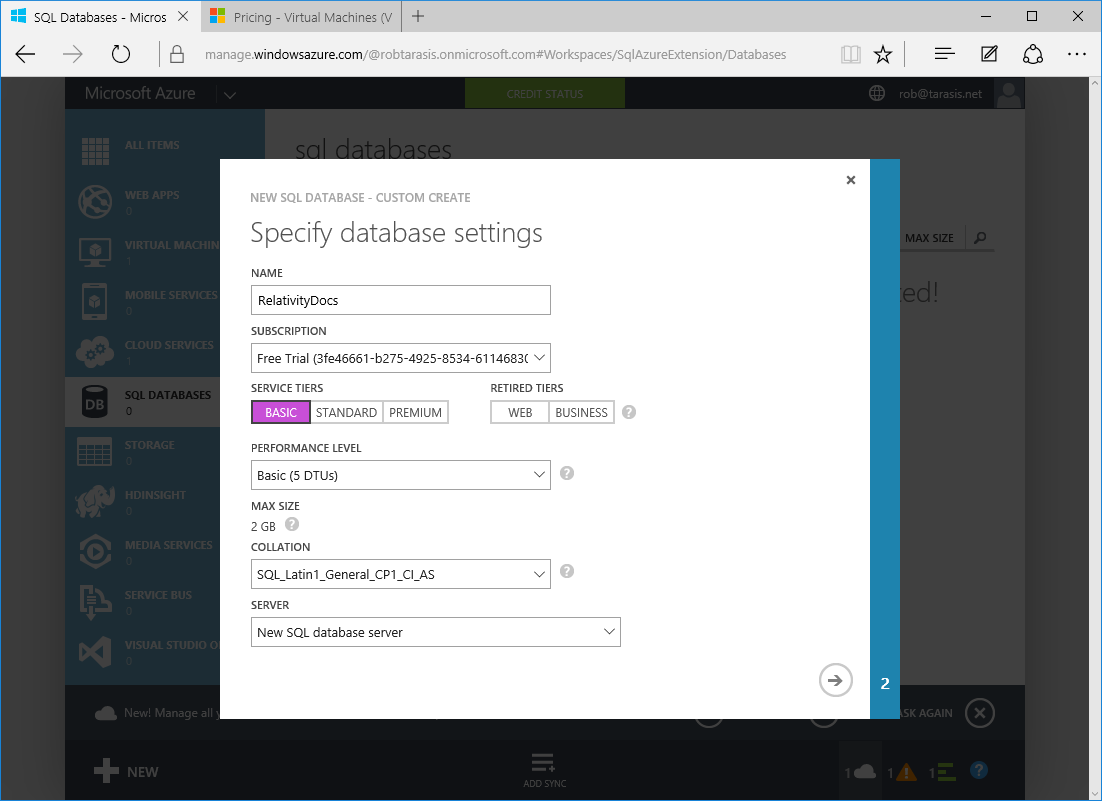
The first page of the wizard is for the main details of the server; from its name, the type of performance level you need, the maximum size of the database you think you will need and the database server you want it on. Fill this in as is appropriate for you, as this is for example purposes we've created a small 2GB basic server with the name RelativityDocs. When your ready click on the right arrow in the circle to move to the next page.
-
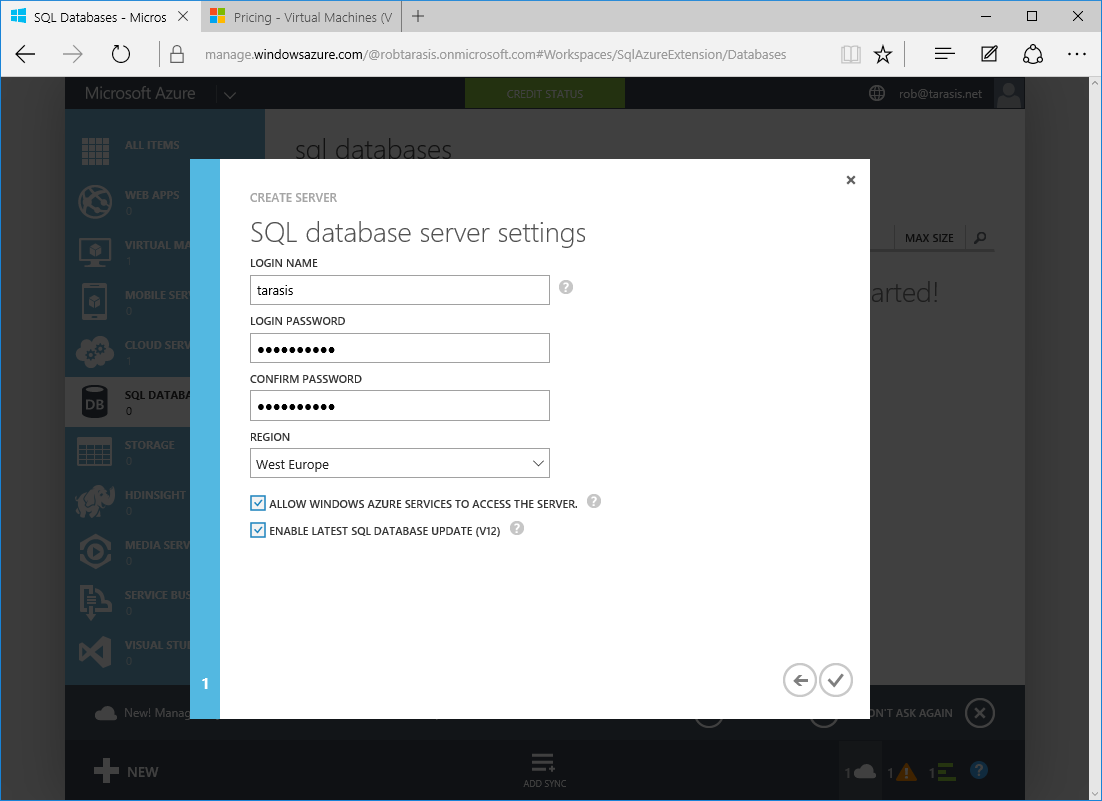
On this page you create the login details that will be required to access the server. Create a LOGIN NAME & PASSWORD and set the region that is most suitable for your server to be deployed to. Ensure that you check ALLOW WINDOWS AZURE SERVICES TO ACCESS THE SERVER so that you server will be able to connect using the internal network without needing to added to the approved IP address list.
-
When you are ready click on the tick. This will return you to the sql databases overview page and show you that your DB is currently being created. Normally this is only a few minutes for small databases but larger ones take longer.
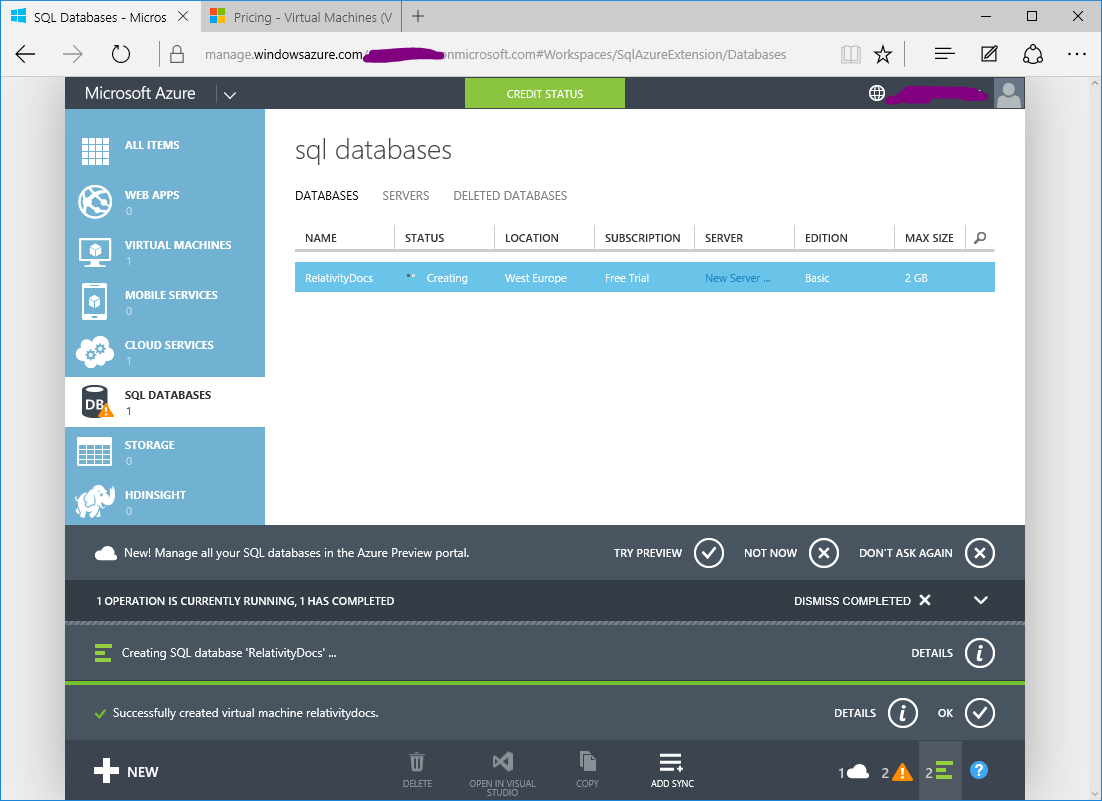
-
Once the database has been created the value in the STATUS column will change to Ready or ONLINE.
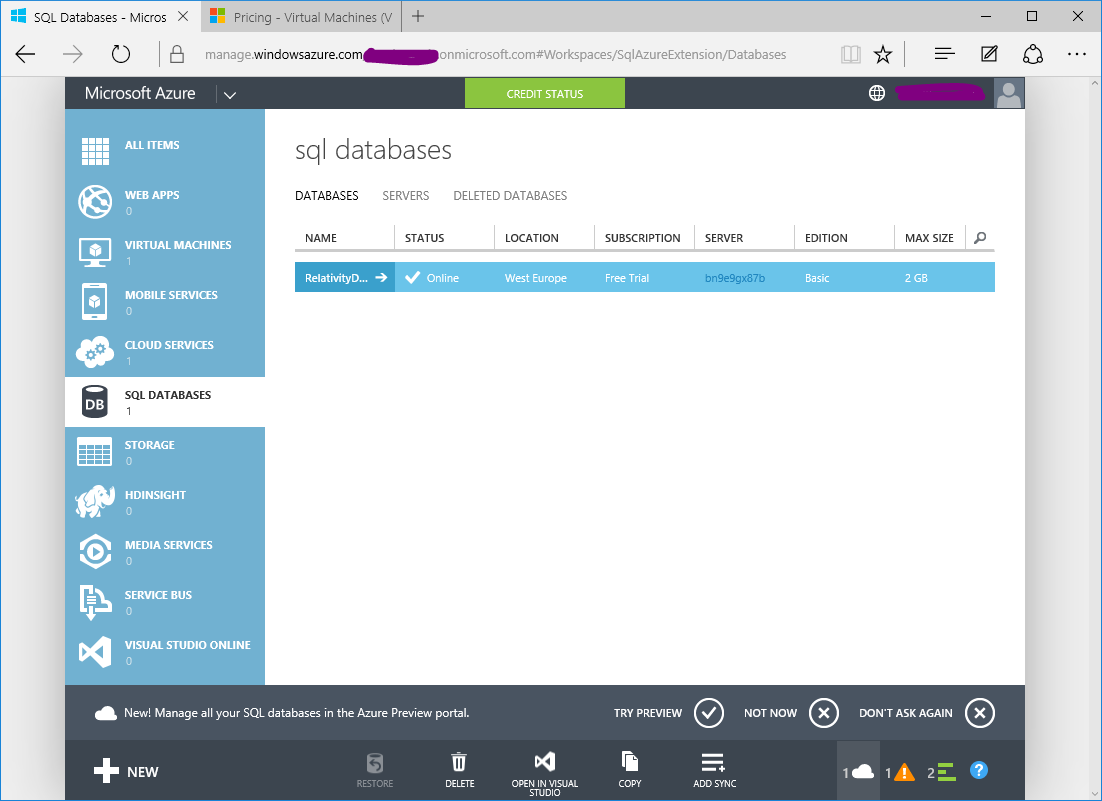
Now that the Database has been created you can now use it with an instance of Relativity.
Optional: Connect Schema to SQL Server
Adding an Azure SQL Database to your schema in Relativity is a breeze. Though you will need to configure the domain, schema and connections from a local copy of Relativity Admin Tool so that you can open the Schema Modeler application which is located in the Data Abstract (Common) folder in C:\Program Files (x86)\RemObjects Software\.
Note before we start, if you haven't already done so, you should add the IP address from your Internet connection to the SQL Database's Allowed IP Addresses list. This means you can use other tools (like Visual Studio) to define your database tables. Go to SQL Databases->Your Database Name and then click on Set up Windows Azure firewall rules for this IP address to add your current IP address to the firewall.
- Open the Relativity Admin Tool on your local machine and then connect to your remote server.
- Open the Domains folder in the source tree and then double click on Add new Domain.
- Set the name to something appropriate and then click on the Floppy Disk icon to save the change to the domain.
- Next open up the new Domain and double click on Add new Schema.
- Give it a name, click on the Floppy Disk icon and then click on the Open in Schema Modeler button which will open the empty schema in the modeling tool and a seperate window for managing your database connections.
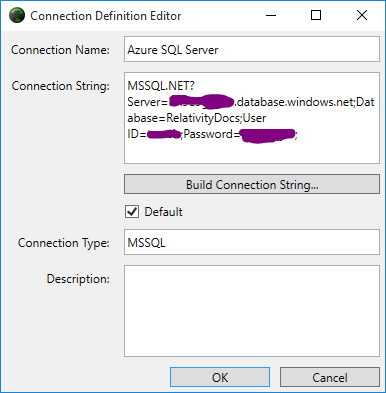
- On the Connection Manager window click on the circular green + icon which will open up the Connection Definition Editor.
- Set a name for the connection, for this example we used Azure SQL Server and then press the Build Connection String... button to open the Connection String Builder.
- Set the driver to MSSQL.NET, set the Server Name to your SQL Server name. Next set the Login and Password that you set in the previous section. Set the database name to the name you gave your database in the previous section.
- Press Test Connection to ensure that you have all the details correct. If it is you'll get a confirmation dialog saying the Connection is alive. Then press OK.
-
You will be returned to the Connection Definition Editor with the fields filled in.
-
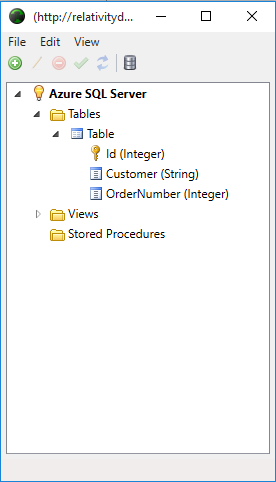
Press OK to be returned to the Connection Manager, which will now show your new connection. When you expand the connection you can see the tables, fields and views in your database. Note here we had previously used Visual Studio Community Edition to create a table and add a couple of fields to it.
Notes
-
Note that the size of the VM you need is really dictated by your needs, during initial testing / development you could use an A0 or A1 VM and then later change it D1 depending on the traffic/number of clients you are dealing with. ↩
-
Please consult the guide Deploying Relativity on Windows for instructions on how to install Relativity server as a Windows Service. ↩