Main Window
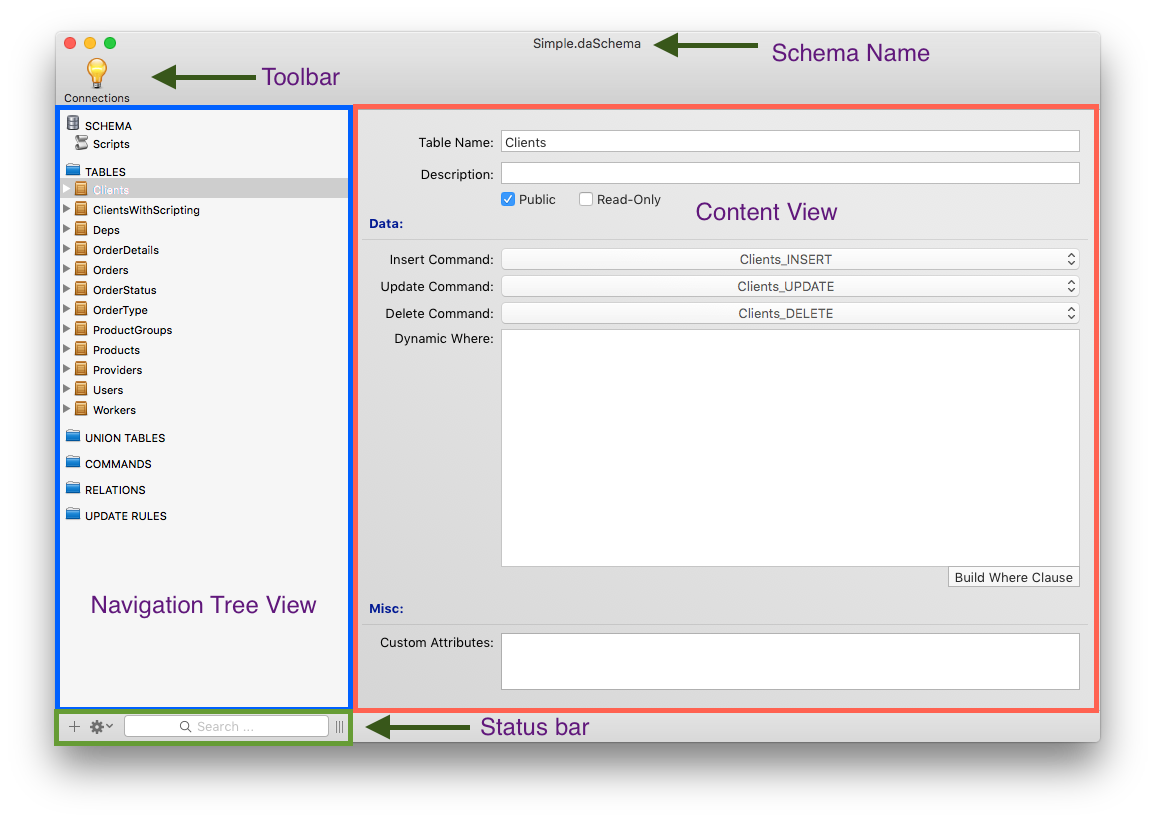
Once your selected a Schema you are presented with the window above, which is where you will do all the configuration of the Schema. The UI is split into 4 sections, with the majority of the work happening in the middle.
The Toolbar at the top of the window, has a button Connections which when pressed will open the Connection Manager which lists all of the connections that have been configured for the domain.
The left side of the window is the Navigation Tree View which you can use to select the different sections that make up the schema and work with the elements that make up those sections. The sections a differentiated by being a blue folder and the available sections include SCHEMA, TABLES, UNION TABLES, COMMANDS, RELATIONS and UPDATE RULES. The sections can be expanded or collapsed depending on your needs by hovering the mouse pointer over the section name area and the clicking on the Show or Hide that appear; note that Show and Hide will only appear if there are subelements in the section.
The right hand side of the window is the Content View which changes depending on what has been selected in the Navigation Tree View. Sometimes it will be a display view, other times it is an editor you can use to change details about a table, or command.
At the bottom of the window is a Status Bar which contains two buttons and a search field. The + button is context aware and will create a new instance of whatever section or element that is currently selected in the Navigation Tree View be it a Table, Command and so on. The Gear icon which gives some additional actions for the selected element, which typically is typically Delete but when a Table is selected you will also have the option to preview it. There is also a Search field, which will search the whole schema for anything that matches your search request.

The last thing to note is that when the schema you are working on has changes made to it, the Windows close button will be updated with a visual indicator, which is a black dot, to let you know that you need to save your changes. If you decide that you don't want to keep the changes then you can click on File->Revert to Saved.
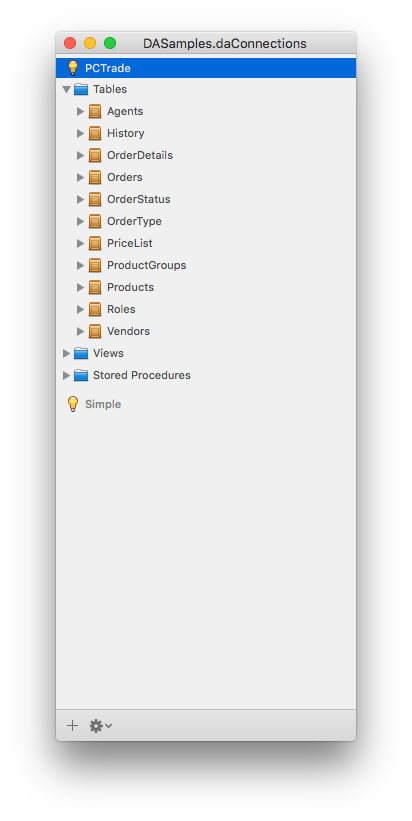
When the schema is opened a Connection Manager view is also opened, so that you can quickly see the Connections and their tables, fields, views and stored procedures that are available to you. This is particularly useful as you are able to drag and drop those tables, fields, view and stored procedures onto the main schema modeler window to quickly get started building your schema.
To collapse a connection you aren't interested in hover the mouse over the name and click on the hide button that appears. You can likewise show a collapsed connection by clicking on the show button.
If you realise that you need a connection that hasn't yet been defined, then you can press the + button at the bottom of the window to quickly build up a new connection without having to switch back to the main Server Explorer window. Using the Gear icon, you can delete the currently selected connection from the schema. The ConnectionManager documentation will take you through the steps of creating a new Connection.