Union Tables
Using the Schema Modeler view you can add a Union Table that selectively and seamlessly combines the data of several tables together and presents it to the client as a single unified virtual data table, much like you would have when using the UNION SQL statement.
This page will give you an overview of the section and step you through creating a brand new Union Table in only a few clicks of the mouse.
Union Tables overview
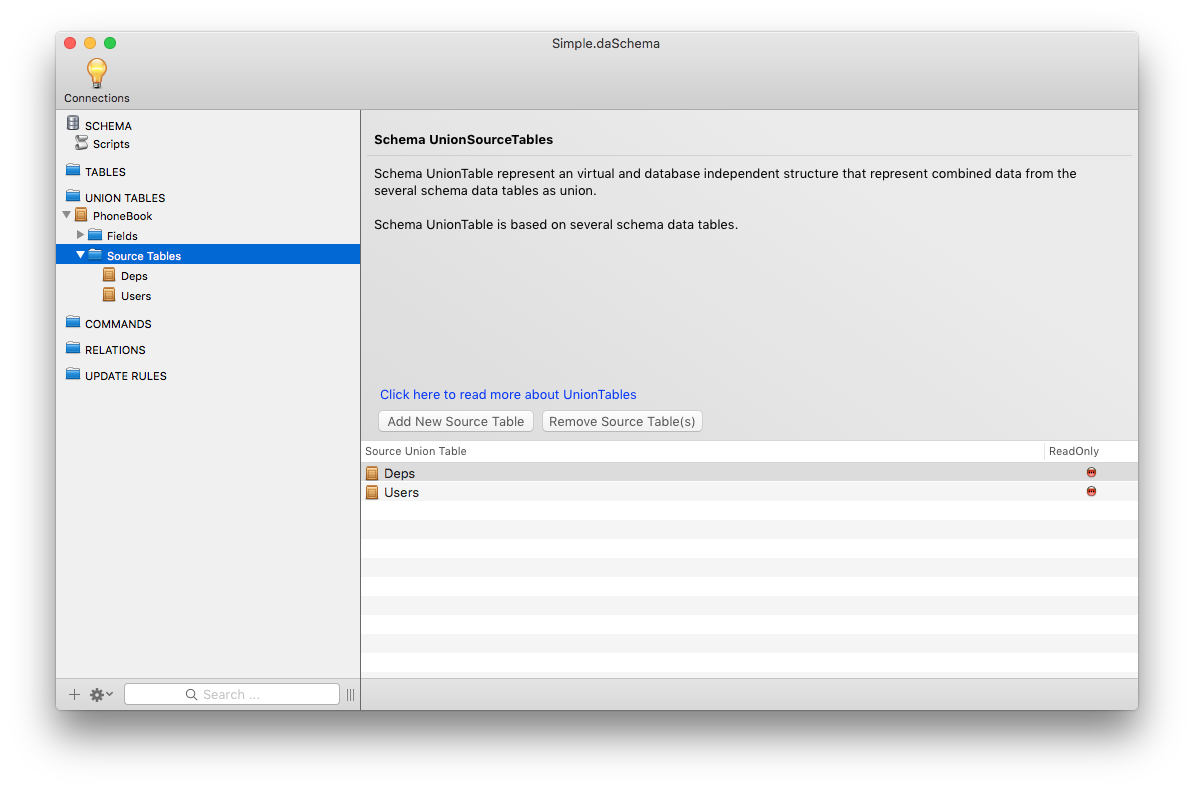
Selecting the Union Tables folder in the navigation tree view displays an overview of the currently available Union Tables, as well as providing a means to create new ones, and delete those no longer required.
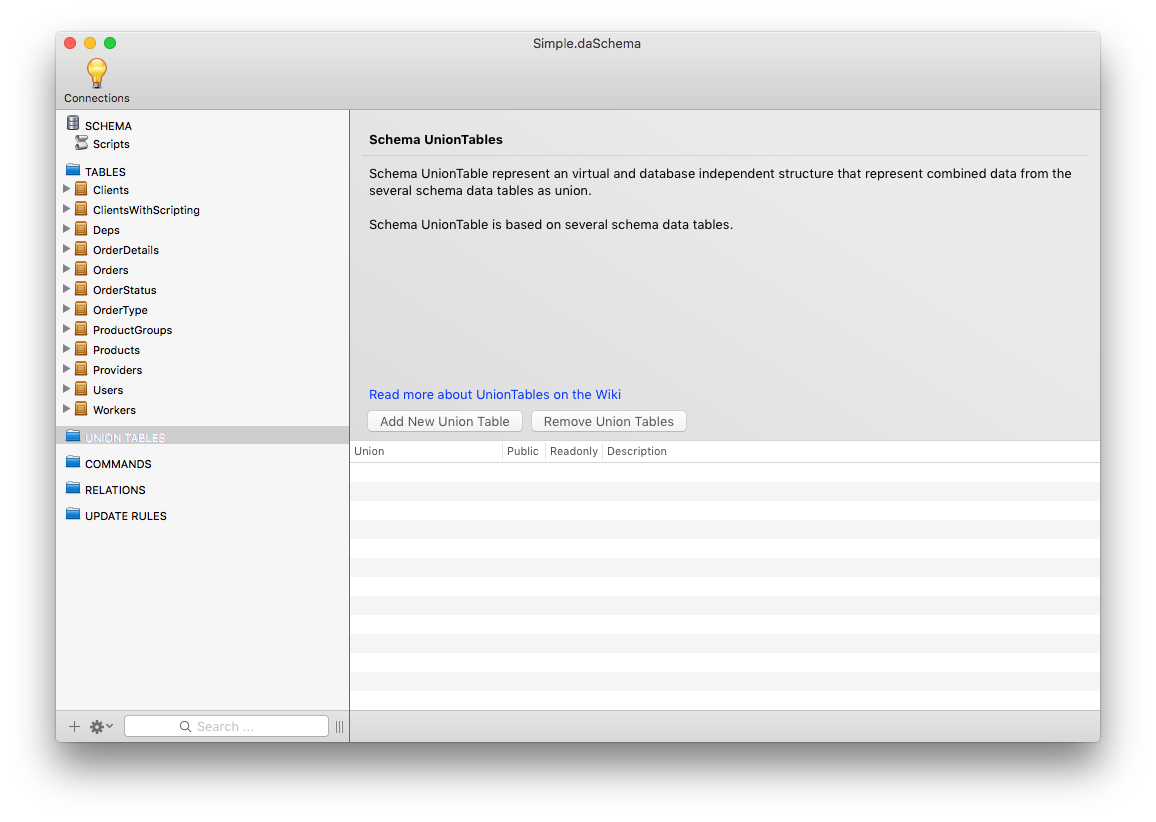
The table has four columns which presents basic information about the Union Table, specifically the name of the Union Table that you would use in your code, whether it is available publicly or is internal for the server, whether its contents are Read-Only and an optional description.
To delete a Union Table that is no longer required, simply select it in the table and press the Remove Union Tables button. Otherwise right click on the Union Table in the navigation tree and click on Delete Union Table \<Tablename\>.
Adding a new Union Table
To add a new Union Table to the Schema, either press the Add New Union Table button in the Union Tables view, or right click on the UNION TABLES folder in the navigation tree and select Add new Union Table. Doing this will create a new Union Table with and load the Union Table editor shown below.
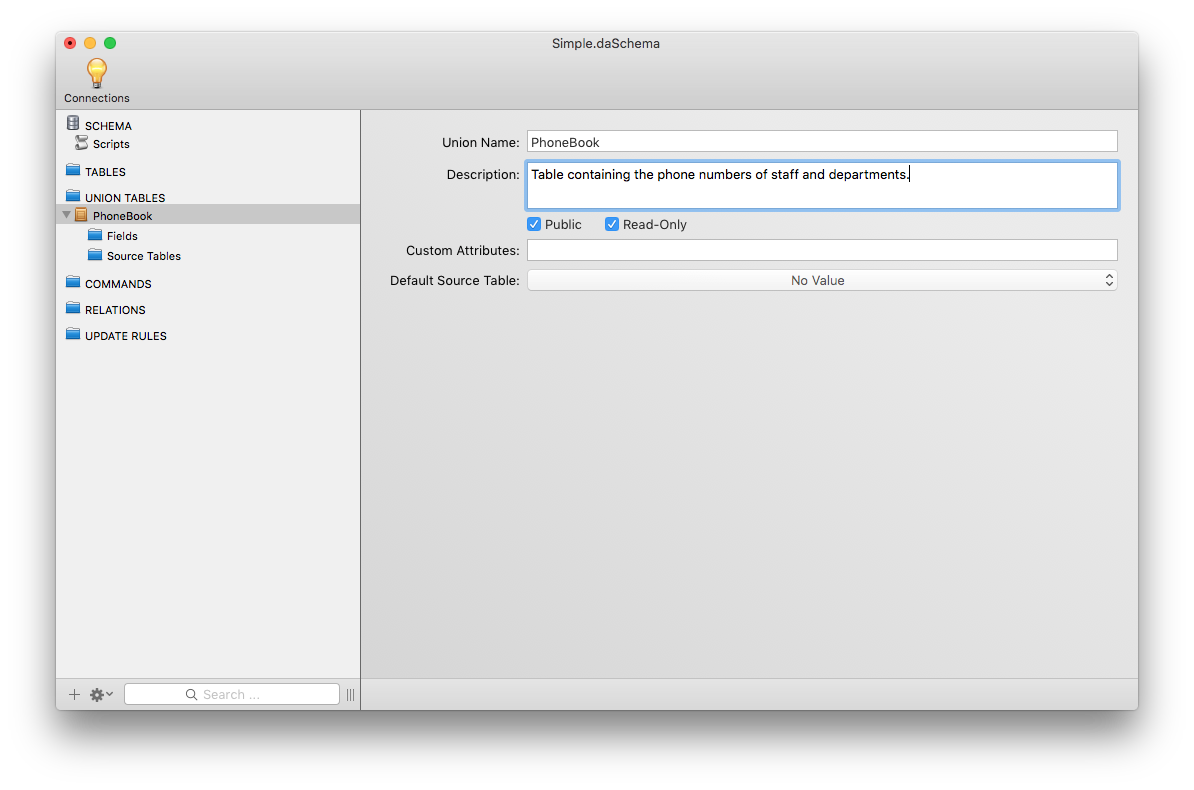
This editor allows you to set the basic details of the Union Table:
Union Nameis the required name of the table, which will be used to retrieve the table in your code.Descriptionis an optional description of what the table is for.Publiccheck this if the Union Table is to be available to client applications. Otherwise it is only available to the server.Read-Onlycheck this if you wish the Union Table to be read-only.Custom Attributesis an optional field where you can supply a string that can be used by the client application or on the server side with Business Rules ScriptingDefault Source Tableis a drop down box from which you can select which of the tables you've added to the Union Table should be the default table.
If you expand the new Union Table folder you will see two additional folders. The Fields folder presents the abstract & database independent fields that will make up the Union Table. The Source Tables folder lists the tables that the Union Table will retrieve data from.
NOTE: You cannot build a Union Table that pulls data from two different connections. The tables that comprise the Union Table must be from the same connection.
Add / Edit Fields
Fields are how you interact with that data, and are used to help define the mapping between the Union Table that your client will interact with and the underlying Source Tables. You can either add Fields manually, or they will be automatically generated for you when you drag your first table into the Source Tables folder. Note that you can remove fields that you aren't interested in & rename others; Schema Modeler will update the table mappings for you to ensure that everything still works.
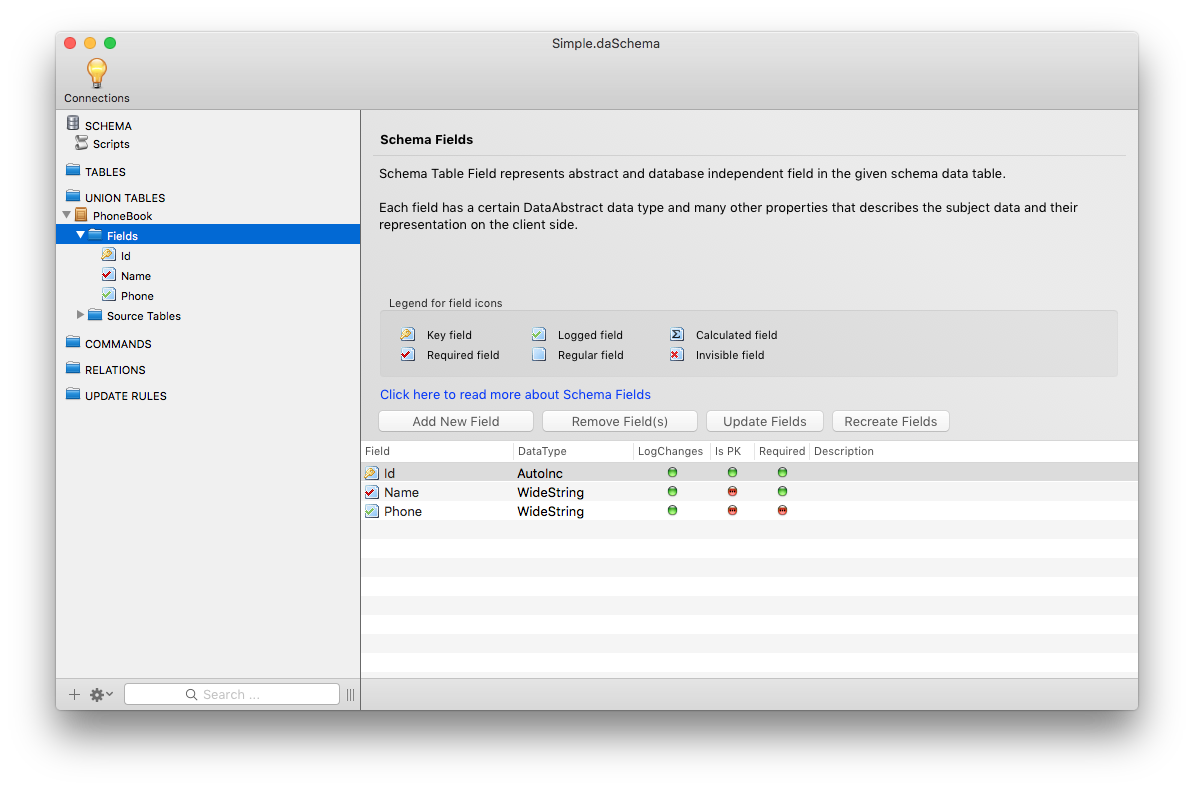
When you click on the Fields folder in the navigation tree view you will get a view which presents basic information about the fields that are currently available in the union table. From it you can see information about each field, specifically:
Fieldis the name of the field.DataTypeis the data type of the field.LogChangesindicates if changes to that fields data are logged.Is PKindicates if the field is a primary key or notRequiredindicates if the field is RequiredDescriptionis an optional description of what the field is.
You can work with the fields, including adding new ones, removing ones that are not needed, update the fields or start over by recreating the fields in case you made a mistake and need to start over. If you want to edit a field either double click it in the table in the Fields view, or by selecting the field from the Fields folder.
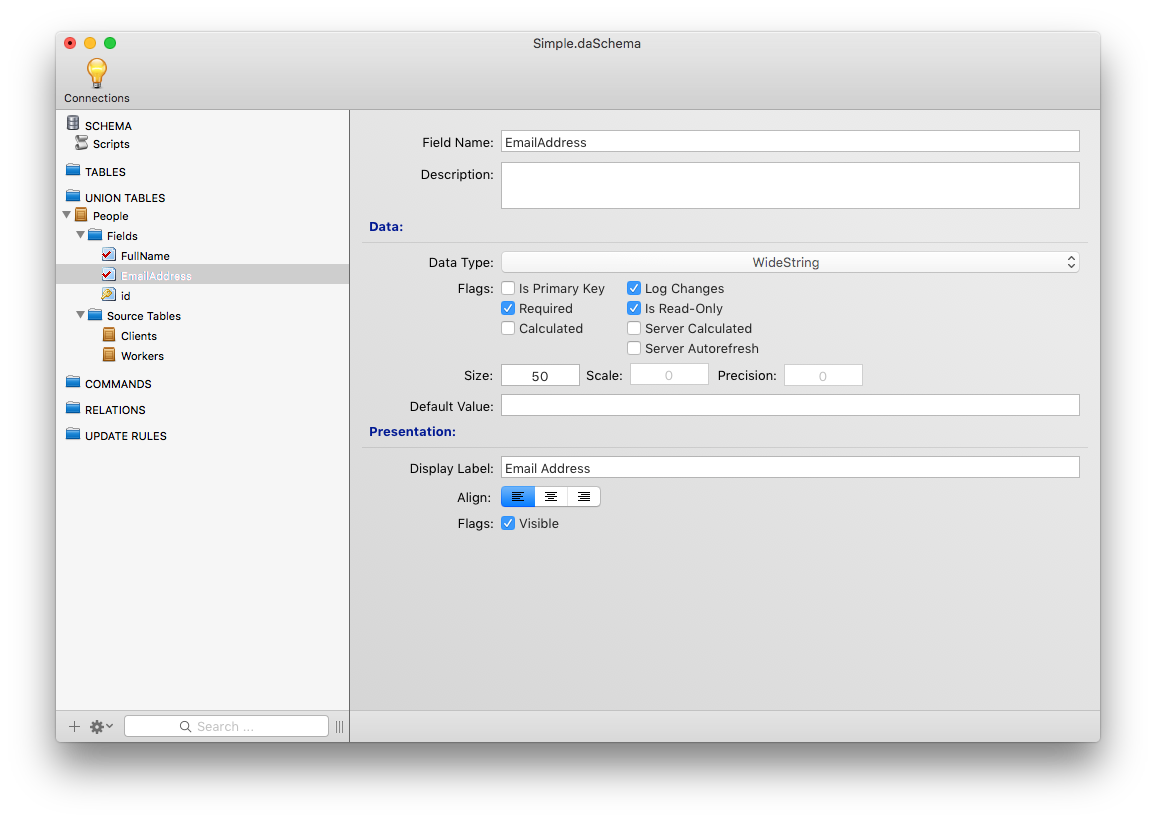
Adding or editing a field takes you to the Field editor which is split into four sections allowing you to customise the field to your needs:
- General - You can change the field name here, and supply an optional description of what the field is used for.
- Data - Here you can manage the main details of the field. You can specify if its a primary key, a Calculated field, its data type and much more.
- Presentation - allows you to supply information about how the field would be presented in a table view. You can specify a separate label to use instead of the field's name, its alignment, whether it should be visible (for instance in a client app you wouldn't normally display the id field) and so on.
Add / Edit Source Tables
The Source Table is a data table that is in the current schema that provides data to the Union Table based on the mapping you define between the Union Table fields and the data tables fields.
When you select the Source Tables folder from the navigation tree view, you will see the Source Tables view which displays any source tables that currently exist, and allows you to quickly add a new source table to the Union Table.
There are two ways to add a new Source Table. The first is to click on the Add New Source Table button. This switches to an Source Tables editor view (which you can see below) from which you need to set the Schema Table that the source table will use. Click on the drop down box and choosing the appropriate table, which will then update the name of the Source Table in the Source Tables folder to match.
Another way to add a new Source Table is to use drag & drop. Simply drag a Table from the TABLES folder in the navigation tree view and drop it onto the Source Tables folder. If no fields have been defined yet for the Union Table then they will be generated for you based on the Table you just dropped. If fields have already been defined, then a basic mapping will be setup between the Union Table and the newly dropped Source Table which you should configure to ensure the mapping is as you require.
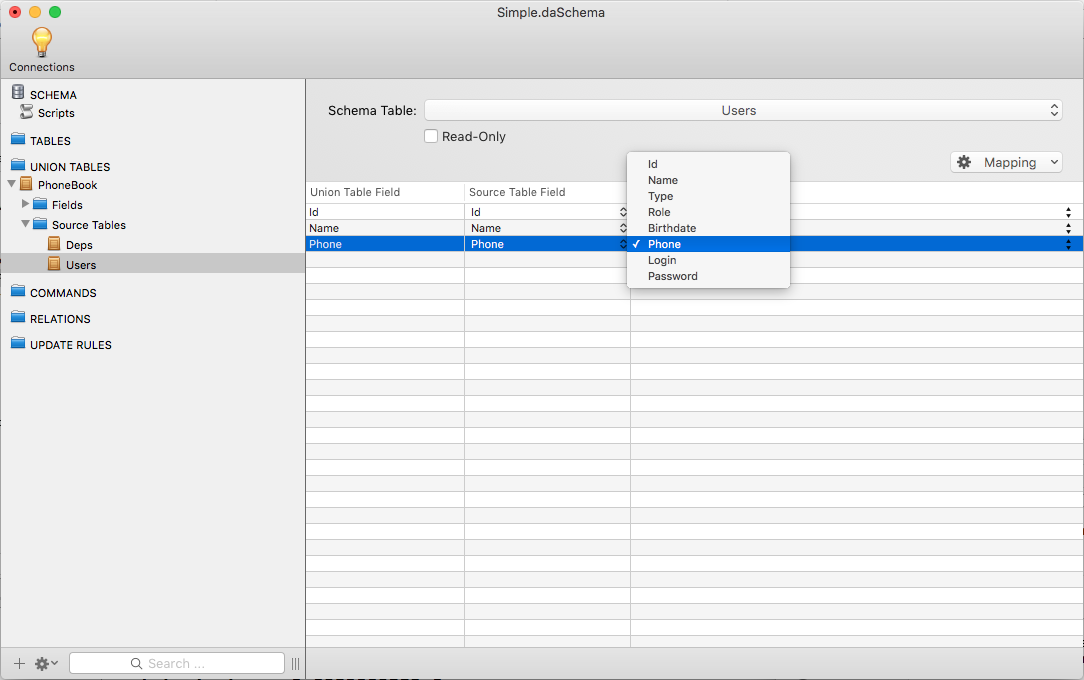
In the Source Table editor you can change the mappings between the Union Table fields and those in the Source Table to suit your needs; including clearing the mappings completely and recreating the default mappings.
The Source Table fields are matched to the Union Table fields on a first come first serve basis, as such you should alter the mappings to best suit your needs. To change a mapping, click on the appropriate Source Table Field and a popup box will appear (as shown in the above figure) letting you choose from the fields available in that source table.
If you ever want to recreate the default field mappings, or indeed clear the mappings completely, then click on the Mapping button, and then click on the appropriate option.
Example of creating a Union Table
An step by step guide to creating a union table and retrieving results from it is available in the Getting Started section entitled Adding & Reading from a Union Table.