Editing Tasks
It's all well and good to be able to see the status of the tasks, but it's time to start adding features to the application that allow the user to add, edit or delete a task. The first step is to add the ability to edit tasks.
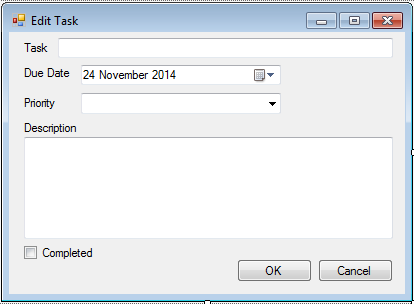
Edit Tasks Form
Add a new form to the project and name it AddEditTaskForm, we will re-use this form later for adding new tasks on the following page.
Add the following controls:
- A TextBox named titleTextBox
- A DateTimePicker named dueDatePicker
- A ComboBox named priorityComboBox
- A TextBox named descriptionTextBox
- A CheckBox named isCompletedCheckBox
- A Button named okButton with the DialogResult set to OK
- A Button named cancelButton with the DialogResult set to CANCEL
Add the labels and place the controls as shown in the screenshot:
Now we need to wire the UI elements up. Open the code view of AddEditTaskForm and add the following code which adds a private Tasks property which we use to store the data from the dialog UI elements, and to set the values in the dialog.
private Tasks.Tasks _dataContext;

public Tasks.Tasks DataContext
{
    get
    {
        this._dataContext.Task = this.titleTextBox.Text;
        this._dataContext.DueDate = this.dueDatePicker.Value;
        this._dataContext.Details = this.descriptionTextBox.Text;

        if (this.isCompletedCheckBox.Checked)
        {
            this._dataContext.Done = 1;
        }
        else
        {
            this._dataContext.Done = 0;
        }

        this._dataContext.Priority = ((KeyValuePair<Int64, String>)this.priorityComboBox.SelectedItem).Key;

        return this._dataContext;
    }
    set
    {
        this._dataContext = value;
        this.titleTextBox.Text = this._dataContext.Task;
        if (this._dataContext.DueDate.HasValue)
        {
            this.dueDatePicker.Value = this._dataContext.DueDate.Value;
        }
        else
        {
            this.dueDatePicker.Value = DateTime.Today;
        }
        this.descriptionTextBox.Text = this._dataContext.Details;

        if (this._dataContext.Done == 0)
        {
            this.isCompletedCheckBox.Checked = false;
        }
        else
        {
            this.isCompletedCheckBox.Checked = true;
        }

        this.priorityComboBox.Items.Clear();
        this.priorityComboBox.DisplayMember = "Value";
        foreach (var item in Tasks.Tasks.GetAvailablePriorities())
        {
            this.priorityComboBox.Items.Add(item);
            if (item.Key == this._dataContext.Priority)
            {
                this.priorityComboBox.SelectedItem = item;
            }
        }
    }
}
Switch to TasksPartial.cs and add a new method which is a lookup method that returns the available priorities as a dictionary which is used to populate the ComboBox which the user uses to choose a priority level.
public static IReadOnlyDictionary<Int64, String> GetAvailablePriorities()
{
    return new System.Collections.ObjectModel.ReadOnlyDictionary<Int64, String>(Tasks._priorityLookup);
}
Next switch to MainForm.cs and make the following changes. First specify that we are going to use a collection class by adding
using System.Collections.Generic;
Then add two private fields, the first of which is used to store a list of the tasks. The second is used to store a reference to our data source.
private List<Tasks.Tasks> _data;
private BindingSource _dataSource;
Finally we need to edit loadButton_Click to use those new variables.
private void loadButton_Click(object sender, EventArgs e)
{
    // snipped code

    this.CustomizeDataGridView();
    Tasks.Tasks.ParsePrioritiesTable(this._dataModule.DataAdapter.GetTable<Tasks.Priorities>());

    this._data = (from x in this._dataModule.DataAdapter.GetTable<Tasks.Tasks>() select x).ToList();
    this._dataSource = new BindingSource();
    this._dataSource.DataSource = this._data;

    this.tasksDataGridView.DataSource = this._dataSource;
}
Add an Edit Button
Add a new button to MainForm called editButton with the title Edit Task. This will be used to edit the selected task.
Double click on the button and add the following code which creates a Task called taskToEdit
private void editButton_Click(object sender, EventArgs e)
{
    Tasks.Tasks taskToEdit = (Tasks.Tasks)this._dataSource.Current;

    using (var form = new AddEditTaskForm())
    {
        form.DataContext = taskToEdit;

        if (form.ShowDialog() != DialogResult.OK)
        {
            return;
        }

        taskToEdit = form.DataContext;
    }

    this._dataModule.DataAdapter.UpdateRow(taskToEdit);
}
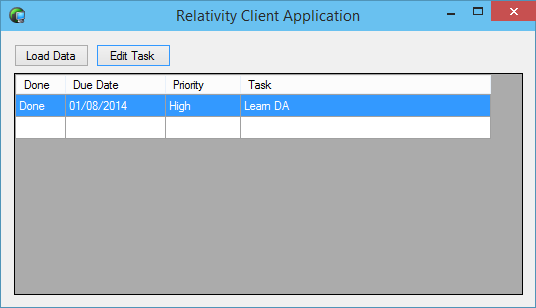
Now when you run the app, press the load button to load the data and then press the edit button.
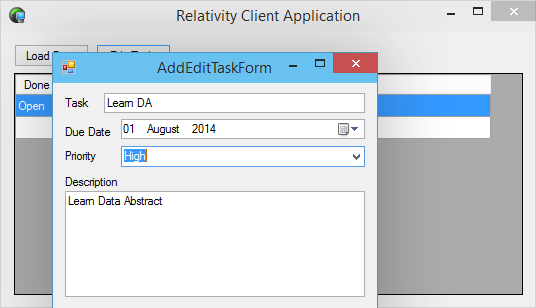
Change the priority from Low to High and click OK.
The user can now edit their task, but if they quit the app and restart they will find the data has reverted back to its original form. At present all changes the user makes are only applied to the local data. To make the changes permanent we need to apply them to the server.
Applying the Edits
To apply any changes the user makes to the data we need to call the ApplyChanges method of the DataModule class. For the purposes of this tutorial we will only apply the changes when the user actively presses a button.
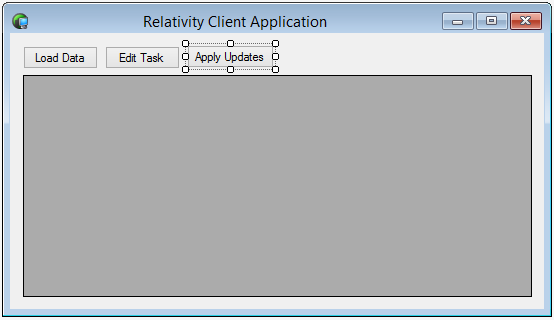
Add a new button to the MainForm called applyUpdatesButton with the title Apply Updates.
Double click on the button and add the following code to the applyUpdatesButton_Click event handler.
private void applyUpdatesButton_Click(object sender, EventArgs e)
{
    this._dataModule.DataAdapter.ApplyChanges();
}
Repeat the earlier change to the tasks priority. Then press the Apply Updates button, quit the app, restart it and press Load Data. You will find that the change has been persisted. It is worth noting that if the network connection disappears pressing the Apply Updates button will cause a System.Net.Sockets.SocketException exception to be thrown which you should handle.
When to Apply Updates?
The right time to apply updates back to the server will depend very much on what type of application you are developing. You can call ApplyChanges after every change to a table if you need to, however, it is more efficient to batch changes together before applying them.
Next we'll add server-side scripting so that each user only sees their own tasks.