Server-Side Scripting
Server Side Scripting
You may have already noticed that your application currently has a pretty major flaw. Right now it displays all the tasks in the Tasks table rather than just the tasks of the user who has logged in. To prove this, re-start your sample application and log in with a different user. (Username: Alex, Password: 111, if you used the sample data). You should still see the exact same single task you saw before. That task belongs to the previous user (Daniel), so this user (Alex) should not be able to see it.
One solution to this problem would be to change the client to add a condition to only select data for the current user. (This could be done using DA SQL or Dynamic Where, which are not covered in this tutorial.) Even though this would work, it's really not good to leave something as important as data privacy to the client; you’ll want to ensure there is no way the client could ever see someone else's data, even by accident. Fortunately Data Abstract supports this by allowing you to apply filtering of data at the Relativity domain. With the filter applied in the Relativity Server, the client can still request the whole Tasks table, but will actually only receive a filtered set of data that belongs to them.
Auto SQL vs. Custom SQL
Put Xcode aside for a while (but do not stop the running the application - you will use it a bit later to test your changes) and re-open Server Explorer. Locate and open the Tasks schema in the Schema Modeler. Expand the Tasks table and select its statement node.
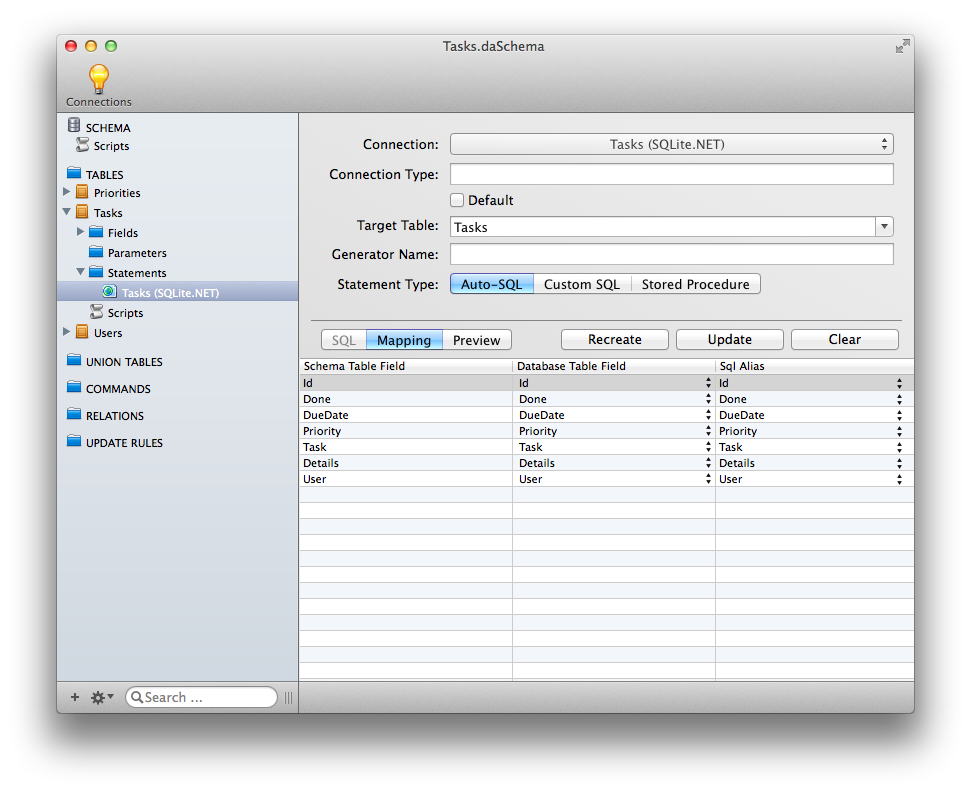
By default, each table in a schema is set to use an Auto SQL statement. This means that the SELECT statement for the table will be generated by the Data Abstract library automatically, depending on the schema for the table.
In this case, you’ll want to use a custom SQL expression for getting data from this table, so change the statement type to Custom SQL. The Schema Modeler will generate an initial custom SQL statement for the table for you.
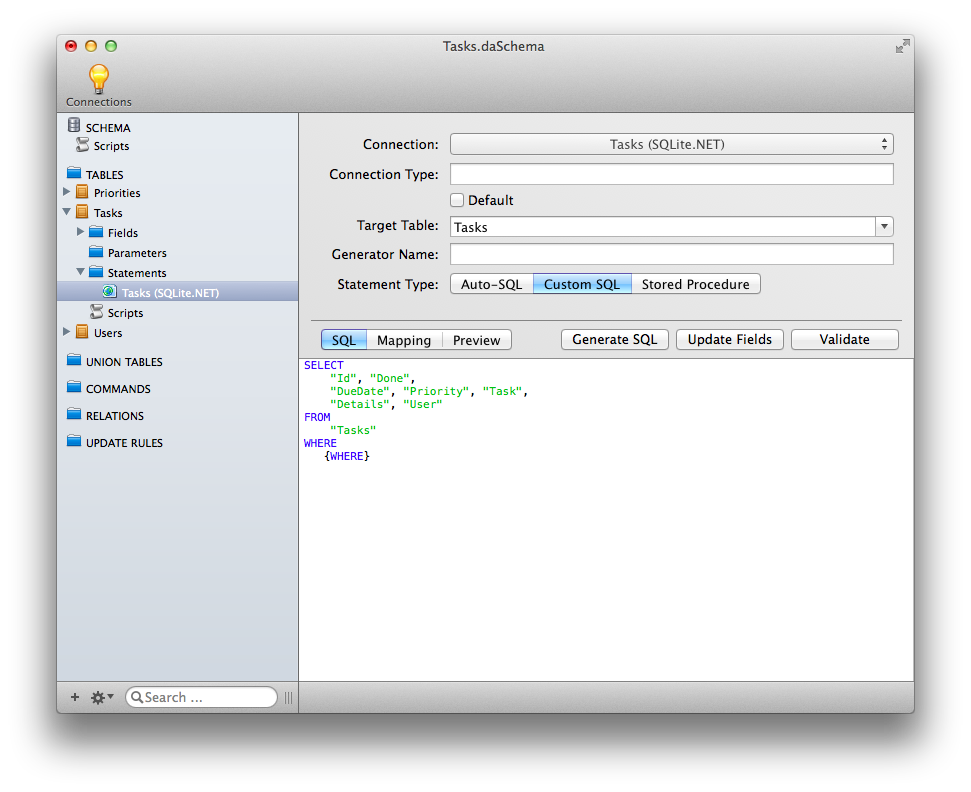
NOTE: The default SQL has a {WHERE} macro. This serves as a placeholder for adding a dynamic where expressions to the client. At runtime, this macro will be replaced with a translated DynamicWhere, or a TRUE expression (like 1 = 1) in case the request doesn't use the DynamicWhere feature. You need to make sure you leave this in the SQL.
You need to alter the SQL expression to add the condition to select records only for the currently logged-in user. Since “current user” is a rather dynamic thing, you are going to have to use a custom macro to represent the user identifier.
Add the line AND "User" = {USER_ID} to the SQL.
SELECT
     "ID", "Done",
     "DueDate", "Priority", "Task",
     "Details", "User"
FROM
     "Tasks"
WHERE
    {WHERE}
AND "User" = {USER_ID}
NOTE: The {} syntax declares a macro. You can call it anything you like, {USER_ID} is just a suggestion. The only requirement is that the macro name is unique within the schema.
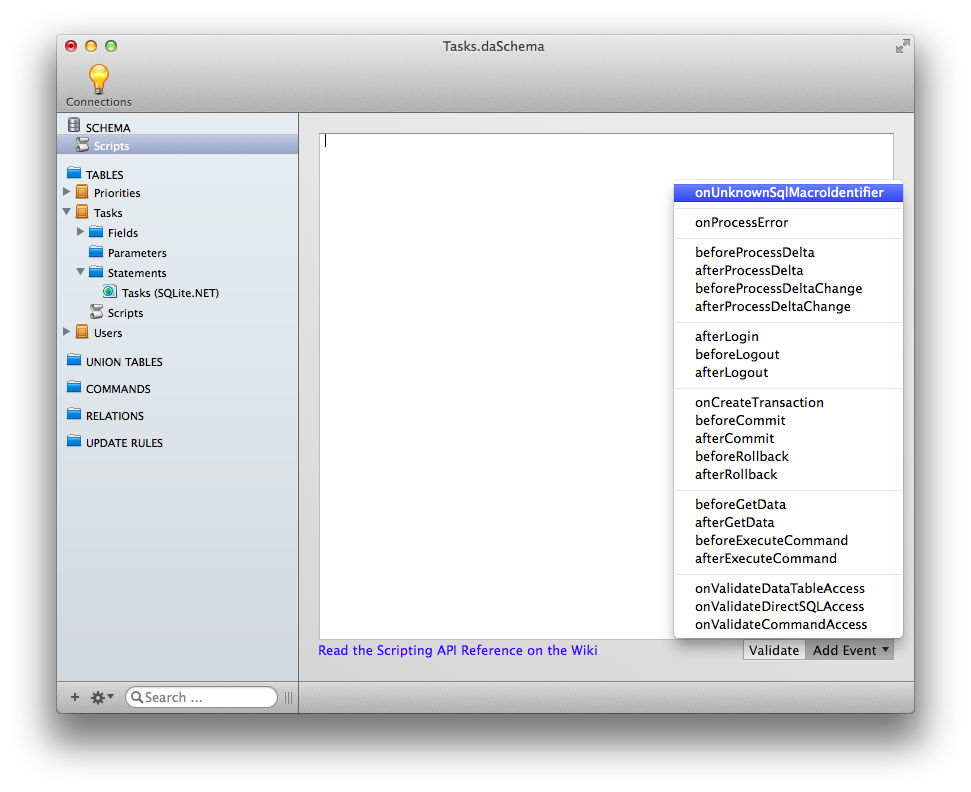
While obtaining data for a given table, Data Abstract will try to prepare a final DB-specific SQL statement. It will try to resolve all macros and right now will fail, as it will not recognize the {USER_ID} macro. This will cause it to trigger an onUnknownSqlMacroIdentifier event.
You are now going to hook into that event and give it an implementation for the {USER_ID}} macro, so that is no longer fails.
Implementing the Macro
Expand the SCHEMA tree node and select the Scripts entry. Using the Add Event button, add the onUnknownSqlMacroIdentifier script handler.
Implement the macro as follows:
// Called when an unknown macro is used from within an SQL statement.
function onUnknownSqlMacroIdentifier(name)
{
    if (name = 'USER_ID')
        return session['Login.Id'];
}
You can validate your script by using the Validate button.
You now need to save the changed schema and return to your running application. Click the reload button and the row belonging to Daniel will hopefully disappear. From now on a user should only see his own tasks.
What is going on?
So what happened here? If you cast your mind all the way back to the section of this tutorial on data access, you will hopefully remember that you configured the data login for your domain to use the User table as the LoginProvider.
After a user has successfully logged in, the session will get a bunch of properties with values from the Data table row for the current user.
So for example, if the table used in DbTableLoginProvider has the fields ID, Name, LoginName, GroupID and Active, the session will get the following entries after a successful login:
'Login.ID' = 2
'Login.Name' = 'Daniel Jackson'
'Login.LoginName' = 'Daniel'
'Login.GroupID' = '2'
'Login.Active' = '1'