Connections
Next you are going to need to set up a connection to your database for your domain. Relativity Server will use this connection when responding to requests and updates for your DATutorial domain. The connection is going to point Relativity Server to the SQLite database you downloaded or created earlier.
Creating a new connection
Select and expand the new DATutorial folder under the Domains folder in the source list and then select the Connections folder. In the display panel, click the Add New Connection button, which should show a connection sheet.
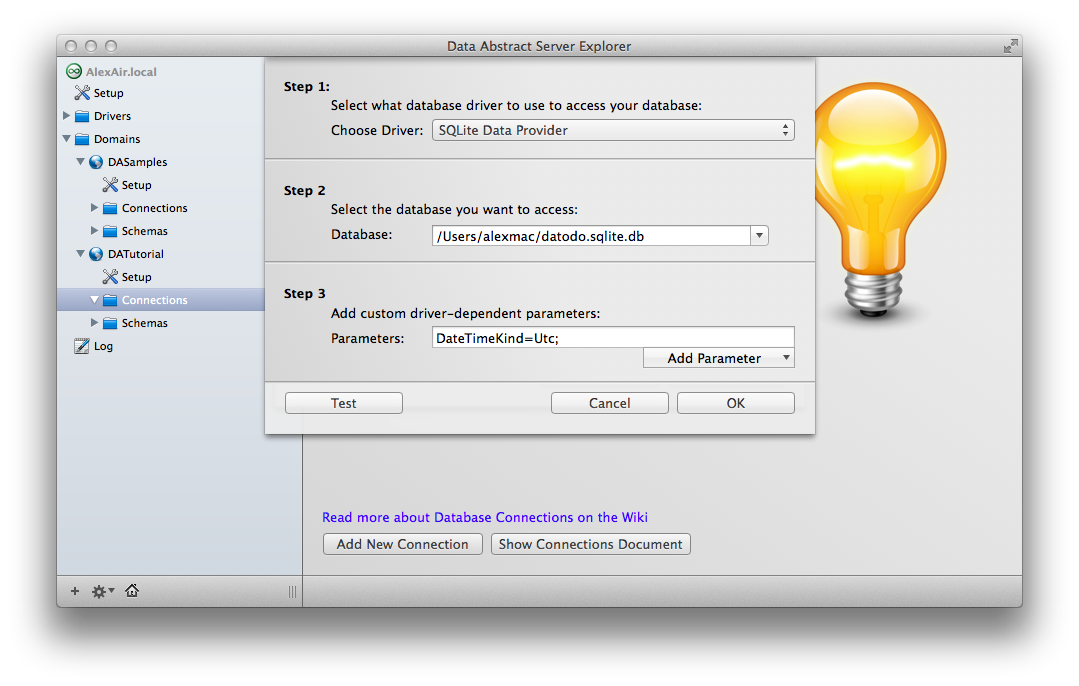
Choose the SQLite Data Provider as the driver and set the Database field to reference the database file you downloaded or created.
TIP: You can select the Database text field, then go to Finder, drag the database file from there and drop it into the Database text field.
Once set up, you can test the connection by using the Test button.
If everything tests out OK, click the OK button. The connection string wizard will be closed and you will see the Connection Editor sheet with an ADO.NET connection string inside. You can change any other connection properties here. In this case, you might like to change the connection name to Tasks (SQLite.NET).
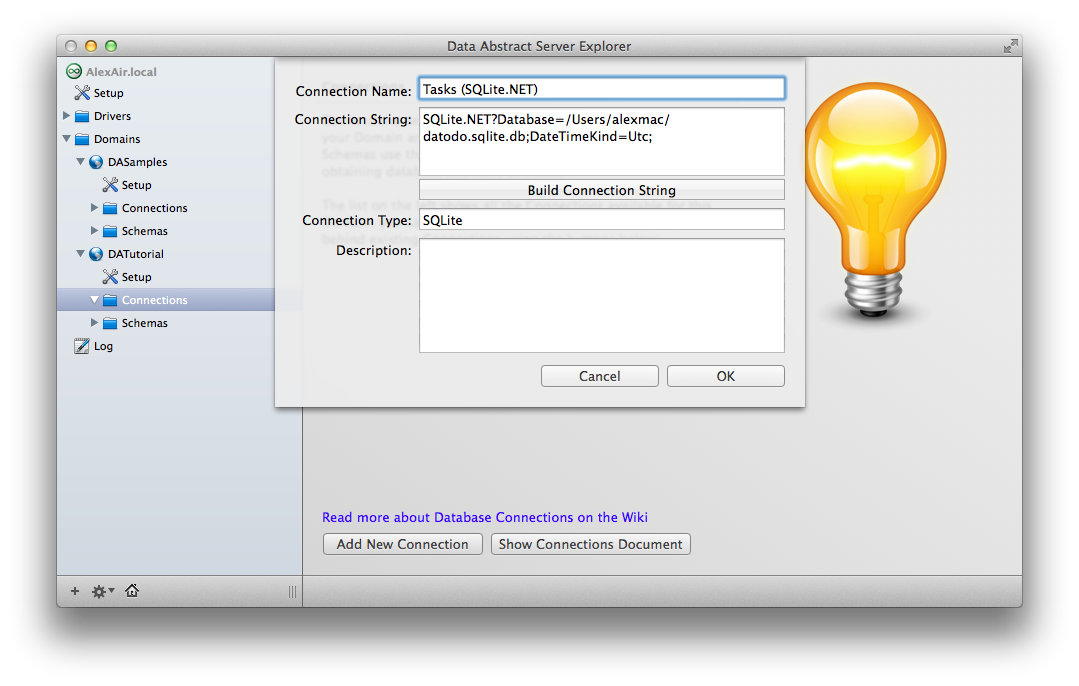
You may be wondering why you should use (SQLite.NET) in the connection name. Remember, Relativity Server uses ADO.NET drivers to access databases, so in this case, you are actually using the SQLite.NET driver.
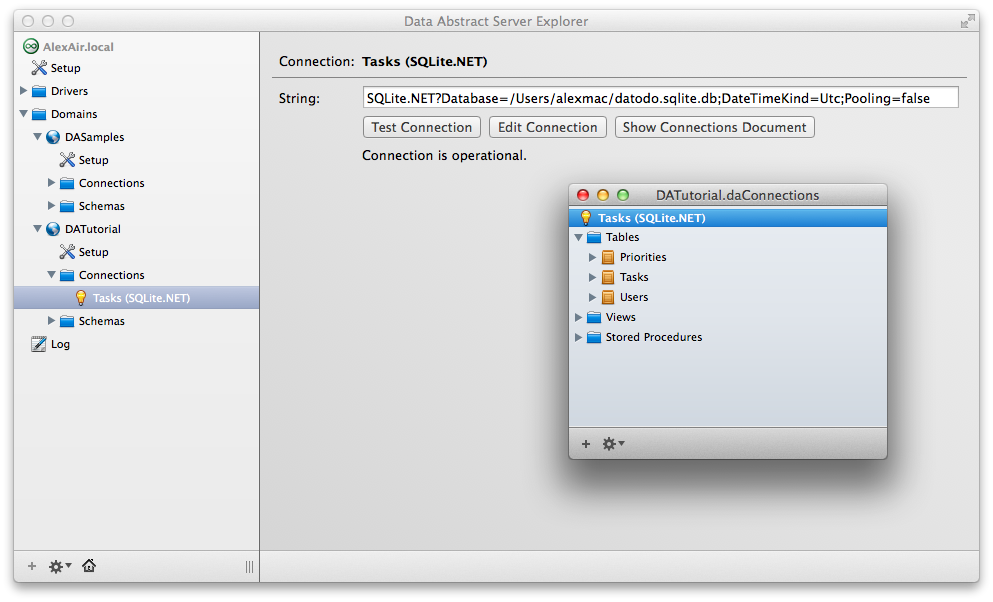
Testing the Connection
After applying the changes, you will see your new connection in the source list. You can test this connection or open its document and review the content of the connection simply by selecting it in the source list.