Authentication and Application Security (.NET)
This article describes how login and user authentication is handled in the Data Abstract .NET edition (DA for short). See article Authentication and application security (Delphi) for the Delphi edition.
When writing real life business applications with DA, one important concern is security. Chances are that your middle tier server is exposing sensitive data that you would not want any anonymous user on your local LAN (or worse, the entire Internet) to access or even modify. A login system is needed to ensure that only authorized users can get access to the data, and/or that these authorized users only get access to the subset of data they are allowed to access.
Data Abstract provides a default solution for this, which are supported on three levels:
- The session handling system provided by the underlying Remoting SDK.
- The
LoginServiceservice that Data Abstract defines, based on the BaseLoginService class. - Default code generated for you by the Login-enabled Data Abstract project templates.
Let's have a look how each of these levels work together to provide a sophisticated, flexible and yet easy-to-use authentication system for your multi-tier database applications.
Remoting SDK Session Handling
The Remoting SDK provides a flexible implementation for session management that is used as the foundation for the default authentication mechanism in Data Abstract.
By default, the instances of your data abstract service are created without reference to a specific client, and subsequent calls into your server might be served by different instances. You cannot assume that field values from a previous call are still accessible when the next call from a client comes in. This is what makes Remoting SDK servers stateless and forms the foundation of proper scalability.
Sessions provide a means of storing client-specific information in a separate storage that is independent of the actual service instances processing the request. There could be a different instance for each call, or they might even be running on different physical servers in a server farm, but data is persisted between calls.
For the authentication, a session is used to store the identity (and possibly details about the privileges) of the user when he logs in. This information is then available in subsequent data access calls. If no session or no valid login information is found in a data call (because the user did not authenticate correctly before), the request will be rejected immediately.
The RemObjects.SDK.Server.Service class, used as the base for all Data Abstract services, already contains the necessary code to handle sessions for you. In particular, the Session[] indexer property wraps all session accesses, allowing you to store custom named values in one call and retrieve them again in the next.
Also, the RequireSession property can be set to true to force all calls in a particular service to require an existing session - basically preventing any access to a particular service until a session has been established by talking to another service class (typically a specific Login service).
A Remoting SDK SessionManager component is used to handle the maintenance of the actual session data. This component also takes care of expiring sessions after a given time-out, making sure that sessions that are not properly closed from the client side will not continue living forever and that stale sessions do not become a resource drain.
Different SessionManager implementations are provided to meet different needs, from a light-weight MemorySessionManager that stores session data within memory for a single server application to the OlympiaServerSessionManager that stores session data for a server farm across the network.
The LoginService interfaces
A login service is a secondary service implemented in your Remoting SDK or Data Abstract server that is provided for the sole purpose of having clients log in (authenticate) and log out. Usually, this service will be implemented independently of the "real" services (which might be data services or services exposing custom methods).
A typical login service will expose two methods, Login and Logout; the Login method will verify the authentication info passed to it (commonly a user name and password), create a session and fill it with information about the user (which could include the User ID, a list of privileges specific to the user, or any other custom information). The Logout method will simply undo a previous login by destroying the session.
Data Abstract defines two standard service interfaces for exposing the login service to the client: ISimpleLoginService and IMultiDbLoginService. Both of these provide a login method that expects a user name and password; the latter also expects a database name or a connection name string, providing an easy way to have the client select a specific database (if such functionality is required).
These two interfaces are just provided for convenience and as a common standard though. You can easily define your own service interface to handle login, to pass different information, or to handle login via a shared key or a public/private key system.
The Login templates
Implementing the login service yourself is fairly straight forward, but Data Abstract comes with two templates (one for Simple and one for the MultiDb login) that provide the bulk of the necessary plumbing and infrastructure code for you. These templates are provided for all three supported languages: C#, Oxygene and Visual Basic.
On the server side, the templates already provide two services for you, named DataService and LoginService. DataService is a standard DA data service that will serve your data, just as in a plain DA application. LoginService provides a basic login service that already handles the login and logout processes - it only needs to be extended very minimally to enforce your application-specific login logic.
LoginService derives from the BaseLoginService class and overrides its LoginEx method. In particular, the default login code looks like this (for C#):
[ServiceMethod]
public override bool LoginEx(String loginString)
{
    // LoginEx infrastructure provides unified way to set additional login parameters
    // (like DomainName for Relativity)
    // Note how LoginEx string is parsed and actual login method is called
    var loginParameters = new LoginStringParser(loginString);

    var isLoginValid = loginParameters.Username == loginParameters.Password; // TODO Implement credentials check here

    if (!isLoginValid)
    {
        this.DestroySession();
        return false;
    }

    this.Session["Username"] = loginParameters.Username; // Create a session

    // TODO Store additional data in the session if needed

    return true;
}
As you can see, the login code first parses the login string (which carries the user name, the password and any additional parameters) and verifies the credentials - in the auto-generated code by simply comparing the user name and password for equality. On success it creates a new session by writing a value into Session["Username"] (the Remoting SDK for .NET creates a session for the current client automatically as soon as a value is written into it); on failure it calls DestroySession and returns false.
You can also store information about the user's permissions in the session (e.g. to later enable/disable certain features of the GUI) based on the user's rights.
Of course you should never rely on enforcing user rights by simply disabling GUI on the client. Since the client is (theoretically) out of your control, malicious users could use a tampered client application to circumvent your limitations. You should always enforce user restrictions on the server as well; e.g. if a certain user is not allowed to add new records, this should be enforced in the BusinessProcessor's events.
Disabling of features on the client should only act as a usability guide, for example so that your users don't see menu items not available to them or do not have to wait for a server round-trip to learn that a particular database action was not permitted.
The above user name and password validation code is only provided as a guide to getting started; for a real life application, you will want to change this logic to do a proper lookup of usernames and passwords from the database, check the username against a config file or do some other kind of validation to prevent unauthorized access. The Hint box below shows an example of how to use Data Abstract itself to check login information against a database.
Adding a database-based login to your LoginService is straightforward.
First, double-click the LoginService.daSchema file that's already in your project to launch Schema Modeler. Add a new Data Table and create a statement to verify your login. The exact SQL will depend on your database layout, but it will probably look something like this:
SELECT [UserID] FROM [Users]
  WHERE [Username] = :Username
    AND [Password] = :Password
Next, update the Field and Parameter lists for your table to match the code just written. Name the finished data table CheckLogin and close the Schema Modeler.
Back inside Visual Studio, open your LoginService and, inside the LoginEx override, replace the dummy name/password comparison with proper code to execute your data table:
IDataReader dr = Connection.NewDataReader("CheckLogin");
ea.LoginSuccessful = dr.NextResult();
if (ea.LoginSuccessful)
{
  ...
Inside the if block you can also access any fields returned from your CheckLogin data table, e.g. to persist privileges to the session, to store a User ID or to send back details to the client as part of the UserInfo.
If you're using the MultiDb template and want to use the selected database for login, you will also need to set the ConnectionName property to match the connection name passed before creating the data reader.
When the user validation fails, DestroySession is called, so that any session that might have been active before is removed and the user is logged off. Of course in the most common case - a user calling Login for the first time, with invalid credentials - this will be a no-op.
Similarly, the Logout method simply calls DestroySession:
[ServiceMethod]
public override void Logout()
{
    // Perform actions needed for user logout

    this.DestroySession();
}
Of course, you can add any custom code to this method if needed, e.g. to write the logout to a log file.
The DataService generated by the login templates is already marked with the [ServiceRequiresLogin] attribute (the code-first equivalent of setting RequireSession to true) by default, ensuring that it can only be accessed after a successful login has created a session.
The MultiDbLogin template
In general, the MultiDb template works similarly to the Simple login. As well as the User ID, it also stores the connection name passed in the session and provides a BeforeAcquireConnection event handler in the data service, which will read the connection name from the session before the connection is actually acquired.
Of course for a real business application, you might want to extend the LoginEx override to verify the connection name passed and possibly validate that the user is allowed to access that connection.
The Client Templates
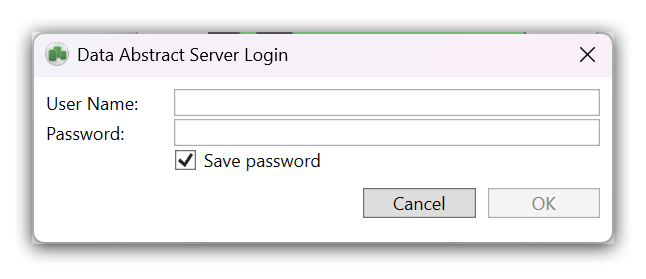
In addition to the code provided for the server, the matching client templates also provide code and infrastructure to support the login mechanism. For example, a standard LogOnForm that your application can use to prompt the user for name and password and a MultiDb version which also provides a connection name as part of your project.
Again, this form only serves as a starting point; you can enhance and customize it to meet your needs or to fit your application's custom UI.
The client application also provides LogOn and LogOff methods that contain code to show the login dialog and to perform the actual login and logout on the server by calling the login service's LoginEx and Logout methods. These methods are grouped in the LogOn/LogOff Handling code region.
Finally, event handlers are provided for the form's Load, FormClosing and LoginNeeded events and the clientChannel to perform the login and logout, when needed.
Design Time Login
Implementing your server to require login also affects the design time experience. For example, when you select Create DA LINQ Table Definition Classes from your remoteDataAdapter, the wizard lets you choose where to read the schema from. Selecting Connect to a Custom Data Abstract server makes the IDE contact the DataService on your running server to obtain the schema information.
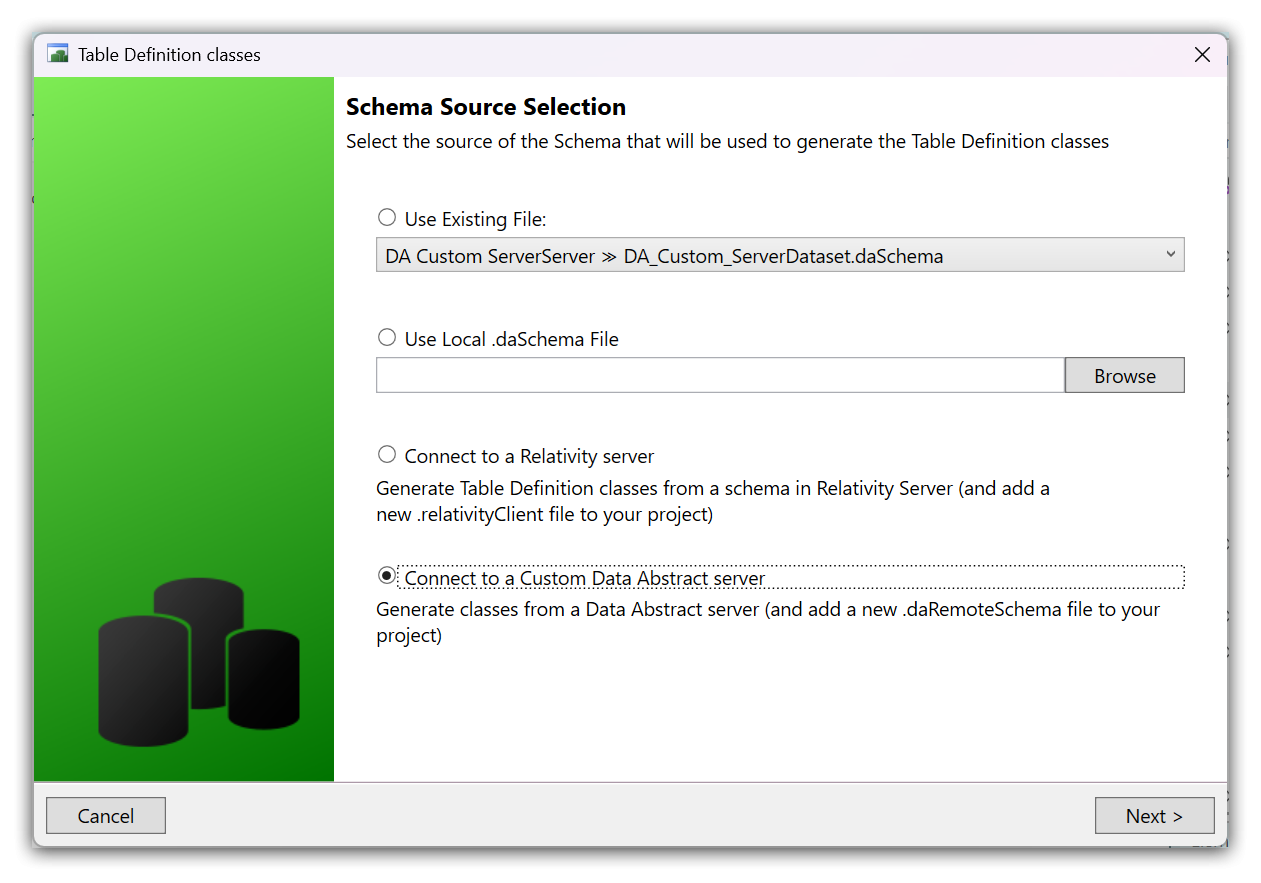
If your DataService is set up to require a session, this call cannot succeed until you have logged in. Fortunately, the Visual Studio IDE integration for Data Abstract is aware of the login mechanism and lets you provide your login information right on the connection page of the wizard, as shown below.
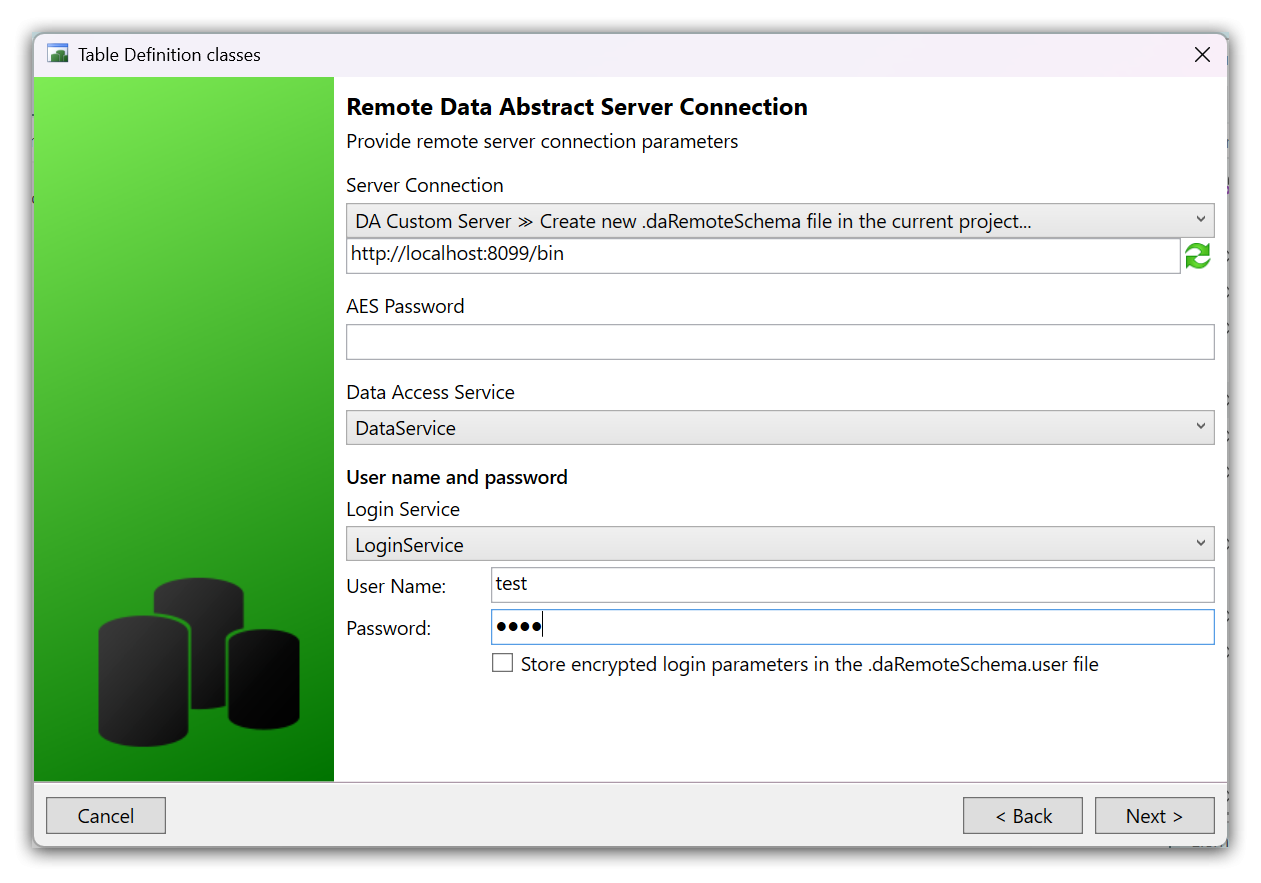
Here you can pick the Data Access Service and the Login Service (if you're using the default names provided by the template, the right items will be pre-selected for you) and enter your user name and password. The IDE then performs the login call to the server before retrieving the schema.
Once this is done, the IDE will proceed and, if your login was successful, retrieve the schema and let you generate the classes.
As at runtime, your session will be maintained during design time, so for subsequent requests the login dialog will not reappear until your session has expired on the server.