Mac OS X version
To open SQL Browser on the Mac, you need to be first using Server Explorer and then navigate to the Schema you are interested in if it is an instance of Relativity Server, or if its a custom Data Abstract server navigate to the service you are interested in. You then need to press the "Explore Data" button which will then open the SQL Browser window.
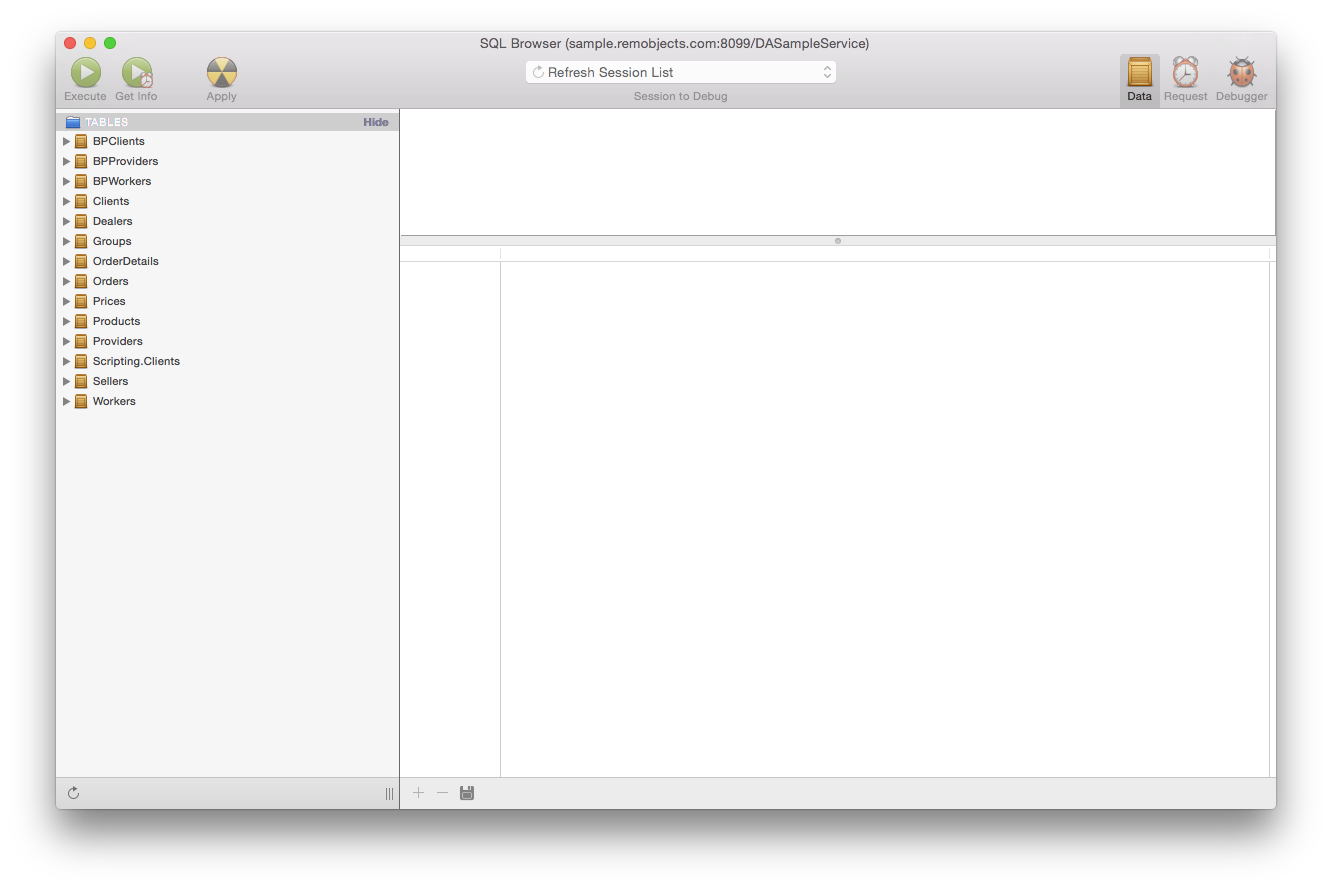
The SQL Browser window is broken up into 4 areas.
- Left Side - This is the Source List which displays all the tables in the Schema/Data Service. If you expand a Table (click the >) it shows the field names which have icon overlays.
- The top right - Is a SQL Editor for entering SQL queries. It is automatically populated with an SQL query string when you double click on a table name.
-
The bottom right - Is a Results View, which displays the results of the executed SQL query. At the very button there are three icons
- + - when pressed will add a row to the currently selected table
- - - when pressed will delete the currently selected row
- Floppy disc icon - when pressed this will commit the local changes to the server.
-
Toolbar - SQL Browser has a toolbar which buttons for the more common tasks:
- Execute - Execute the SQL statement currently in the SQL Editor view. This button is only active when there is something in the editor.
- Get Info
- Apply - Commits an local changes to the tables to the server. This icon is disabled unless there is a change.
- Data - Shows the data view used to explore the content in the Schema
- Request
- Debugger - Switches the Results View to a script debugger view. Note that you can only use this view if you have checked "Enable Script Debugging" in the Schema Setup page.
Note that the Toolbar can be modified as you need by selecting View->Customize Toolbar or right clicking on the toolbar and selecting Customize Toolbar. There you can add fields for server address, choosing the schema or domain.
To execute the SQL query, click on the green "Execute" button on the Toolbar. If the SQL is correct the Results View will display the results. If there is a problem, like for instance the SQL is malformed, then you will get a "Request failed" error dialog.
After the results of the query are displayed in the Results View it is possible for you to make changes to the data. Typically you can add & delete rows to the table. As noted earlier press the + icon to add a new row, and press the - icon to delete the highlighted row. You can also edit individual fields by first clicking on the row you are interested in, and then clicking on the field you want to change.
To save the changes to the server then you either need to press the Apply toolbar button, or the floppy disc icon at the bottom of the results view.