Desktop
The SimpleDataOperations desktop sample is available in all 4 languages that Data Abstract for .NET supports. It is a basic desktop program that demonstrates the most common interactions you will make to an instance of Relativity Server. Namely it shows how to:
- how to handle logging the user in
- retrieve a table from the server
- add a row to the retrieved table
- apply the changes back to the server
- delete a row from the table
Getting Started
The sample is typically located in C:\Users\Public\Documents\RemObjects Samples\Data Abstract for .NET\C#\SimpleDataOperations, though you may have installed the Data Abstract for .NET SDK and it's samples in another location. Obviously substitute C# with the language you are interested in; for instance Oxygene, Silver/Swift or Visual Basic.
To build it, you will of course need Visual Studio, and like all the samples provided with Data Abstract for .NET you will need to be running Relativity Server with the DASamples Domain and the Simple Schema available.
Running the Sample
When run the sample presents the user interface and sets up the connection to an instance of Relativity Server. No data is retrieved until the "Load" button is pressed.
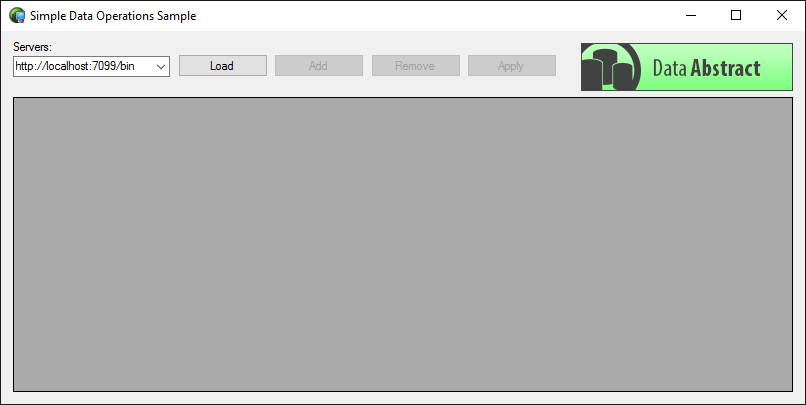
The UI is comprised of two sections, the first is a toolbar that contains a combo box that has the address of the server to connect to, which by default is an instance of Relativity Server running on the local machine however it can be changed as needed. Then there are 4 buttons; the "Load" button retrieves a set of data from the "Deps" table in the "Simple" schema, the "Add" button adds a new row to the local table, the "Remove" button will delete the selected row from the table and finally the "Apply" button will send all local changes to the server to be applied to the data there. The other part of the UI is the large area below which will contain the table data after it has been loaded from the server.
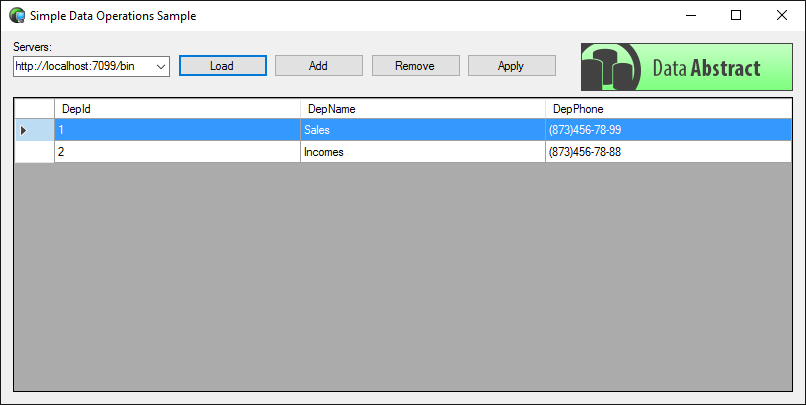
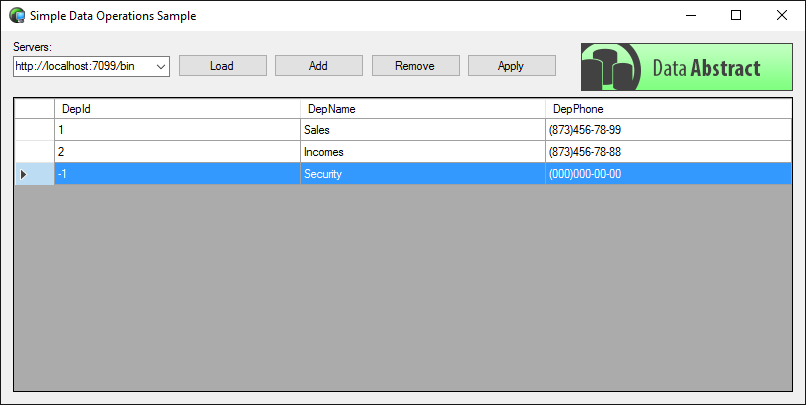
After the data has been loaded you can double click on any field to change its content. Note that when you add a new row that its "DepId" is initially a negative number (-1, -2 and so on) until the changes have been applied to the server, at which point the rows will be assigned proper "Id" values and then those values will be returned and the local data updated to reflect those changes.
It should be noted that if you quit the program without applying the local changes to the server then they will be lost.
Examining the Code
This sample is comprised of two classes; DataModule which handles the interaction with Relativity Server and MainForm which handles the user interface interactions.
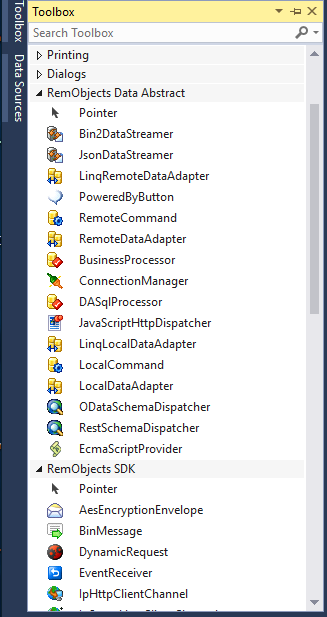
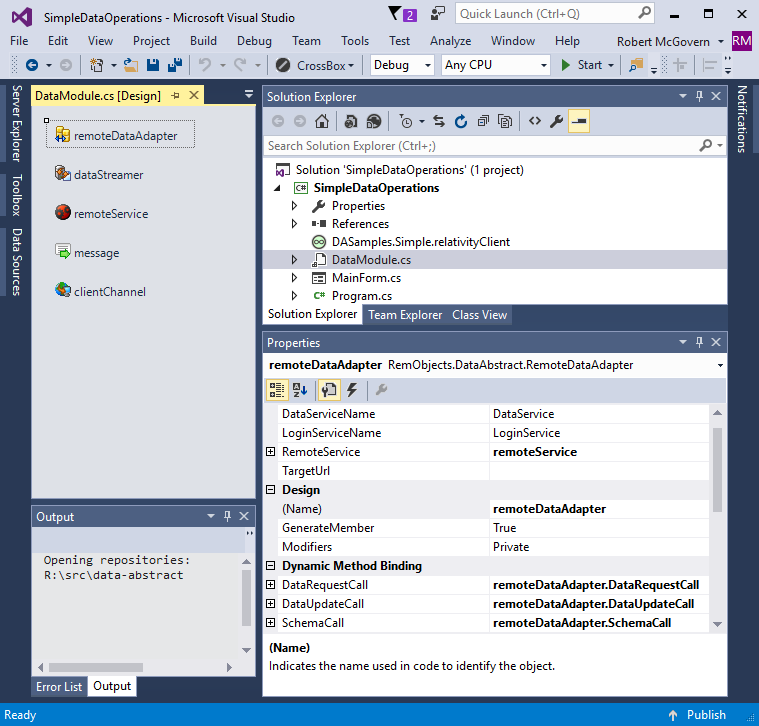
The user interface for MainForm is built using the Visual Studio "Design" view. Likewise a number of the objects that are used to build the connection to the server are built in the "Design" view of DataModule from components in the "Toolbox". Typically these are added and configured for you when building a program using one of the provided Visual Studio Template Wizards.
The Deps schema table used in this sample has three fields:
- DepId is the primary key and use an AutoInc data type.
- DepName is a string of up to 50 characters and is required for each new row
- DepPhone is also a string of up to 50 characters, the field is optional.
Setting up a connection
Creating the connection through which all communication with the server will typically be created for you by the Data Abstract Visual Studio Template Wizards. This will generate a DataModule object for you with the RemoteDataAdapter properly configured.
You can manually configure the connection either in code (see the SimpleDataOperations Console for an example of this), or by using the design view of a class and adding components from the "RemObjects Data Abstract" and "RemObjects SDK" sections of the aforementioned "Toolbox".
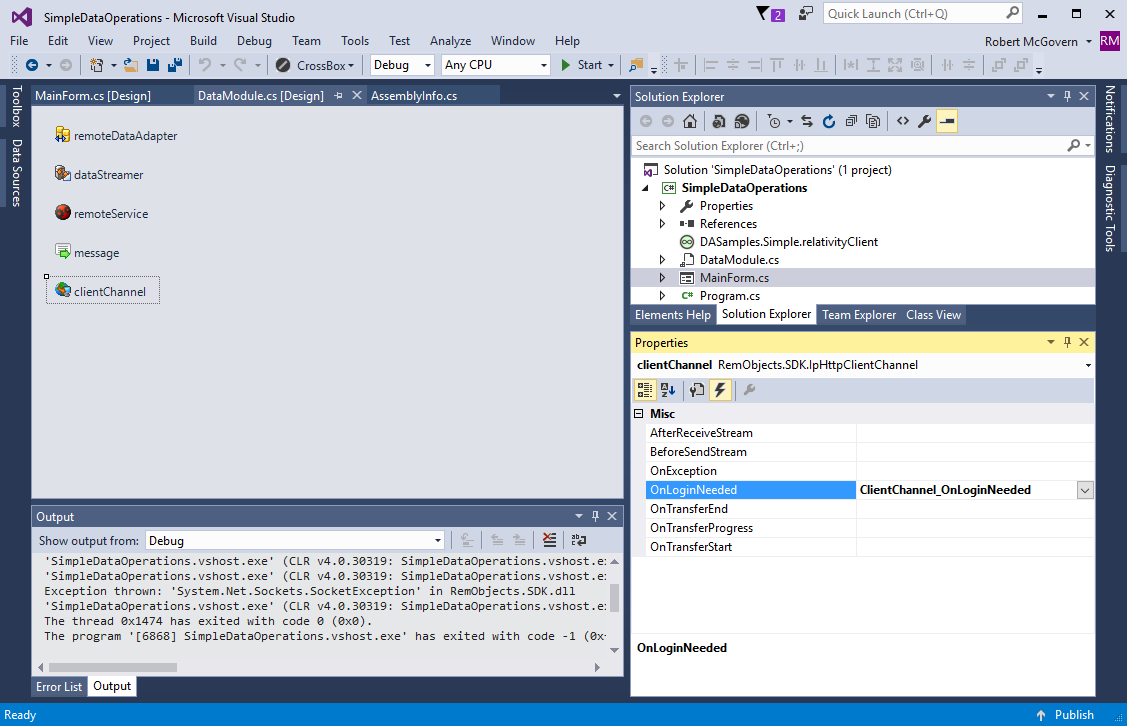
Logging In
When connecting to the server, normally those actions require an authenticated connection before allowing any changes to the data. Typically when authentication is required, the ClientChannel will call the method that was assigned to the "OnLoginNeeded" property in the design view. Here that is the ClientChannel_OnLoginNeeded method of DataModule.
The implementation of ClientChannel_OnLoginNeeded below calls the LogOn method to handle the actual log on attempt. To login a special login string (lLoginString) needs to be passed to the LoginEx method of BaseLoginService.
The LoginEx method returns a boolean which will be true if the login attempt was successful or false if it failed. To create an instance of BaseLoginService you can use the factory constructor RemObjects.DataAbstract.Server.BaseLoginService_Proxy to which we pass the previously created message type and channel type objects, and the name of the login service to connect to (typically "loginService").
The login string is comprised of 4 parts:
- User Id the username to attempt to login with
- Password the password to use
- Domain the name of the domain that the schema is located in
- Schema the name of the schema we wish to use
For example, the login string from this sample is "User Id=simple;Password=simple;Domain=DASamples;Schema=Simple"
private void ClientChannel_OnLoginNeeded(object sender, LoginNeededEventArgs e)
{
    // Performing login
    Boolean lLogged = this.LogOn();
    if (lLogged)
    {
        e.Retry = true;
        e.LoginSuccessful = true;
        return;
    }
    else
        MessageBox.Show("Login failed");
}

public Boolean LogOn()
{
    RemObjects.DataAbstract.Server.IBaseLoginService lLoginProxy =
        new RemObjects.DataAbstract.Server.BaseLoginService_Proxy(this.message, this.clientChannel, "LoginService");
    String lLoginString = @"User Id=""simple"";Password=""simple"";Domain=""DASamples"";Schema=""Simple""";
    this.IsLoggedOn = lLoginProxy.LoginEx(lLoginString);
    return this.IsLoggedOn;
}
method DataModule.ClientChannel_OnLoginNeeded(sender: System.Object; e: LoginNeededEventArgs);
begin
  // Performing login
  var lLogged: Boolean := self.LogOn();
  if lLogged then
begin
    e.Retry := true;
    e.LoginSuccessful := true;
    exit
  end
  else
    MessageBox.Show('Login failed')
end;

method DataModule.LogOn: Boolean;
begin
  var lLoginProxy: RemObjects.DataAbstract.Server.IBaseLoginService := new RemObjects.DataAbstract.Server.BaseLoginService_Proxy(self.message, self.clientChannel, 'LoginService');
  var lLoginString: String := 'User Id="simple";Password="simple";Domain="DASamples";Schema="Simple"';
  self.IsLoggedOn := lLoginProxy.LoginEx(lLoginString);
  exit self.IsLoggedOn
end;
func ClientChannel_OnLoginNeeded(sender: Object!, _ e: LoginNeededEventArgs!) -> ()! {

  //  Performing login
  var lLogged: Boolean! = self.LogOn()
  if lLogged {

    e.Retry = true
    e.LoginSuccessful = true
    return
  } else {

    MessageBox.Show("Login failed")
  }
}

public func LogOn() -> Boolean! {

  var lLoginProxy: RemObjects.DataAbstract.Server.IBaseLoginService! = RemObjects.DataAbstract.Server.BaseLoginService_Proxy(self.message, self.clientChannel, "LoginService")
  var lLoginString: String! = "User Id=\"simple\";Password=\"simple\";Domain=\"DASamples\";Schema=\"Simple\""
  self.IsLoggedOn = lLoginProxy.LoginEx(lLoginString)
  return self.IsLoggedOn
}
Private Sub ClientChannel_OnLoginNeeded(sender As Object, e As LoginNeededEventArgs) Handles clientChannel.OnLoginNeeded
    ' Performing login
    Dim lLogged As Boolean = Me.LogOn()
    If lLogged Then
        e.Retry = True
        e.LoginSuccessful = True
        Return
    Else
        MessageBox.Show("Login failed")
    End If
End Sub

Public Function LogOn() As Boolean
    Dim lLoginProxy As RemObjects.DataAbstract.Server.IBaseLoginService = New RemObjects.DataAbstract.Server.BaseLoginService_Proxy(Me.message, Me.clientChannel, "LoginService")
    Dim lLoginString As String = "User Id=""simple"";Password=""simple"";Domain=""DASamples"";Schema=""Simple"""
    Me.IsLoggedOn = lLoginProxy.LoginEx(lLoginString)
    Return Me.IsLoggedOn
End Function
Retrieving a Table
To retrieve a copy of a table from the schema we need to use the Fill method of the RemoteDataAdapter. The version uses here takes a single argument which is the DataSet to fill with data. As the DataSet contains a DataTable with the name of a table that exists in the schema, the server will return a copy of that table's data and it will be stored in the DataTable in the DataSet.
The Clear method of DataTable removes all existing data from the table.
NOTE Passing an invalid table name to the Fill method will result in an ROException being thrown which should be handled accordingly.
//DataModule.cs
public void GetData()
{
    this.dataTable.Clear();
    this.DataAdapter.Fill(_dataSet);
}
//DataModule.pas
method DataModule.GetData;
begin
  self.dataTable.Clear();
  self.DataAdapter.Fill(_dataSet)
end;
//DataModule.swift
public func GetData() -> ()! {
    self.dataTable.Clear()
    self.DataAdapter.Fill(_dataSet)
}
'DataModule.vb
Public Sub GetData()
    Me.dataTable.Clear()
    Me.DataAdapter.Fill(_dataSet)
End Sub
Inserting a Row
To create a new table row use the NewRow method of DataTable which will return an empty DataRow configured for the table. Then use the item properties to pass the values required for each column to the DataRow. The last step is to add the new row to the table which is done by using the Add method of the Rows DataRowCollection.
At this point the changes to the row are only in the local data. This is why the "DepId" of the new row is assigned a negative number so as not to clash with the server. When you apply the changes to the server a proper value will be assigned to the ID and the updated value returned to the client program.
This is particularly observable in this sample when you add a new row has a DepId of "-1", once the changes have be applied to the server that DepId is updated to reflect what the actual id is on the server.
//DataModule.cs
public void InsertDepartment()
{
    DataRow dr = this.dataTable.NewRow();
    dr["DepName"] = "[New Department]";
    dr["DepPhone"] = "(000)000-00-00";

    this.dataTable.Rows.Add(dr);
}
//DataModule.pas
method DataModule.InsertDepartment;
begin
  var dr: DataRow := self.dataTable.NewRow();
  dr['DepName'] := '[New Department]';
  dr['DepPhone'] := '(000)000-00-00';

  self.dataTable.Rows.Add(dr)
end;
//DataModule.swift
public func InsertDepartment() -> ()! {

    var dr: DataRow! = self.dataTable.NewRow()
    dr["DepName"] = "[New Department]"
    dr["DepPhone"] = "(000)000-00-00"
    self.dataTable.Rows.Add(dr)
}
'DataModule.vb
Public Sub InsertDepartment()
    Dim dr As DataRow = Me.dataTable.NewRow()
    dr("DepName") = "[New Department]"
    dr("DepPhone") = "(000)000-00-00"

    Me.dataTable.Rows.Add(dr)
End Sub
Applying Changes back to the server
To apply the changes made to a DataTable and its DataRows back to the server you need to use the Update method of RemoteDataAdapter. Typically you would pass the DataSet object containing the DataTables to the Update method so that all local changes are applied to the server. However there are alternative versions of the Update method that allow you to better control what changes are sent.
Any additional changes or new data that are on the server will be sent back to the client program and the local DataSet will be updated to reflect the current state of the server data.
//DataModule.cs
public void UpdateData()
{
    this.DataAdapter.Update(_dataSet);
}
//DataModule.pas
method DataModule.UpdateData;
begin
  self.DataAdapter.Update(_dataSet)
end;
//DataModule.swift
public func UpdateData() -> ()! {

    self.DataAdapter.Update(_dataSet)
}
'DataModule.vb
Public Sub UpdateData()
    Me.DataAdapter.Update(_dataSet)
End Sub
Deleting a Row
Removing or deleting a row from a DataTable is as simple as using the Delete method of a particular DataRow. If you don't have a reference to the particular row you can instead pass the row index to the RemoveAt method of DataRowCollection for example: lDataSet.Tables["Deps"].Rows.RemoveAt(4);.
//DataModule.cs
public void DeleteDepartment(DataRow aDataRow)
{
    if (aDataRow == null)
        return;
    aDataRow.Delete();
}
//DataModule.pas
method DataModule.DeleteDepartment(aDataRow: DataRow);
begin
  if aDataRow = nil then
    exit;
  aDataRow.Delete()
end;
//DataModule.swift
public func DeleteDepartment(aDataRow: DataRow!) -> ()! {

  if aDataRow == nil {

    return
  }
  aDataRow.Delete()
}
'DataModule.vb
Public Sub DeleteDepartment(aDataRow As DataRow)
    If aDataRow Is Nothing Then
        Return
    End If
    aDataRow.Delete()
End Sub