Loading Data
We are going to begin by retrieving the tasks from the Tasks table. To achieve that we need to have a way for the user to provide their login details. For this we will create a simple login dialog asking the user for a username and password.
Login Dialog
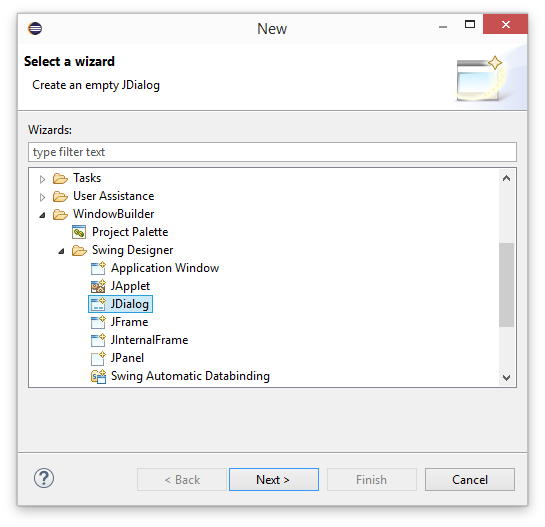
To handle login we will need to create a dialog to ask the user for a username and password. We can use WindowBuilder to create a new JDialog.
Add a new dialog to the project (File->New->Other->WindowBuilder->Swing Designer->JDialog).
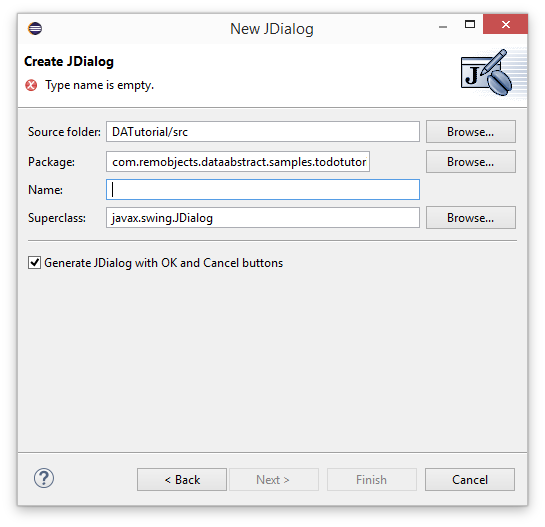
Press Next and set the name to LoginDialog.
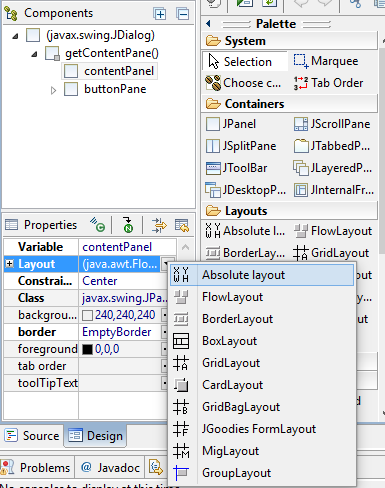
A JDialog is created with an OK and CANCEL button already added. To the content pane above those we want to add the following controls:
- A JTextField named textFieldUsername;
- A JPasswordField named passwordFieldPassword;
- Two JLabels the first "Username:" and the second "Password:"
Align them as you wish, for ease we have set the Layout property of the contentPanel to absolute.
Switch to the source view and add a variable which we will check to see if the user dismissed the dialog with the OK or Cancel buttons
private boolean loginCancelled = true;
Next add a helper method to return the value of loginCancelled
public boolean getLoginCancelled() {
    return this.loginCancelled;
}
In the class constructor we need to add ActionEventListeners to the OK and Cancel buttons so we can detect when the button has been selected.
For the OK button we dispose of the dialog and set loginCancelled to false.
okButton.addActionListener(actionEvent -> {
    this.dispose();
    loginCancelled = false;
});
Should the user press the Cancel button, we simply dispose of the dialog.
cancelButton.addActionListener(actionEvent -> {
    this.dispose();
});
Last but not least set the LoginDialog to be modal. Either use WindowBuilders property editor, or add a call to setModal at the end of the LoginDialog constructor.
setModal(true);
Logging In
Now that we have a login dialog we will call it when the user presses the Load Data button.
First add a new private variable that we'll use to keep track of whether the user is logged in or not. We'll only display the login dialog when the user isn't logged in.
private boolean isLoggedIn;
Create a method called initListeners that we will call at the end of the TodoApp() constructor. Over the following pages we will add the required ActionEventListeners for each of the UI buttons.
private void initListeners() {
}
The first ActionEventListener we are adding is to the Load Data button. We are using the Lambda shortcut to remove some of the code boiler plate, however you can see the new lambda version just below it.
this.btnLoadData.addActionListener(actionEvent ->
{
});
We add a test to see if the user is logged in, using the isLoggedIn boolean. If they are not logged in then we instantiate the LoginDialog class and set it visible.
this.btnLoadData.addActionListener(actionEvent ->
{
    if (!this.isLoggedIn) {
        LoginDialog loginDialog = new LoginDialog(this);
        loginDialog.setVisible(true);
    }
});
As we made the LoginDialog a modal dialog we test if the login was canceled. If it wasn't then we call the DataModules login method passing the username & password from the dialog as arguments.
If the attempt to login returns true, we set the isLoggedIn boolean to true and then call the DataModules loadData method to attempt loading the data from the Relativity Server.
If the attempt to login returns false, we simply show a message dialog informing the user that the login attempt failed and return from the method.
this.btnLoadData.addActionListener(actionEvent ->
{
    if (!this.isLoggedIn) {
        LoginDialog loginDialog = new LoginDialog(this);
        loginDialog.setVisible(true);

        if (!loginDialog.getLoginCancelled()) {
            if (this.dataModule.login(loginDialog.getUsername(), loginDialog.getPassword())) {
                this.isLoggedIn = true;
            } else {
                JOptionPane.showMessageDialog(this, "Error Logging in, please try again");
                return;
            }
        } else {
            // Login Canceled
            return;
        }
    }

    this.dataModule.loadData();
});
The last change for TodoApp.java add the method call to the end of the TodoApp constructor.
public TodoApp() {
    // snipped code

    this.initListeners();
}
Swap to DateModule.java and create the login method used above. It takes two String arguments which are uses to create a new String that is passed to the RemoteDataAdapter.
The loginString is comprised of:
- the username of the user attempting to log in
- the password of the user attempting to log in
- the name of the data
Domainwe are interested in; hereDATutorial - the name of the schema we are interested in; here
Tasks
The RemoteDataAdapter login method returns a boolean to indicate if the attempt was successful or not, here we simply pass that back from our login method.
public boolean login(String username, String password) {
    String loginString = String.format("User=%s;Password=%s;Domain=%s;Schema=%s",
            username, password, "DATutorial", "Tasks");

    return this.dataAdapter.login(loginString);
}
If you run the app at this point and press the Load Data button, the user would log in, but no data would be returned from the server. Now we add support for retrieving the data.
Getting the Data
Create another a method in DataModule.java called loadData which we call at the end of the Load Data listener in TodoApp.java.
The first step is to create an array of the tables we wish to retrieve from the server. Here we want both the Tasks table data to have the actual users tasks, and the Priorities table for use as a lookup table a little later on.
We then clear the data that was previously in the tasks table, this is needed to remove any calculated fields or lookup fields that we've added. If we didn't do that then duplicates of those columns would appear.
To actually retrieve the data from the server we call the fill method of the DataAdapter, passing in the table(s) we are interested in. There are multiple variants of the fill method, see the API documentation for more information.
public void loadData() {
    DataTable[] tables = {this.tasksTable, this.prioritiesTable};

    this.tasksTable.clear();
    this.tasksTable.getColumns().clear();

    this.dataAdapter.fill(tables);
}
Also rather than using fill we could instead use fillAsync, which retrieves the data in an asynchronous manner. You call fillAsync in the same manner as fill, passing in the tables we are interested in, however we can also supply a callback. (If you don't want to provide a callback you can pass in null)
This is an example using an anonymous callback class. The FillRequestTask object passed to completed by DA provides methods which we can use to check the fill request's status or to determine why the fill failed.
this.dataAdapter.fillAsync(tables,requestInfo, new FillRequestTask.Callback() {
    @Override
    public void completed(FillRequestTask aTask, Object aState) {
        if (aTask.isCancelled() || aTask.isFailed()) {
            System.out.printf("An error occured: %s\n", aTask.getFailureCause().getMessage());
        } else {
            System.out.println("success");
        }
    }
}).execute();
The final step is to connect the tasksTableModel of DataModule.java to the tasks JTable in TodoApp.java so that table shows the data we have retrieved from the server.
Swap to TodoApp.java and add a new private variable to store a reference to the DataModule class.
private DataModule dataModule;
Add a new method initComponents which will handle creation of the DataModule class and attach our DataTableModel for the tasks table to our JTable.
private void initComponents() {
    this.dataModule = new DataModule();
    this.table.setModel(this.dataModule.getTasksDataTableModel());
}
Finally call the initComponents method at the end of the TodoApp constructor.
public TodoApp() {
    // snipped code

    this.initComponents();
    this.initListeners();

    // snipped code
}
First Run
Now run the app, when the UI appears press the Load Data button and when the login dialog appears enter Alex for the username and 111 for the password and then press OK.
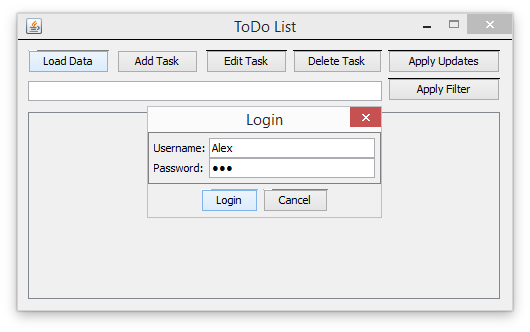
If Relativity Server is running you'll be greeted by the data from the database.
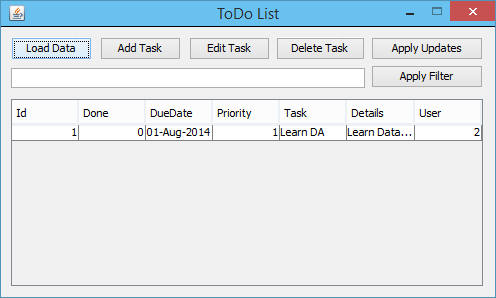
The DataAbstract components have handled all the complexity behind retrieving the remote data and left you the simple task of opening the table, just as if it were connected to a local database.
In the next page we will improve the UI to hide columns that shouldn't be visible to the user like User and Id.