Editing Tasks
Its all well and good to be able to see the status of the tasks, but it's time to start adding features to the application that allow the user to add, edit or delete a task. The first step is to add the ability to edit tasks.
Building the visual side of the Edit Tasks Dialog
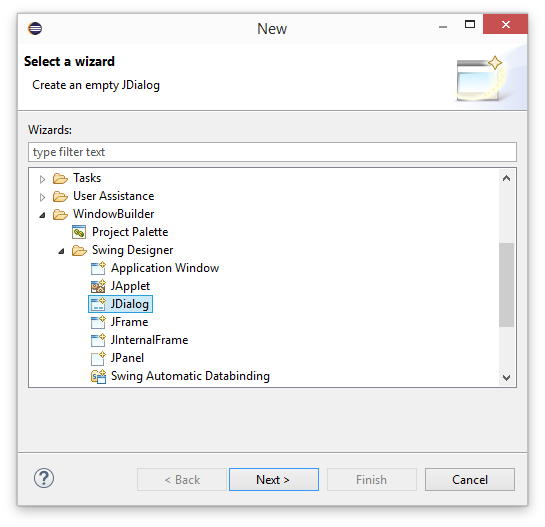
Add a new dialog to the project (File->New->Other->WindowBuilder->Swing Designer->JDialog).
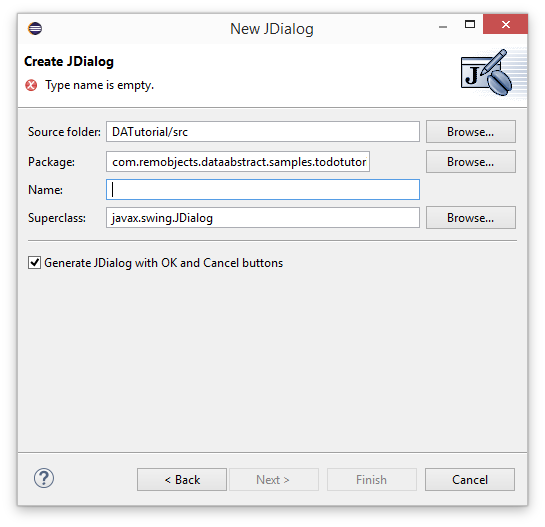
Press Next and set the name to EditTaskDialog, note we will later re-use this dialog when we add new tasks.
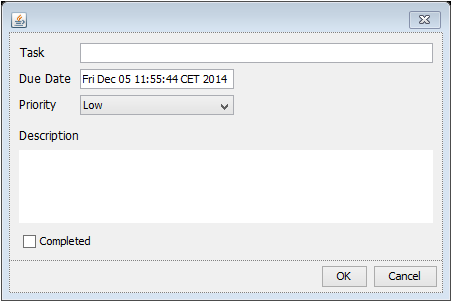
A JDialog is created with an OK and CANCEL button already added. To that we want to add the following specific controls:
- A JTextField named textFieldTask
- A JTextField named textFieldDueDate
- A JComboBox named comboBoxPriority
- A JTextArea named textAreaDescription
- A JCheckBox named chckbxCompleted
Note: Java does not provide a Date Picker in the Swing libraries, though it does now have one in the JavaFX libraries. Here we simply present the due date as a String, but you could use a 3rd Party date picker here instead.
Place the controls as shown in this screenshot, as well as the associated labels:
Next we need to wire up the UI elements.
The code side of EditTaskDialog.java
Switch to the source editor of EditTaskDialog.java and add two private variables:
  private DataRow selectedRowData;
  private boolean wasEditCancelled = true;
selectedRowDatawill hold a reference to theDataRowwe are currently working with.wasEditCancelledis a boolean we will test to see if the user pressed the OK or CANCEL buttons.
In the constructor EditTaskDialog() find the section that creates the okButton which should look something like this
{
  JButton okButton = new JButton("OK");
  okButton.setActionCommand("OK");
  buttonPane.add(okButton);
  getRootPane().setDefaultButton(okButton);
}
Add an ActionEventListener to the button to detect a click / key press. Here we dispose of the dialog and set the boolean to false.
okButton.addActionListener(actionEvent -> {
  this.dispose();
  wasEditCancelled = false;
});
A similar thing needs to be added to the cancel button, find the code block similar to the following
{
  JButton cancelButton = new JButton("Cancel");
  cancelButton.setActionCommand("Cancel");
  buttonPane.add(cancelButton);
}
and add an another ActionEventListener, this time we simply want to dispose of the dialog when the user clicks Cancel
cancelButton.addActionListener(actionEvent -> {
  this.dispose();
});
The last addition to the constructor is to set that the EditTaskDialog should be modal
this.setModal(true);
Add a helper method, wasDialogCancelled to return the value of the variable wasEditCancelled.
public boolean wasDialogCancelled() {
  return wasEditCancelled;
}
There are two more methods to add. The first is setData which takes a DataRow as an argument. The method extracts the data from the DataRow and uses it to fill the UI elements.
The only things to really note are that for the JComboBox we need to reduce the priorityLevel by 1 because it uses a 0 index. The second thing we do is create a simple date formatter which will convert the date into just day, month and year for us. For the purposes of this example we are not interested in exact time or timezone. The last thing is we convert the value of the Done field from a Long to a boolean.
Note: If we didn't use the date formatter the date would appear something like "Fri Aug 01 02:00:00 CEST 2014" in the Due Date textfield.
public void setData(DataRow selectedRow) {
  selectedRowData = selectedRow;

  String taskName = (String) selectedRowData.getField("Task");
  String taskDescription = (String) selectedRowData.getField("Details");
  Date dueDate = (Date) selectedRowData.getField("DueDate");
  Long priorityLevel = (Long) selectedRowData.getField("Priority");
  long doneStatusAsLong = (Long) selectedRowData.getField("Done");

  textFieldTask.setText(taskName);
  textAreaDescription.setText(taskDescription);
  SimpleDateFormat simpleDateFormatter = new SimpleDateFormat("yyyy-MM-dd");
  textFieldDueDate.setText(simpleDateFormatter.format(dueDate));
  comboBoxPriority.setSelectedIndex((int) (priorityLevel-1));

  boolean doneStatusAsBoolean = doneStatusAsLong == 0? false: true;
  chckbxCompleted.setSelected(doneStatusAsBoolean);
}
The last method to add to EditTaskDialog.java is getData which returns the DataRow object originally passed in, populated with the data from the UI fields. Note we could add code to compare the old value with the new value, but the DataRow object can do that for us.
The main thing of note here is that we initalise dueDate to the original date in case there is a problem parsing the new date provided by the user. Otherwise we reverse what we did in the setData method, where we increase the JComboBox index returned by getSelectedIndex to reflect how we model the priorities in the Priorities table, and we convert the boolean returned from isSelected into a 1 or 0.
public DataRow getData() {
  String taskName = textFieldTask.getText();
  String taskDescription = textAreaDescription.getText();
  java.util.Date dueDate = (Date) selectedRowData.getField("DueDate");

  try {
    dueDate = new SimpleDateFormat("yyyy-MM-dd").parse(textFieldDueDate.getText());
  } catch (ParseException e) {
    e.printStackTrace();
  }

  Long priorityLevel = (long) (comboBoxPriority.getSelectedIndex()+1);
  Boolean doneStatus = chckbxCompleted.isSelected();
  Long doneStatusAsLong = (long) (doneStatus == true? 1 : 0);

  selectedRowData.setField("Task", taskName);
  selectedRowData.setField("Details", taskDescription);
  selectedRowData.setField("DueDate", dueDate);
  selectedRowData.setField("Priority", priorityLevel);
  selectedRowData.setField("Done", doneStatusAsLong);

  return selectedRowData;
}
Thats everything for the EditTaskDialog.java, now we need to wire up the Edit Task button in TodoApp.java.
Wiring up the Edit Button
Switch over to TodoApp.java and add a new ActionEventListener to the initListeners method. The first step is to confirm that we actually have a row selected when the user presses the Edit Task button. If -1 is returned by getSelectedRow then no row is currently selected.
this.btnEditTask.addActionListener(actionEvent ->
{
  int indexOfSelectedRow = this.table.getSelectedRow();

  if (indexOfSelectedRow != -1) {
  }
});
Next we must convert the index of the selected row, to the real index of the row in the table model. This is important for later when we allow the user to filter the table. When a table has been filtered the row index will not match that of the table model and if the user tried to edit or delete a row, it would be the wrong row.
To convert the index of the selected row to the real index we call the JTable method convertRowIndexToModel passing in the index of the selected row indexOfSelectedRow. We then retrieve the row from the underlying DataTableModel.
this.btnEditTask.addActionListener(actionEvent ->
{
  int indexOfSelectedRow = this.table.getSelectedRow();

  if (indexOfSelectedRow != -1) {
    int realIndex = this.table.convertRowIndexToModel(indexOfSelectedRow);
    DataRow selectedRow = this.dataModule.getTasksDataTableModel().getRow(realIndex);
  }
});
Next create an instance of EditTaskDialog and configure it, setting a title and passing it the selected row using our setData method.
this.btnEditTask.addActionListener(actionEvent ->
{
  int indexOfSelectedRow = this.table.getSelectedRow();

  if (indexOfSelectedRow != -1) {
    // snipped code

    EditTaskDialog editDialog = new EditTaskDialog();
    editDialog.setLocationRelativeTo(this);
    editDialog.setTitle("Edit Task");
    editDialog.setData(selectedRow);
    editDialog.setVisible(true);
  }
});
Finally we check to see if the user dismissed the dialog by pressing Cancel by calling wasDialogCancelled. If they haven't they we call the getData method to extract the new values from the UI.
this.btnEditTask.addActionListener(actionEvent ->
{
  int indexOfSelectedRow = this.table.getSelectedRow();

  if (indexOfSelectedRow != -1) {
    // snipped code

    if (!editDialog.wasDialogCancelled()) {
      selectedRow = editDialog.getData();
    }
  }
});
Testing
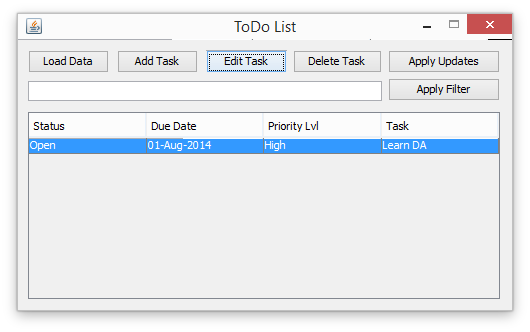
Now when you run the app, press the load button to load the data, select the row with the task and then press the edit button.
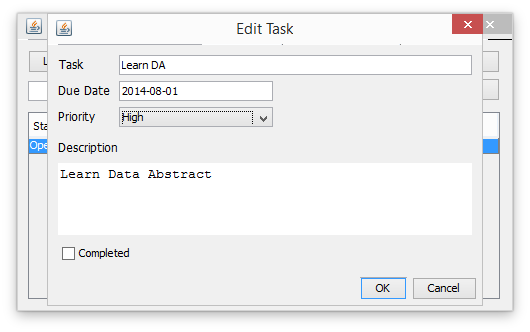
Change the priority from Low to High and click OK. This dismisses the dialog and shows the newly edited task.
While the user can now edit their task, if they quit the app and restart they will find the data has reverted back to its original form. At present all changes the user makes are only applied to the local data. To make the changes permenant we need to apply them to the server.
Applying the Edits
To apply any changes the user makes to the data we need to call the applyChanges or applyChangesAsync methods of the DataAdapter. We will do this in two parts, first the actual calling of applyChangesAsync will be handled in our DataModule class, the second part is adding a listener to the Apply Updates button.
Switch to editing DataModule.java and add a new method applyChanges. In it we ask the RemoteDataAdapter to apply the changes to the server in an asynchronous fashion. We pass in the table whose changes we want to apply (tasksTable) and an anonymous UpdateRequestTask callback class. We show it below using the Lambda feature of Java to remove the boiler plate code.
public void applyChanges() {
  this.dataAdapter.applyChangesAsync(tasksTable, (aTask, aState) -> {
    if (aTask.isCancelled() || aTask.isFailed()) {
      System.out.printf("An error occurred: %s\n", aTask.getFailureCause().getMessage());
    } else {
      System.out.println("update success");
    }
  }).execute();
}
You could equally write the call to applyChangesAsync as
this.dataAdapter.applyChangesAsync(tasksTable, new UpdateRequestTask.Callback() {
  @Override
  public void completed(UpdateRequestTask aTask, Object aState) {
    if (aTask.isCancelled() || aTask.isFailed()) {
      System.out.printf("An error occurred: %s\n", aTask.getFailureCause().getMessage());
    } else {
      System.out.println("update success");
    }
  }
}).execute();
It is worth noting what happens if you try to apply the changes and the network connection to the Relativity Server has disappeared.
- If you supply a callback, the call to
aTask.getFailureCause.getMessagewill report anHttpClientChannelerror. - If you pass in
nullrather than a callback the attempt to apply the update asynchronously will silently fail. - If you use the synchronous version of
applyChangesit will raise ajava.net.ConnectExceptionexception indicating anHttpClientChannelerror.
Now swap over to TodoApp.java and add another ActionEventListener, this time for the Apply Updates button. In initListeners add
btnApplyUpdates.addActionListener(actionEvent -> {
  this.dataModule.applyChanges();
});
Testing Again
Repeat the earlier change to the tasks priority. Then press the Apply Updates button, quit the app, restart it and press Load Data and log in again. When the data has loaded you will find that the change has been persisted.
When to Apply Updates?
You may wonder when the right time to apply updates is, the answers ulitmately very much depends on the type of application you are developing. You could call applyUpdates after every change a user makes to a task, however, it is more efficient to batch changes together before applying them.
Next we'll tackle adding a new task.