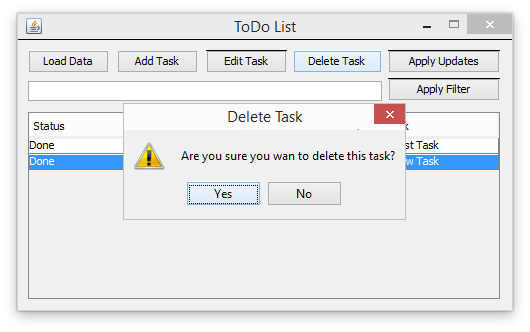
Deleting a Task
Now the user can add and edit tasks, its now time to let the user delete tasks they are no longer interested in. To support deleting we need to make minimal additions.
Earlier when we built the UI, we added the button Delete Task. Our first step is to add an event listener to it.
Open TodoApp.java again and in the method initListeners() add the following to add an Action Listener to the delete button.
btnDeleteTask.addActionListener(actionEvent -> {
});
We want to first make sure that the user has selected a row before we attempt the delete. To do that we ask the table for the selected row and if the result is not -1 then a row has been selected.
btnDeleteTask.addActionListener(actionEvent -> {
    int indexOfSelectedRow = this.table.getSelectedRow();

    if (indexOfSelectedRow != -1) {
    }
});
We should then ask for confirmation that the user really means to delete the selected row. Here we utilize Java's JDialog class and its factory method showConfirmDialog. We pass in the parent class for the dialog, the message we want to display ("Are you sure you want to delete this task?"), a title for the dialog, the type of dialog we are interested in, which in this case is a dialog with only two answers "Yes" or "No" and then finally the icon to display on the dialog; as this is a dangerous operation we display the "Warning" icon.
btnDeleteTask.addActionListener(actionEvent -> {
    int indexOfSelectedRow = this.table.getSelectedRow();

    if (indexOfSelectedRow != -1) {
        if (JOptionPane.showConfirmDialog(this, "Are you sure you wan to delete this task?",
                "Delete Task", JOptionPane.YES_NO_OPTION,JOptionPane.WARNING_MESSAGE) == JOptionPane.YES_OPTION) {
        }
    }
});
If the result from the dialog is that the user selected "Yes" then we convert the index of the selected row to the real index in the underlying data model. At the moment this will be the same index, but later when we add filtering passing the index of the selected row directly will result in the wrong row being deleted.
Finally we pass the real index of the selected row to our Data Module class for it to carry out the delete.
btnDeleteTask.addActionListener(actionEvent -> {
    int indexOfSelectedRow = this.table.getSelectedRow();

    if (indexOfSelectedRow != -1) {
        if (JOptionPane.showConfirmDialog(this, "Are you sure you wan to delete this task?",
                "Delete Task", JOptionPane.YES_NO_OPTION,JOptionPane.WARNING_MESSAGE) == JOptionPane.YES_OPTION) {
            int realIndex = this.table.convertRowIndexToModel(indexOfSelectedRow);
            this.dataModule.deleteRow(realIndex);
        }
    }
});
Switch over to DataModule.java and add the method deleteRow which takes an int as an argument.
public void deleteRow(int selectedRowIndex) {
}
The first thing we do is retrieve the row from the DataTableModel using the passed in index selectedRowIndex and then call the row's delete method. This will mark the row as deleted.
Normally this would be enough, there is however an issue that if you delete a row that has been added BUT has not been sent to the Relativity Server, then an event is not fired causing the row to not be visually removed from the JTable even though its been removed from the underlying data model. To prevent that happening, we send a DataRowChangedEvent to the table model which will then correctly update our JTable.
public void deleteRow(int selectedRowIndex) {
    this.tasksTableModel.getRow(selectedRowIndex).delete();

    this.tasksTableModel.tableRowChanged(new DataRowChangedEvent(tasksTableModel.getTable(), null, DataRowAction.Nothing));
}
Remember that at this point the changes to the table are only made locally. To make them permanent the user needs to click the Apply Updates button or you need to apply the changes immediately. Otherwise the next time the user presses Load Data it will bring back the deleted task.
Now we should make a change to Relavity Server using server side scripting, so that it only returns Tasks that belong to the logged in user.
