Building the User Interface
With Eclipse you have the option of building your User Interface by hand, or by using the Window Builder plugin for Eclipse. We have used the later when building this project, for instructions on how to install to it please refer to the Eclipse help system
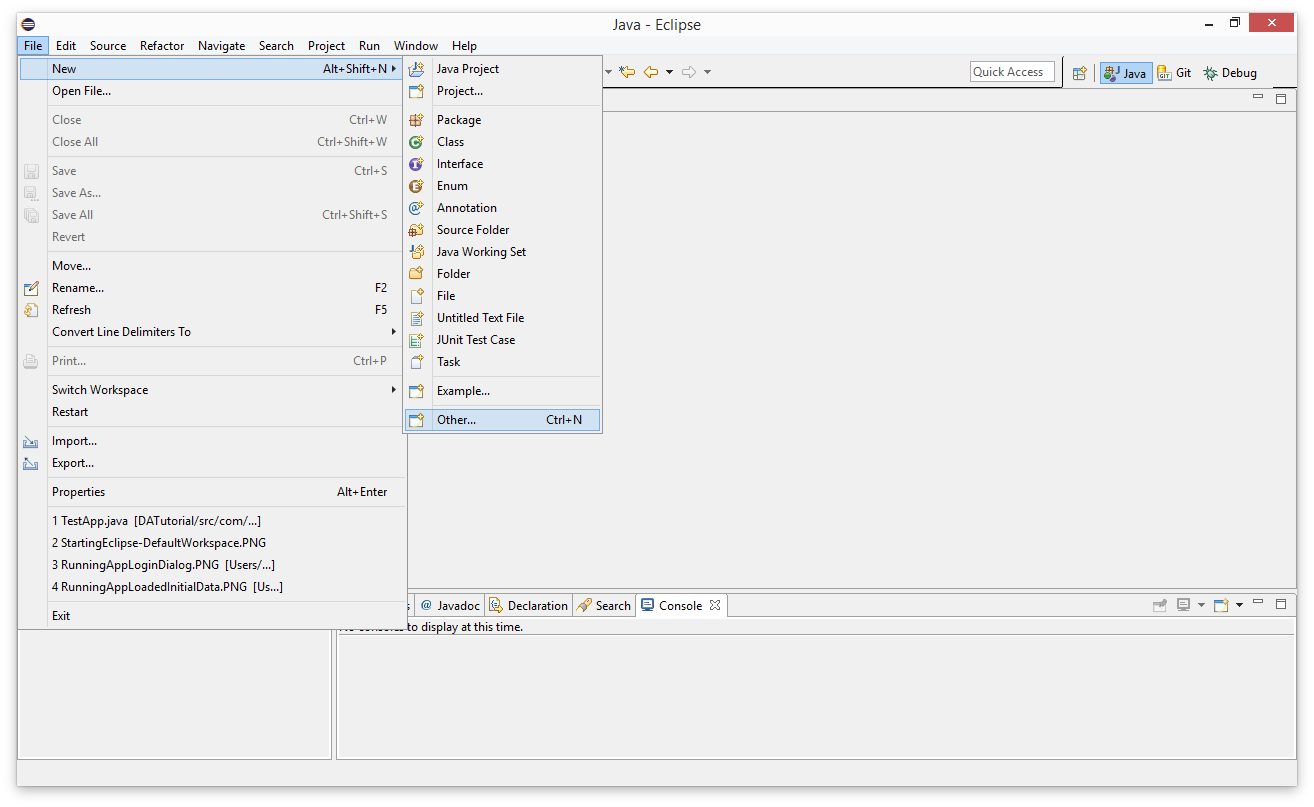
Once it has been installed, select 'File->New->Other' in Eclipse.
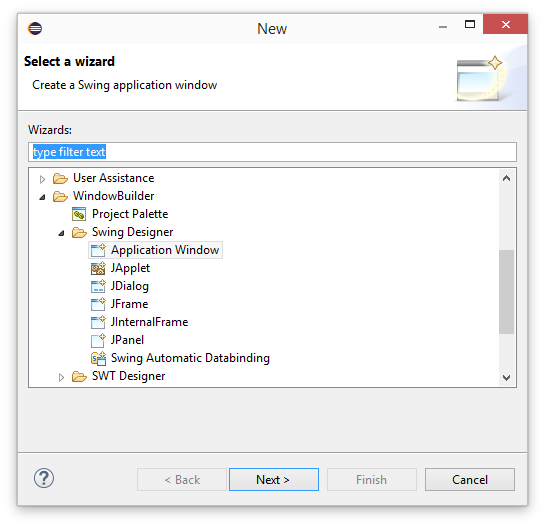
Scroll down to the WindowBuilder folder and expand it. Then expand the 'Swing Designer' folder and select 'Application Window'. Finally click 'Next'.
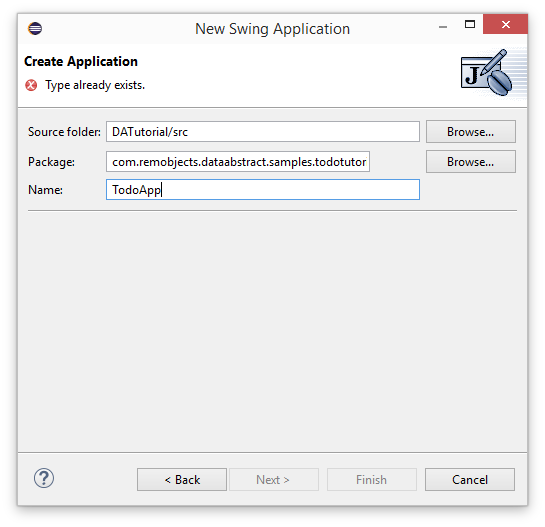
On the 'New Swing Application' page we set the package that we want to use for our app and its 'Name'. We have used com.remobjects.dataabstract.samples.todotutorial for the package and TodoApp for the name.
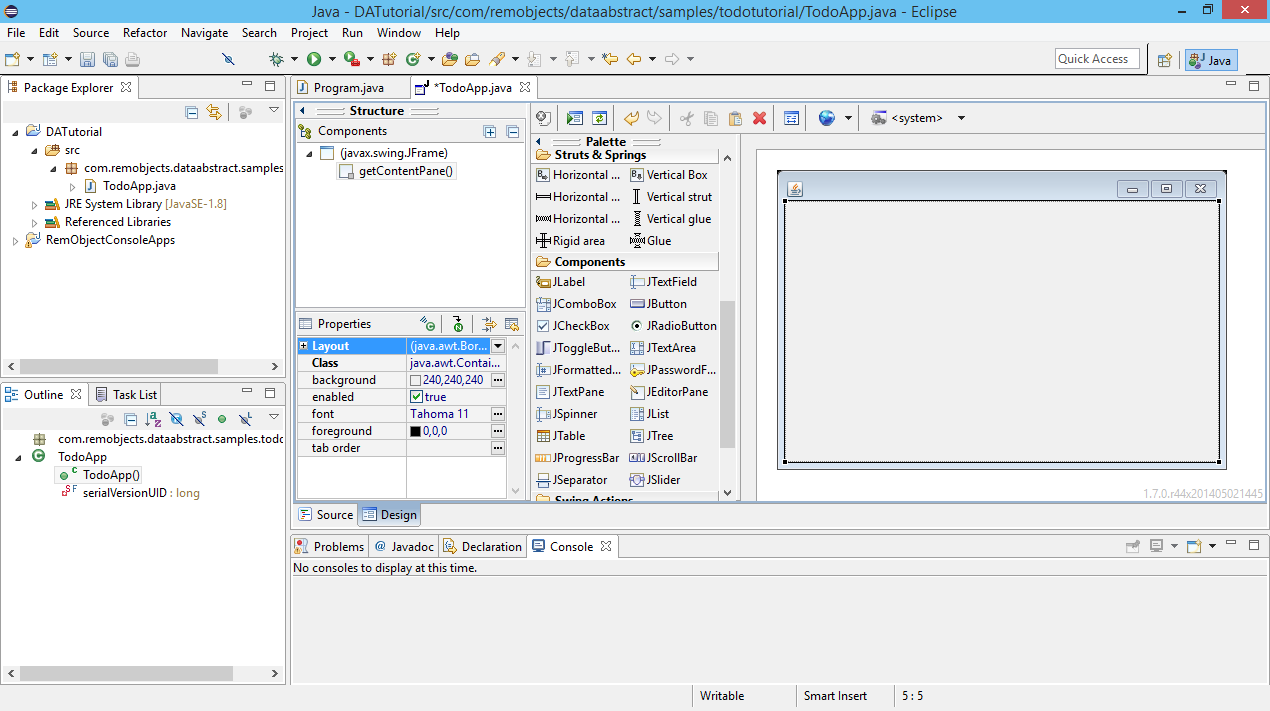
This will add the file to the project, highlight it in the 'Package Explorer' and open it in the editor. Note at the bottom of the editor there are two tabs "Source" and "Design". Select the design tab and it will open a design page which you can see in the figure below, with a palette of UI elements.
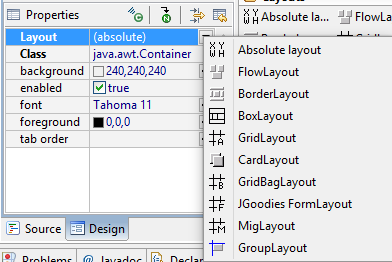
We aren't going to go into the nitty gritty of UI building here. For speed we selected the getContentPane() from the Components Window (see above figure) and changed the Layout to Absolute
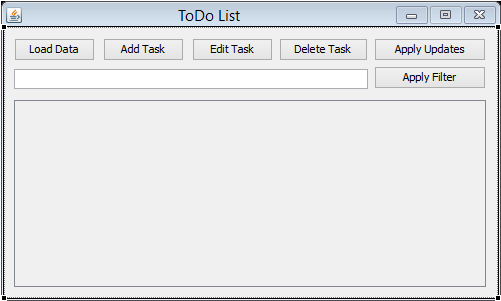
The next step is to resize the window to 500x300 and ensure its resizeable property is set to False. Now build the UI to match something similar to this:
To the content pane add a row of 5 JButton's and for each one set its variable name and the text it will display:
| Variable | text |
|---|---|
| btnLoadData | Load Data |
| btnAddTask | Add Task |
| btnEditTask | Edit Task |
| btnDeleteTask | Delete Task |
| btnApplyUpdates | Apply Updates |
Then add a JTextField, its variable name is textFieldFilter and beside it a JButton with the variable name btnApplyFilter and the text it shows to Apply Filter
Add a JScrollPane with the variable name scrollPane and then add a JTable to that scroll pane. Set the JTable's variable name to table.
Finally configure the table's properties to
- set columnSelectionAllowed to false
- set rowSelectionAllowed to true
- set selectionMode to SINGLE_SELECTION
Thats everything that we will need to do in design mode for the main application window. Next we will create a class that will handle communications with the Relativity Server and then begin to connect the user interface.
