Creating a Custom Server (.NET)
If you find that Relativity server doesn't meet your needs, you can very quickly create your own custom Data Abstract server using the project wizard in Visual Studio that out of the box provides the following features:
- Fully functional Data Abstract server that talks to a specified database
- Optional OData and Business Rules Scripting API support
- Multiple run modes - console application, command-line interface or Windows Service / Unix Daemon
- Windows Service management (installation/deinstallation)
- Single Instance check that ensures only one instance of the server is running
- Startup arguments parser
- Single exception intercept point (useful for logging etc.)
Create a Server
Creating a full featured custom server, as described above, can be achieved in a few simple steps.
1) Start Visual Studio and choose Create a new project.
2) Use the drop-downs at the top of the template list to filter by language (C#), platform (Windows) and project type (Data Abstract), then select Data Abstract WPF App (.NET Framework). Give the project a name and location and click Create to launch the Data Abstract project wizard.
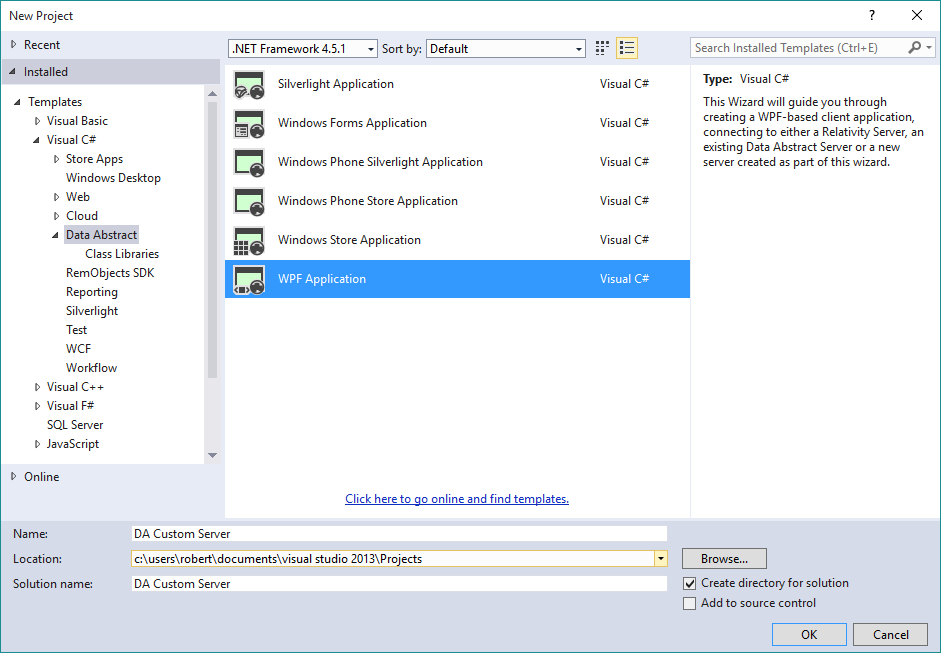
3) This opens the Template Wizard where you can do some custom configuration for the server.
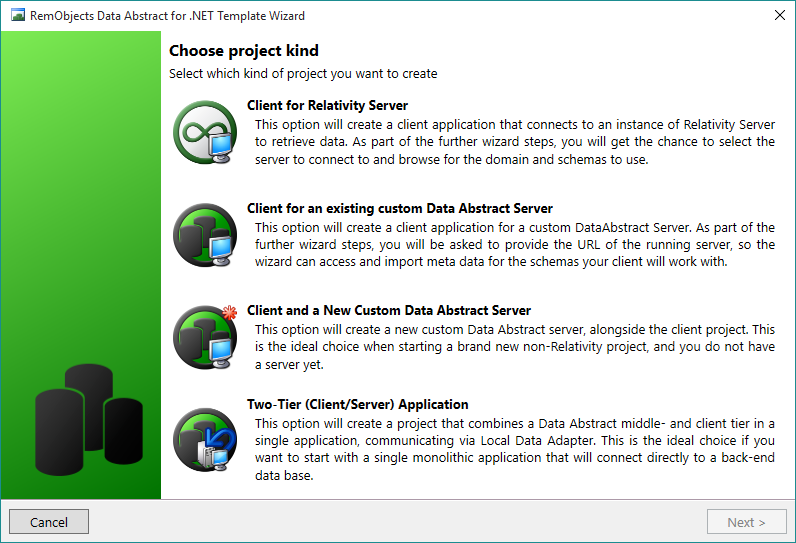
4) Choose Client and a New Custom Data Abstract Server which will create a solution that creates both a client project and a server project. We'll explore that later. Press Next
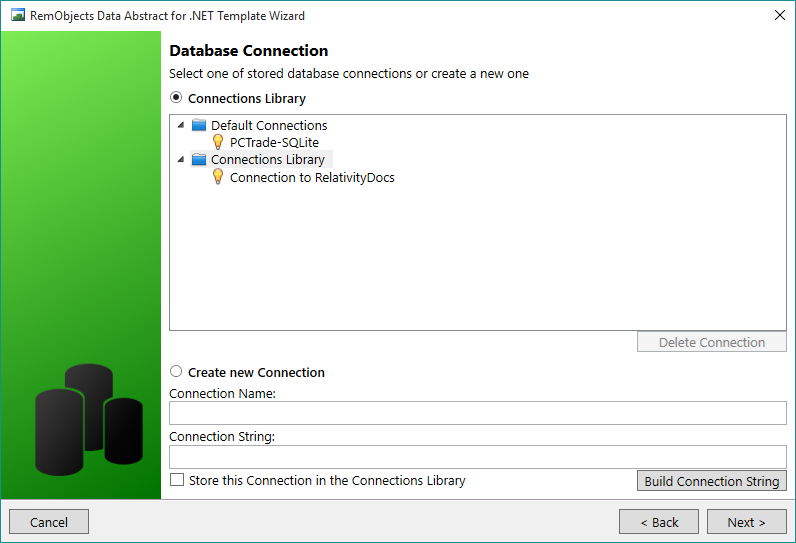
5) The next step is to choose a Database Connection which will be used to generate a Database schema. Under Default Connections you will see the PCTrade-SQLite sample database that is supplied with Data Abstract. If you have previously created a Connection, like when using the Schema Modeler, it will be shown in the Connections Library section. If the connection you are looking for isn't available, you can use the last section to create a new database connection. (Not covered here)
Select PCTrade-SQLite and then click Next
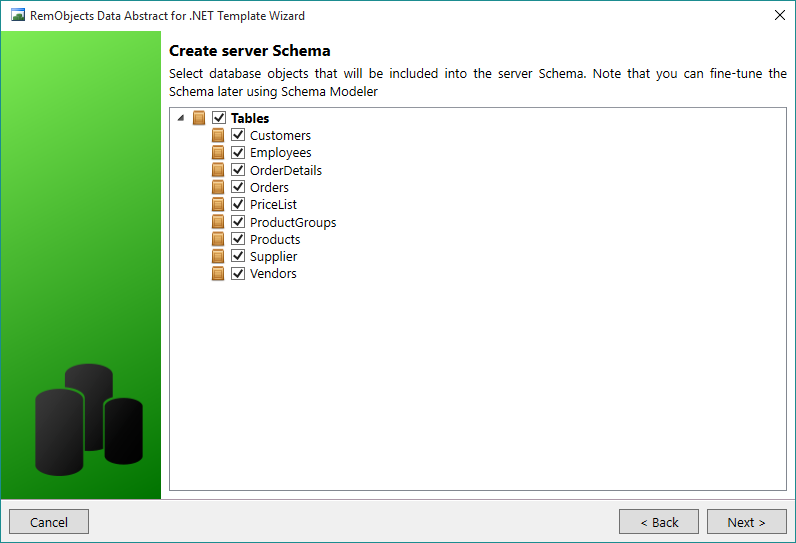
6) The template wizard will then analyze the database connection and present the available tables in the next page of the wizard. Choose the ones you are interested in working with, here we are selecting them all. Click Next.
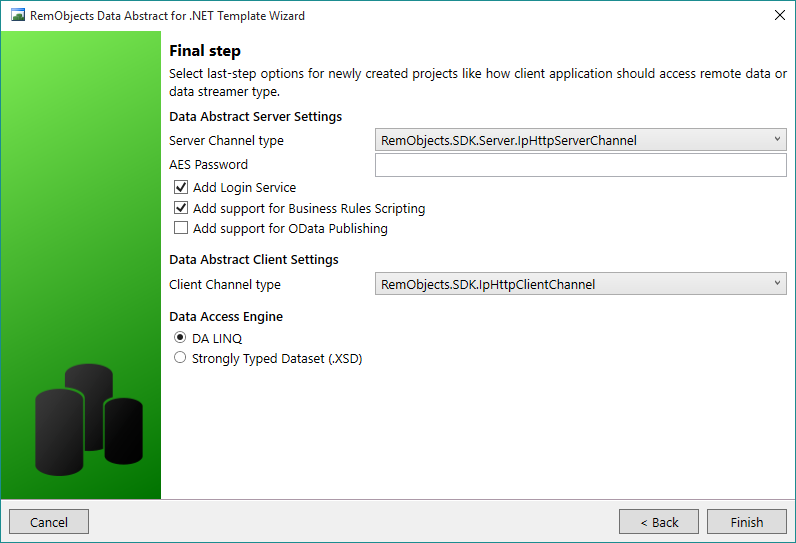
7) The final step allows you to add some customization to the server. You can choose the type of channel you wish to use for the Client & Server. If you wish you can optionally add OData support (which is an HTTP based data access protocol), though its easy to add that later if you desire, and add support for Business Rules Scripting.
Click on Finish and after a short time the wizard will have generated all the required files.
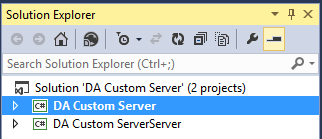
8) When the Wizard is finished, the solution will be opened, and in the Solution Explorer you will see the client and server projects. In the figure here, the projects have been collapsed. DA Custom Server is the client project, DA Custom ServerServer is the server project.
Exploring the files in the Server project
The generated server project contains all the files you need, if you built and ran the project now you would have a running custom server. In this section we will explore what all the files are so that you can understand what you can change / adapt for your own needs.
The generated server is code-first: the Data Abstract services are defined directly in the DataService.cs and LoginService.cs classes using the [Service] and [ServiceMethod] attributes. There is no RODL file, nor generated interface/invoker code, to maintain — you simply edit the service classes.
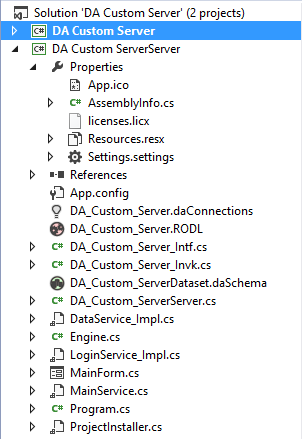
This is a quick overview of all of the files in the project.
| File | Description |
| App.config | Ordinary .NET application configuration file. Needed to explicitly allow the loading of the .NET Framework 2.0 or 3.5 assemblies into the .NET Framework 4.0+ application (relevant when the bundled SQLite database is used). |
| .daConnections file | Contains the underlying database connection parameters. Please note that this file contains database connection parameters, including username and password. |
| .daSchema file | Server Schema definition. Contains information about mapping the physical database tables into logical Schema tables exposed to the client applications. |
| DataService.cs | Implementation of the Data Abstract data access service, derived from the DataAbstractService class. Configures the data streamer, the server Schema and (optionally) the scripting provider. |
| LoginService.cs | Implementation of the user authentication service, derived from the BaseLoginService class. This is where you implement your credentials check. |
| NetworkServer.cs | The server infrastructure component, derived from the NetworkServer class. Hosts the server channel and session management, and in the generated code sets up the optional OData dispatcher. |
| Program | The entry point into the server. Creates and configures an ApplicationServer instance and calls its Run method. |
A deeper look at the most important files:
App.config
Ordinary .NET application configuration file. Needed to explicitly allow loading of the .NET Framework 2.0 or 3.5 assemblies into .NET Framework 4.0+ applications.
<?xml version="1.0"?>
<configuration>
  <!-- if you don't use the SQLite database, you can remove this file from the project -->
  <startup useLegacyV2RuntimeActivationPolicy="true">
    <supportedRuntime version="v4.0" sku=".NETFramework,Version=v4.0" />
  </startup>
</configuration>
This is the recommended place to store application settings, connection strings etc. Please refer to this MSDN article for more details.
.daConnections and .daSchema files
The .daConnections file and .daSchema file define database(s) connection parameters and server Schemas. Both files can be edited using Schema Modeler.
Data Access Service and Login Service
DataService.cs contains the Data Abstract data access service, derived from the DataAbstractService class. Its InitializeComponent method wires up the data streamer (Bin2DataStreamer), the server Schema name and — when scripting support was enabled in the wizard — an EcmaScriptProvider. In most cases this service can be used as is, and there is no need to add any custom methods to it.
LoginService.cs contains the user authentication service, derived from the BaseLoginService class. Here you re-implement the LoginEx method, which checks the user credentials and performs the authentication procedure. The code generated by default is very simple and accepts any credentials where the user name and password match:
[ServiceMethod]
public override bool LoginEx(String loginString)
{
    var loginParameters = new LoginStringParser(loginString);

    var isLoginValid = loginParameters.Username == loginParameters.Password; // TODO Implement credentials check here

    if (!isLoginValid)
    {
        this.DestroySession();
        return false;
    }

    this.Session["Username"] = loginParameters.Username; // Create a session

    return true;
}
NetworkServer
NetworkServer.cs is the server infrastructure component, derived from the NetworkServer class — the very heart of the Data Abstract server. It owns the network connectivity responsible for data transfer over the wire and the session management. In the generated code it overrides InternalStart to publish the Schema over OData when OData support was enabled in the wizard.
The server channel type and port are configured in Program.cs (see below), not in this file.
Program
Program.cs is the entry point into the server. It creates an ApplicationServer instance, configures the network server (channel type and port) and calls Run:
static class Program
{
    public static int Main(string[] args)
    {
        ApplicationServer server = new ApplicationServer("DA Custom Server");

        server.NetworkServer.ServerChannel = new RemObjects.SDK.Server.IpHttpServerChannel();
        server.NetworkServer.Port = 8099;

        server.Run(args);
        return 0;
    }
}
The ApplicationServer class is a helper class that provides an easily extensible way to run application servers as a Windows Service, console application or Unix Daemon with just a few lines of code. The generated Program.cs also contains commented-out samples for enabling TLS traffic encryption. This class is used not only in server applications created by the New Project Wizard; the Relativity Server, Olympia State Server and RO ZeroConf Hub also use an ApplicationServer descendant to perform their startup procedures.
Command Line Processing
Out of the box the server based application recognizes the following command-line arguments (not case-sensitive):
| Parameters | Description |
| -I, /I, --INSTALL | Install service |
| -U, /U, --UNINSTALL | Uninstall service |
| -Q, /Q, --QUIET | Suppresses messages on service installation and deinstallation |
| -C, /C, --COMMANDLINE | Runs in CLI mode |
| -D, /D, --DEBUG | Requests extended debug info (i.e. full stacktraces) |
| -H, /H, -?, /? | Shows command-line arguments help messages |